You are currently viewing our boards as a guest which gives you limited access to view most discussions and access our other features. By joining our free community you will have access to post topics, communicate privately with other members (PM), respond to polls, upload content and access many other special features. Registration is fast, simple and absolutely free so please, join our community today!
If you have any problems with the registration process or your account login, please contact us. Looking forward to seeing you in the forums and talking about AATVs!
holy smokes, that entire process is unnecessary to upgrade older machines. Unless you like to do things like sanitize the bottom of your shoe and pay lots of money to do it.
A 1/4" thick adapter plate solves the 2 issues encountered when upgrading older machines to HD bearings. The adair kit has a nice adapter plate + other parts needed. You could certainly make a 1/4" thick adapter plate on your own, but for the price, it's a really fair deal.
1) center axles require the hole to be slightly larger in the HDPE tub (adapter plate does this as it has a larger hole machined for the HD bearing carrier)
2) corner axle bearing extension also need a slightly larger hole for the same reason. Because it is more difficult to enlargen the hole in a metal bearing extension, the 1/4" adapter plate allows the "rear" of the HD bearing carrier (also approx 1/4" deep) to sit flush with the back of the adapter plate itself. Then, you just bolt on the nice, flat adapter plate (which is now holding the HD bearing carrier) to the old-style bearing extension.
My opinion is you shouldn't upgrade any other way. One gasket behind the adapter plate, two gaskets between the adapter plate and HD bearing flange.
I have been using the adair adapter kit to upgrade the bearings as they wear out. Sofar 6 replaced/upgraded to HDI. it is super simple and easy. some miner cutting on the skid plate was needed on the mid axles. But nothing else.
I did all 8 of my axles with the Adair Hd kits with the axles and it was just a bolt on. Very easy to install. When you are running a heavy track its very wise to go the HD upgrade.[IMG][/IMG]
Photo was last year no snow this year
Last edited by Old Tucker; 03-21-2015 at 01:33 AM.
Its so simple. I think mine came with some instructions. But if not just ask on here and we will help you out. I think it was the same kit for all 8 wheels and it does not matter what axle you use them on, they fit any axle.
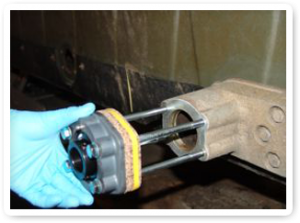
Update ! I just received my Kit from Adair.everything looks great.
I have one question...
The outer bearing goes backwards ? I mean the set screws are outside the tub ? that's weird.
It just makes it a lot easer to assemble. And it you want to pull the axle again just undo the set screw and the axle should just slide out with the inner bolt out and the inner bearing set screw loose. One thing I did is run a small drill down the set screw hole to put a small hole in the axle for the set screw to sit in. That just helps to hold things in place. If you do that, Only do it after every thing is in place and all bolts are tight. That way the bearing is sitting right where its going to ride on the axle, and there is no side load on the set screw.
just my opinion
Yes the kit has you putting the set screw to the inside of the argo. The argo upgrade kit put out by ODG has the set screws also to the inside. I reversed mine so that the set screw are outside. Makes assembly easier, and removing axles much less work. The reason for that is so that the set screw can bite onto the flat spot of the axle. But when you use the Adair kit with the plate, it pushes the bearing farther down the axle.


and pay lots of money to do it.
 Reply With Quote