

 Sections
 Recent Forum Posts

 Currently Active Users

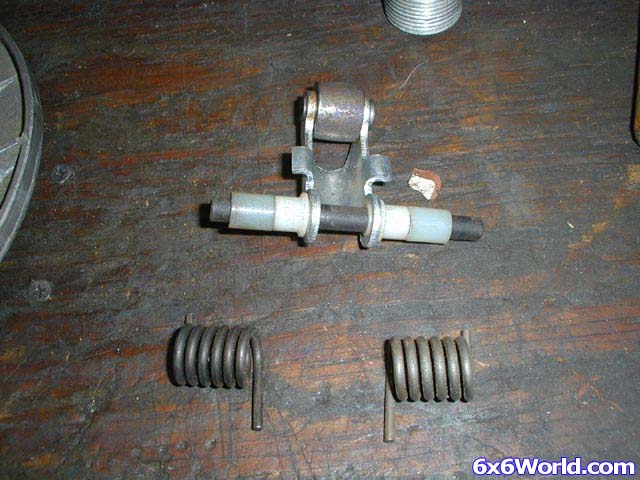
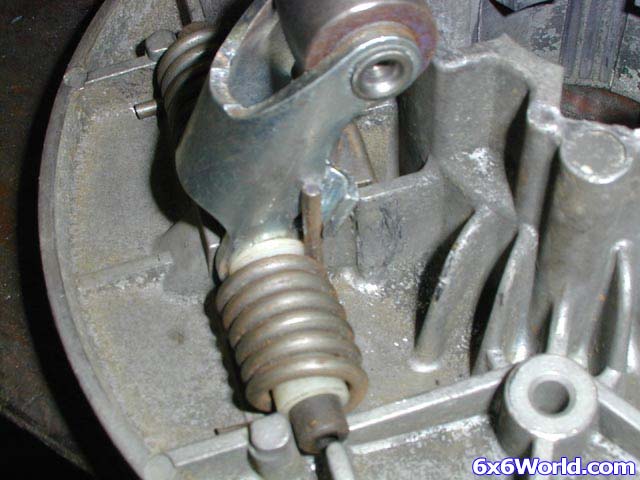
Find the right bushings from the kit for the clutch you have: most of the kits I've had are used for more than one model, so there's extra parts and you need to sort out the ones you need. The collared bushings fit into the roller arms. The 910 will use the longer nylon bushings from the set - make sure they are a good fit between the boss in the clutch and the collared bushing.
The new springs will have one leg longer than the other. The longer leg of the spring will be on the inside to locate on the tang of the roller arm.
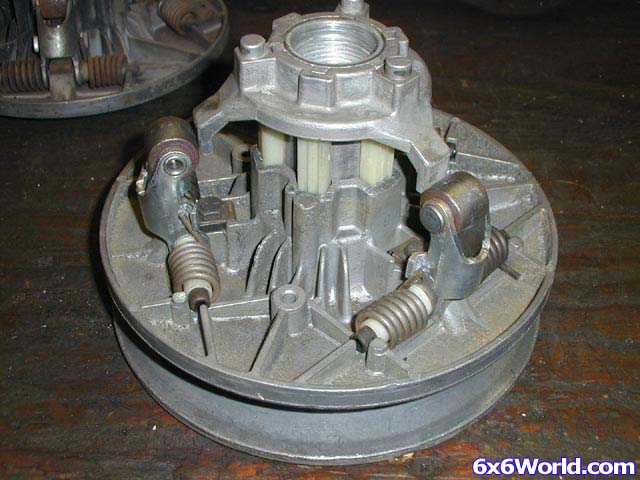
Fit all three sets into the movable face casting.
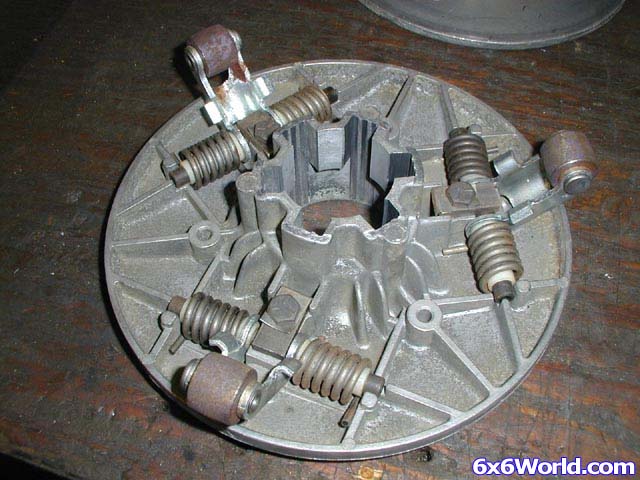
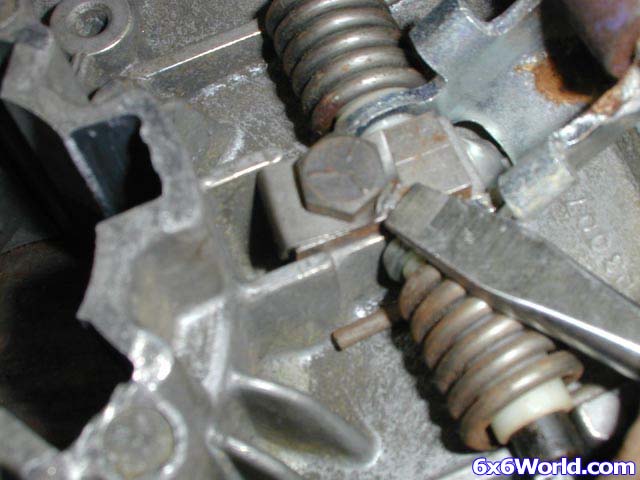
Then install the metal locks and the hex bolts and torque to 5-7 ft. lbs as per the manual. Now bend the locks over one flat of the hex.
Here's where the fun begins. There's a special tool for the springs, but I've never seen one. People always laugh at my tiny Channel locks, but I've never found anything that works nearly as well for this type of thing.
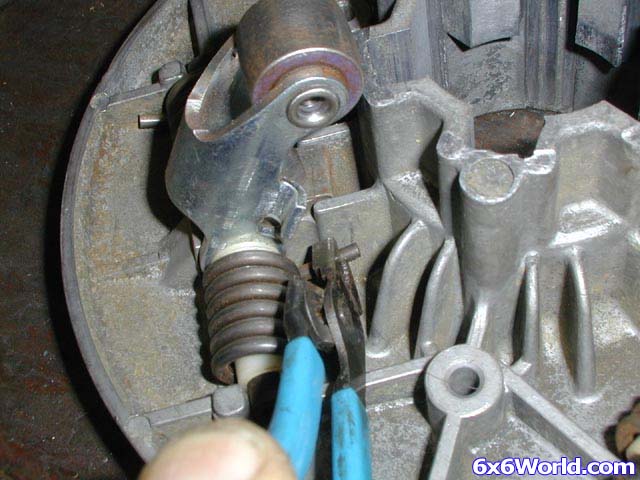
Pull the end of the springs over the tang on the roller arm on each of the sets. It may take a couple tries to get the hang of it, but it works.
Once that's accomplished, you need to block the roller arms out with wood blocks far enough to fit the spider back on. I have found that if you don't have wooden blocks the right size, two teenage boys with screwdrivers will suffice. With the arms out, just tap the spider back into place with a soft hammer.
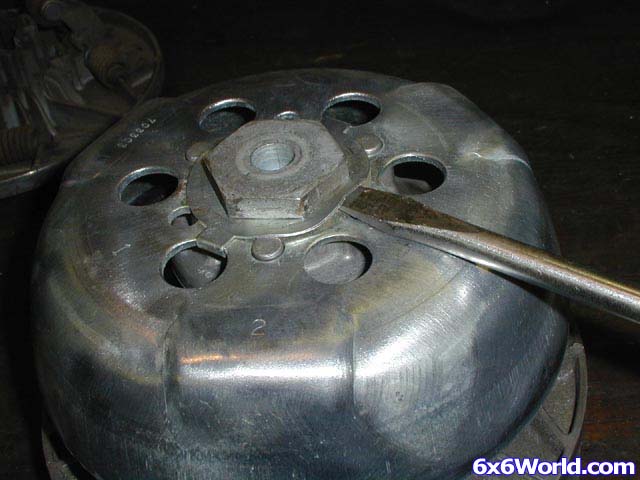
Now you can put the cover (ramp plate) back on, making sure the push-outs in the cover are directly over each of the roller arms. Install the ramp plate, retaining nut and torque to 150 ft lbs. Bend the lock plate over one flat of the hex.
Don't use any kind of wet lube on the moving parts. Wet lubricants will hold dirt, wear parts prematurely, and "gum up" the works so that the clutch jumps or sticks. There are some commercial dry lubes for clutches available and I'd recommend one of those. I have some spray type dry lube left over from my truck mechanic days that was made for the S-cam brakes on heavy trucks. It works fine, too.
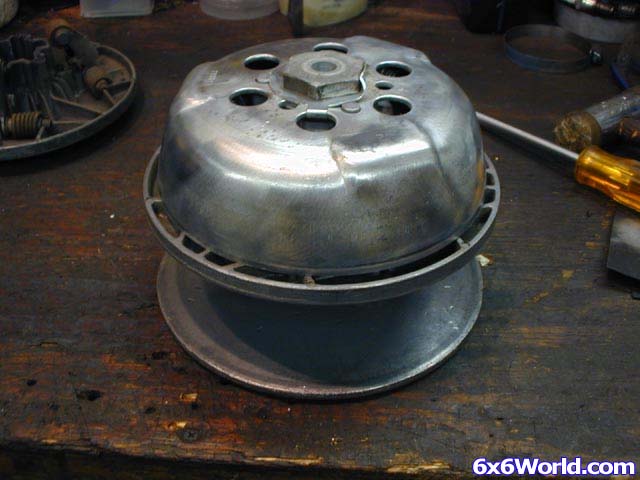
Now you've got a clutch that will last for many years with little or no maintenance. Have fun!

 Latest Poll
Thank you, North Country! I will do that. ...
Thank you, North Country! I will do that.
Rowdy 04-25-2024, 09:54 AMAfter I put the 2 new 21x11x8 22 Mag tires I had on, they?re actually shorter than the original tires by an inch or more. I don?t think I will have any...