

 Sections
 Recent Forum Posts

 Currently Active Users

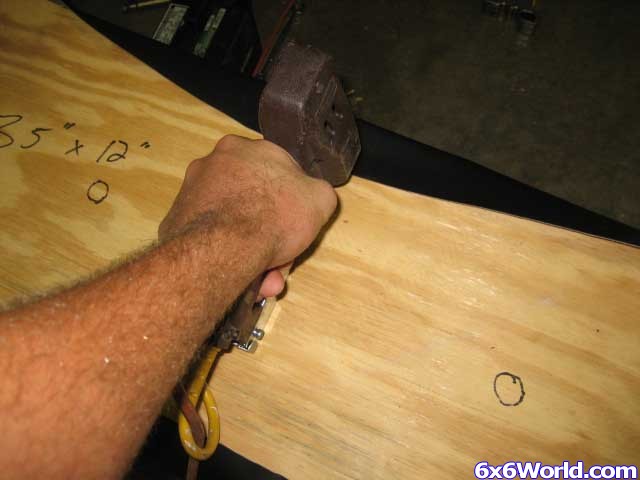
Note: You can start on the ends or the middle but either way leave room for folding the corners shown in the next step.
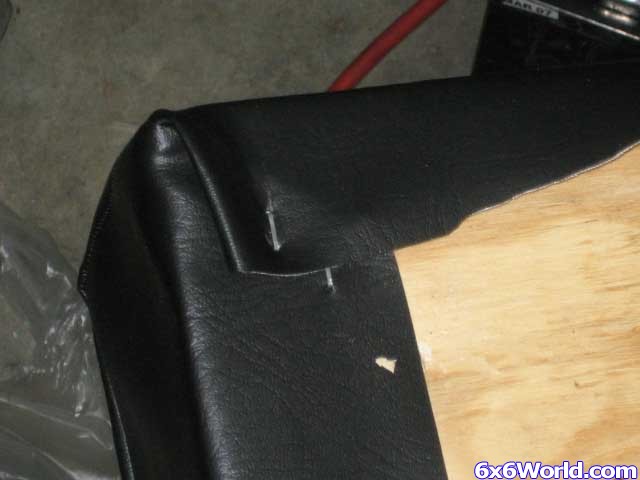
Then move towards the end and place two more staples along the way. (You don’t want a bunch of staples yet until you see how the rest of the material is going to conform. Just enough to hold the material in place.) When you get to the end fold the corners over each other and make sure that the seam on the end is straight. Note: You can fold either way but try to think about which edges will be seen when it is mounted. If the material is bulky, you will want to fold it away from the prominent edge (the front).
Once you get a few staples in, start putting more staples in between the previous ones until you have a staple about every inch or more. I usually go a little overboard with the staples and I also try to turn them different ways so that they are not all pulling the material the same way.
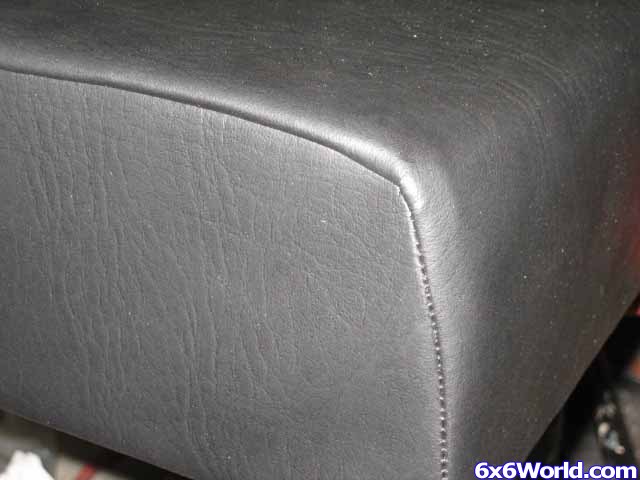
Keep working the wrinkles out and gently tightening the material as you go. Just realize that on the back of the seat where you are stapling, the material will have to wrinkle there, that is not a bad thing. Wrinkles on the front = bad ; Wrinkles on the back = Good. The cover will eventually be completely attached to the base and it should look like this:
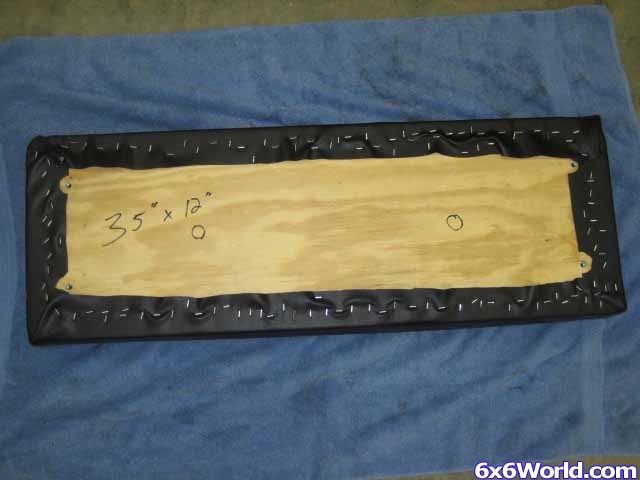
Note all of the wrinkles, staples, and basically a mess that I have on the back of the seat. Don’t worry how that looks though!
Finally, bolt the seat back to the floorboard and install it in your Amphibious ATV!
If you have a back to your seat then you will need to repeat this procedure for that one too but the steps are exactly the same. Congratulations! You now have a new seat.
Picture #20
 Latest Poll
Thank you, North Country! I will do that. ...
Thank you, North Country! I will do that.
Rowdy 04-25-2024, 09:54 AMAfter I put the 2 new 21x11x8 22 Mag tires I had on, they?re actually shorter than the original tires by an inch or more. I don?t think I will have any...