

 Sections
 Recent Forum Posts

 Currently Active Users

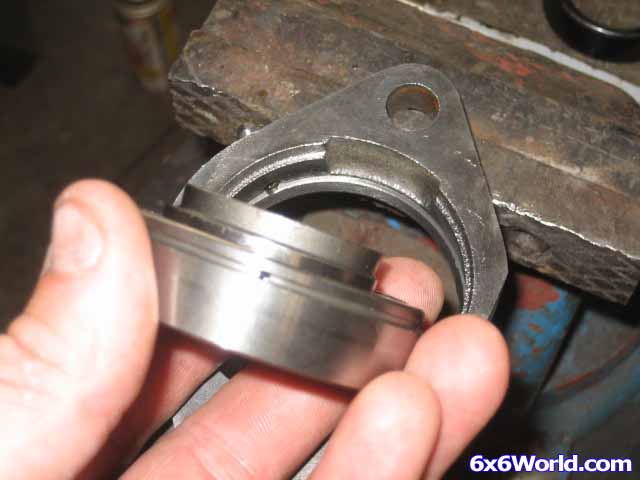
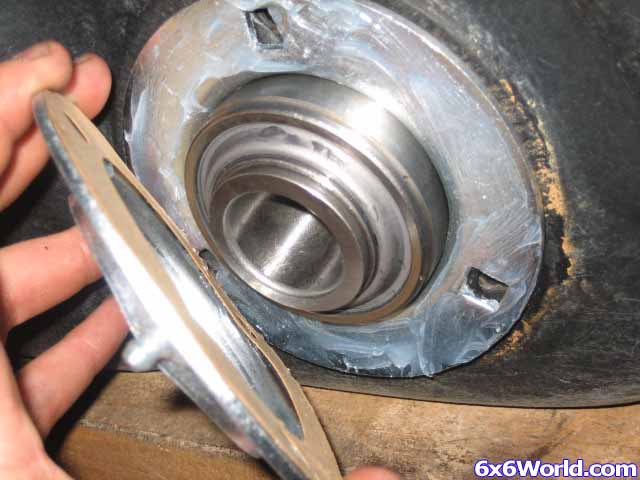
Once you have the flange/housing clean insert the new bearing from the back. This is just a reverse procedure of the way you removed the bearing. Be sure that the lip of the inner race is facing the outside of the housing so that the locking collar can be reinstalled correctly.
TIP: If you look in the picture below you can see a small hole in the groove of the bearing. This is the only place that grease enters the bearing from the flange. I always make sure that this hole is as close to the grease zerk as possible to ensure that grease has the best chance of entering the bearing when you grease it.
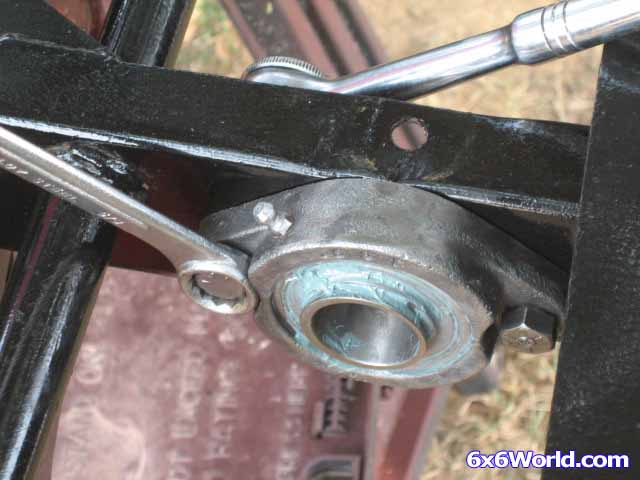
Now bolt the clean housing with the freshly installed bearing back on the frame with the grease zerk pointing up.
TIP: Just torque the bolts a little by hand at this point so that the axle can slide in the bearing easily when everything goes back together. Also, you may want to go ahead and grease the bearing to make sure that the grease is getting to the entire bearing. I use a marine grade grease on all bearings.
Now let’s move to the outer bearing. I am installing new flanges in this article but if you are reusing your old ones you should clean them thoroughly. Also clean the tub around where the flange mounts. Then you will need to seal the inside flange from water. I used strips of 3M strip caulk that I got directly from RI to create a seal around all three bolt holes and the main opening. Use a liberal amount to be sure that it seals properly.
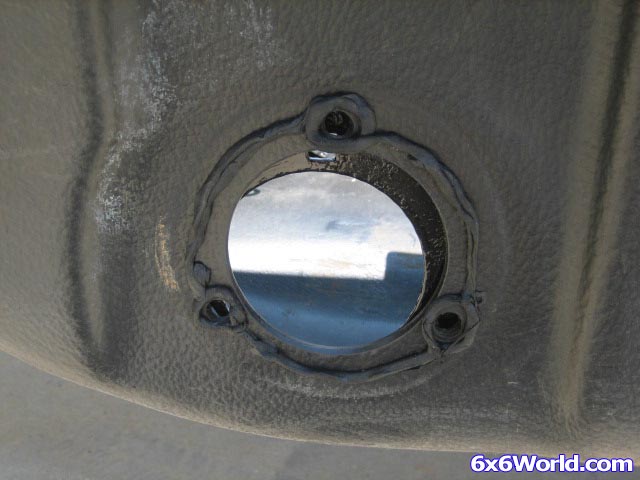
Now place the inside flange (the one without the grease zerk) in the axle hole and be sure to line up the bolt holes.
Next is where I deviate a little from the recommended assembly procedure:
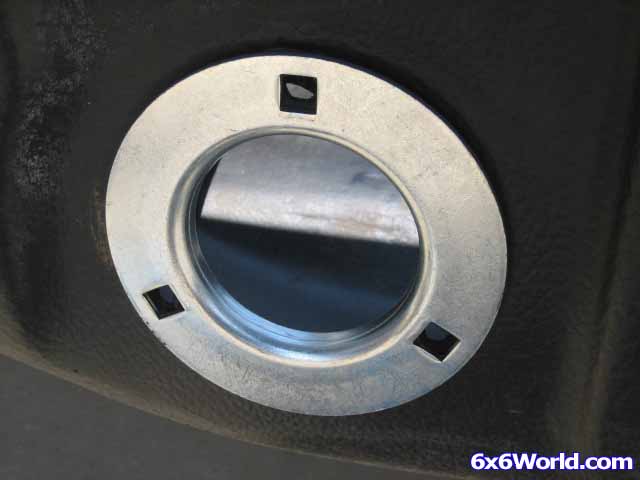
There are several ways to seal the outer bearing flanges from water. Recreative Industries used a paper gasket between the two flanges for a while. Some people use grease and just apply it liberally between both flanges. I went a little further and used silicone in conjunction with the paper gasket supplied by R.I.
I applied silicone to both sides of the bearing flange. Then I placed the new bearing in the housing being careful not to get silicone on it. Finally I placed the paper gasket on the outside flange and sandwiched it in the middle.
Note: When you put the bearing in place be sure that the lip of the race for the locking collar is facing the outside.
Now you can insert the carriage bolts from inside the tub. Put the washers and nuts on from the outside to hold everything in place. You should just torque them a little for now until you get the axle installed. I also put some silicone on the backside of the nuts just for some added waterproofing and peace of mind. The paper gasket is really not necessary when using silicone.
Thank you, North Country! I will do that. ...
Thank you, North Country! I will do that.
Rowdy 04-25-2024, 09:54 AMAfter I put the 2 new 21x11x8 22 Mag tires I had on, they?re actually shorter than the original tires by an inch or more. I don?t think I will have any...