


What's going to hold the synth?


What's going to hold the synth?
My new beer holder spilled some on the trails - in it's hair and down it's throat.
Joe Camel never does that.
Advice is free, it's the application that costs.
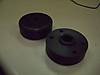
It will be held with the carriage bolts. The UHMW is not finished yet, I still need to cut the seal in and then drill the bolt holes.
I don't have a large enough chuck in my lathe to get a good hold on the UHMW so i've been using the rotary table in the mill.
I want to finish the cuts for the seals before I move the bed to drill the holes.
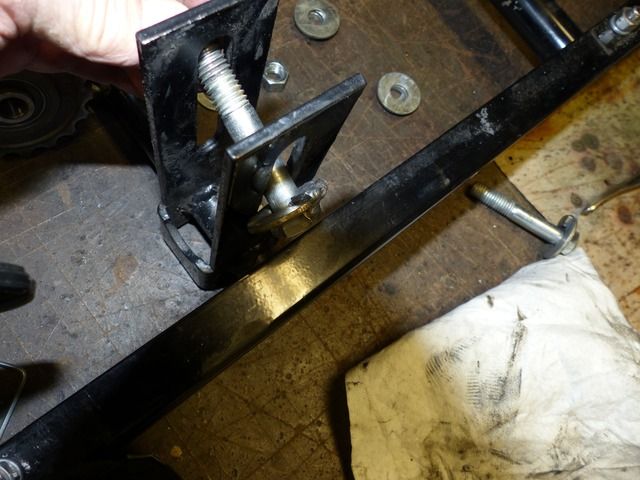
Trying to build a better mousetrap while waiting for parts. When setting the chain tension it sure helped to have an extra hand.
1 on the 2x2 pushing down on the idler and the other on the 3/4" wrench to tighten the bolt. You had to have a wrench on the head of the bolt
or it would just turn.
I cut a piece of 1/8" strap and tacked it to the washer than tacked the head of the bolt to the washer. It slides in the slot and keeps the bolt from turning so you can snug it up without have another wrench on the head of the bolt.

Good idea.
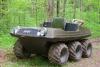
What it lacks in ground clearance it makes up for with traction.
Thanks tbone9
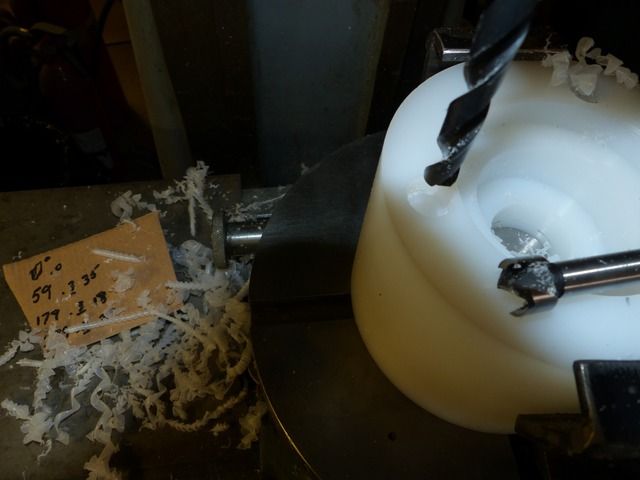
The bearings and seals showed up so I finished turning the UHMW for seal. The carriage bolts will be here today.
Drilled the 3/8" bolt holes and checked for fit, nice and tight. This is the inside of the cage that will bolt to the outside bearing flange.
I won't be using the 3/8" lock washer so I cut a pocket with a 5/8" forstner bit then used the 3/8" bit for the holes. The
5/8" hole fits snug around the nut to keep it from backing off the flange. Confused yet?
Makes sence to me. Is there a way to grease the uhmw to help seal some of the water out?
What it lacks in ground clearance it makes up for with traction.
Yes,there is.
,
,
,
Two holes,one for a vent.
Also turned the face on the back side so this boss engages the hole in the frame. This helps take the now longer flange bolts required out of shear. Kinda supports the body better than 5/16" bolts,in my opinion,too. Sorry bout the second pic,it's dark.
,

Last edited by JoeMeg; 03-16-2016 at 06:05 AM.
I'm going to attempt this again but I know these pics were in this post yesterday,I saw them.
Yes,there is.
Two holes,one for a vent.
Also turned the face on the back side so this boss engages the hole in the frame. This helps take the now longer flange bolts required out of shear. Kinda supports the body better than 5/16" bolts,in my opinion,too. Sorry bout the second pic,it's dark.
Ready to install
Yes, just like Joe showed in his pics.Originally Posted by tbone9

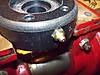
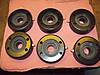
Finished up the machining on the cages. Here are some pics that will explain what has been going on. I never could understand why there wasn't a watertight seal between the
and the tub. So thats what I tried to do. I used a 1.25" triple seal on the outside, it's a tight fit but I still used 2 screws with washers just to make sure it couldn't walk out. The UHMW is slippery stuff,
I've heard of it happening before.
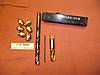
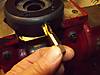
This is what I came up with to grease the OEM bearing. I used 3/8" sq stock and machined it to fit the flange, drilled and tapped for zert then welded it to the outer flange.
Then like Joe, I drilled and tapped the UHMW for a 3/8"npt zert than dried a 1/8" hole at an angle that came out 1/4" in from the outer seal.
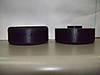
It goes back together just like the original outer bearing flange, seal it with seal tape and silicon and tighten it down with the 3/8" nuts, tighten the lock coller than seal between the flange and the cage and bolt it down. Hopefully that will be waterproof for a long time.
This is shown without the seal but you get the idea.
Now I have a question, how tight do you turn the locking coller?
Nice work! Looks like you thought of everything there. I took a little different approach and used two flange bearings with an enclosed cage packed with grease to keep it watertight. When I did this I went to bearings with the set screws and got rid of the problematic lock collars. As I've had them break and loosen up. Drive them on too tight and risk them breaking on you eventually. Not tight enough and they can loosen. The lock collars were originally designed for one direction applications. We obviously back up. That's just my opinion though. I've had no problems since I went to set screws. To answer your question drive them up good and snug against the direction of forward travel. In other words if the collar was to rub on something it would only try to tighten it.
What it lacks in ground clearance it makes up for with traction.
 Posting Permissions


 Reply With Quote