TheSilverBuick MAX II Project

  1. Welcome to 6x6 World.

    You are currently viewing our boards as a guest which gives you limited access to view most discussions and access our other features. By joining our free community you will have access to post topics, communicate privately with other members (PM), respond to polls, upload content and access many other special features. Registration is fast, simple and absolutely free so please, join our community today!

    If you have any problems with the registration process or your account login, please contact us. Looking forward to seeing you in the forums and talking about AATVs!
+ Reply to Thread
Page 4 of 6 FirstFirst ... 2 3 4 5 6 LastLast
Results 31 to 40 of 57

Thread: TheSilverBuick MAX II Project

  1. #31
    Join Date
    Feb 2017
    Location
    Sparks, NV
    Posts
    85
    I think I have too much pre-load on the spring. Reading up on them I've read between a 1/4 and 1/3 of a turn is sufficient and I turned mine a full half. The coil spacing made me suspicious. I'm going to pop the snap ring off and go for the 1/4 to 1/3 turn.


    **Edit. I think the spring may be tweaked as I dialed it down to a third and a quarter turn and it didn't look much different than in my earlier picture. I set it to a 1/3 turn pre-load and called it good.
    Last edited by TheSilverBuick; 03-20-2017 at 11:07 PM.

  2. #32
    Join Date
    Feb 2017
    Location
    Sparks, NV
    Posts
    85
    I just bought a 2008 Kawasaki Ninja 600 EFI throttle body set with upper injectors on E-bay for $28. Each of the four throttle bodies are 32mm, so if I can fabricate a pair of intake tubes for two of them that should give more than enough air. The Kawi 600 engines were rated at 100HP to the tire, with 8 injectors so that is technically only 25HP worth of fuel injector with only two injectors in place, but assuming they are not maxed out by design and I have the ability to raise the fuel pressure 50%, I'm hoping they'll be sufficient. Just another piece of the puzzle.

  3. #33
    Join Date
    Feb 2017
    Location
    Sparks, NV
    Posts
    85
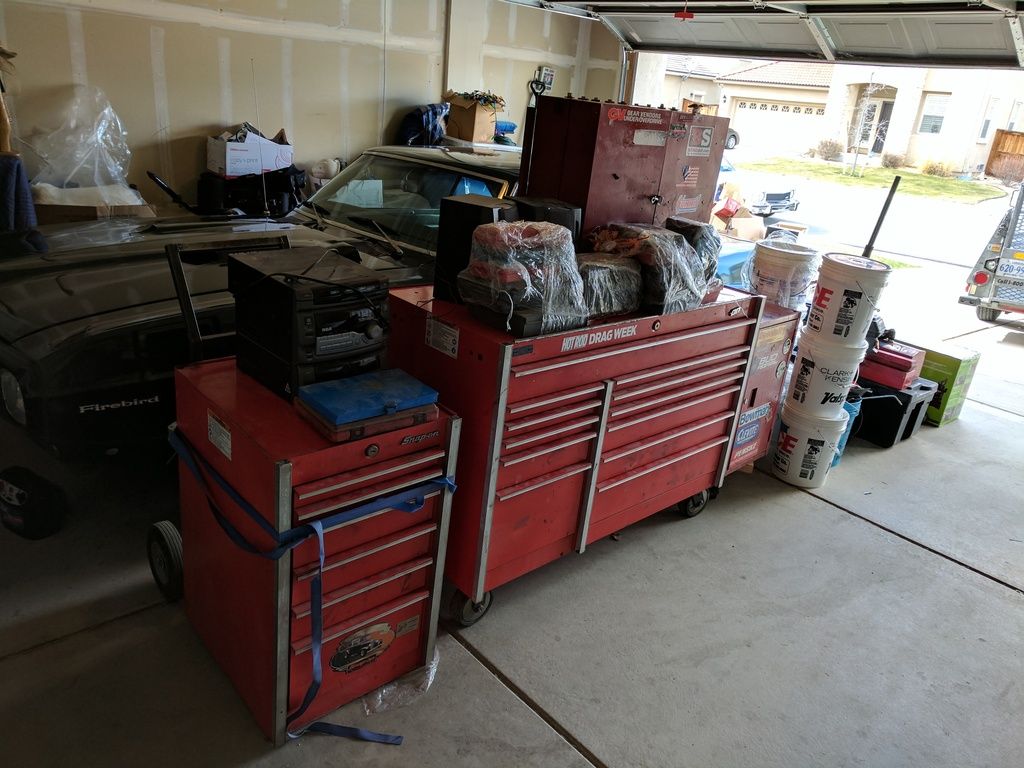
    Tried a couple more times to remove the dowel with no success. I had one shop quote me $80 to extract it and install a new one due to their "minimum" charge requirement. I haven't called any other shop yet. However I did pull the trigger and finally pull 99% of my tools out of storage. I've got to re-stock the drawers with the tools in the buckets, but I've since moved the box/tools to the back wall, set up a space to make a work bench, and with these things on hand I should at worse case be able to drill out the old dowel if I can't yank it out. My next try will involve threading a nut onto the remaining portion of the dowel, give it a small weld tacking, weld a bolt upside down to that and with a socket, another nut and heat see if I can pull the dowel out.


  4. #34
    Join Date
    Feb 2016
    Location
    Mississippi
    Posts
    1,108
    Silverbuick just a little tip regarding thermal expansion -- use some heat to assist your task. The idea is to get the hole hotter than the pin (so the hole expands and becomes bigger than the pin). When I do something like this, I heat the workpiece and then add penetrating oil to cool the part i want to remove. Don't spray penetrating oil directly into a flame or you'll have a fire on your hands, and the heat pluls oil will create quite a bit of smoke, but the penetrating oil will cool/shrink the pin and hopefully it will come on out.

  5. #35
    Join Date
    Feb 2017
    Location
    Sparks, NV
    Posts
    85


    I tried heating the body with a butane mini-torch, with vice-grips on the dowel to both support and help heat-sink it, and used a candle wax on it, more as a penetrant (think rusty bolt), but can certainly use brake clean or some evaporant on the dowel to help chill it. I have a set of proper propane and MAP gas torches in the tool box for some real heat. I have a laser temp gun in there too to read if I'm actually getting a decent temperature delta.

    I also have a set of good drill bits, a drill press, proper bit starting punches, etc and can likely grind it flat'ish, dimple it and drill.

  6. #36
    Join Date
    Feb 2016
    Location
    Mississippi
    Posts
    1,108
    Well get that old raggedy car out of the way so you will have some room to work! (good looking car, by the way)

  7. #37
    Join Date
    Feb 2017
    Location
    Sparks, NV
    Posts
    85
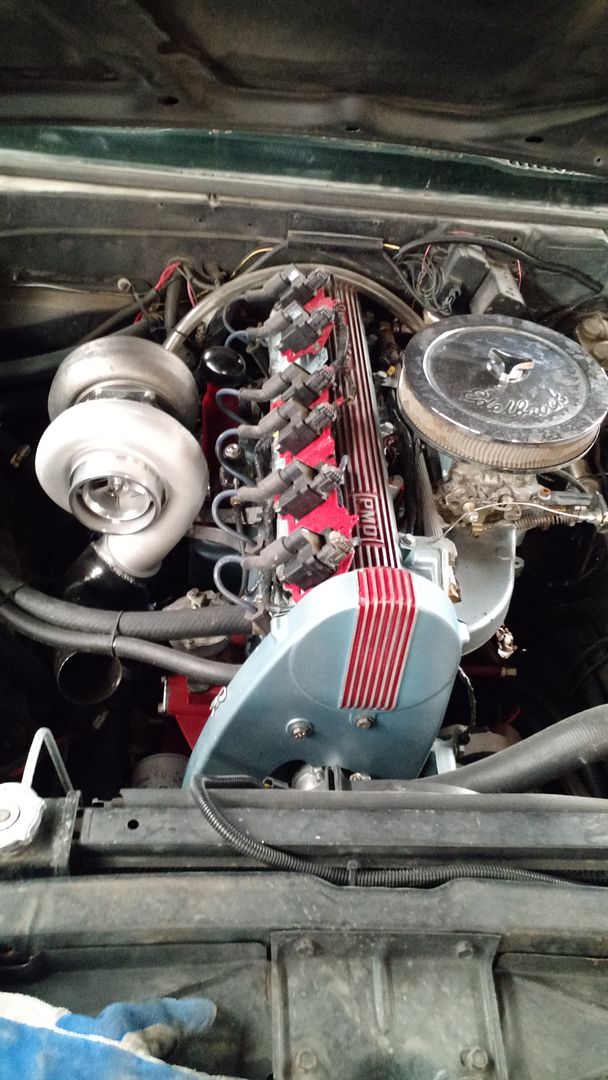
    My economy car? =P I was/am halfway through a turbo install when I moved. Now that my tools are at the house I hope to get back to it once the Max is going.


    You could say I "Max"imized my space =P That back wall has been cleared out and my tool box is there now.

  8. #38
    Join Date
    Sep 2015
    Location
    Taneytown,MD
    Posts
    98
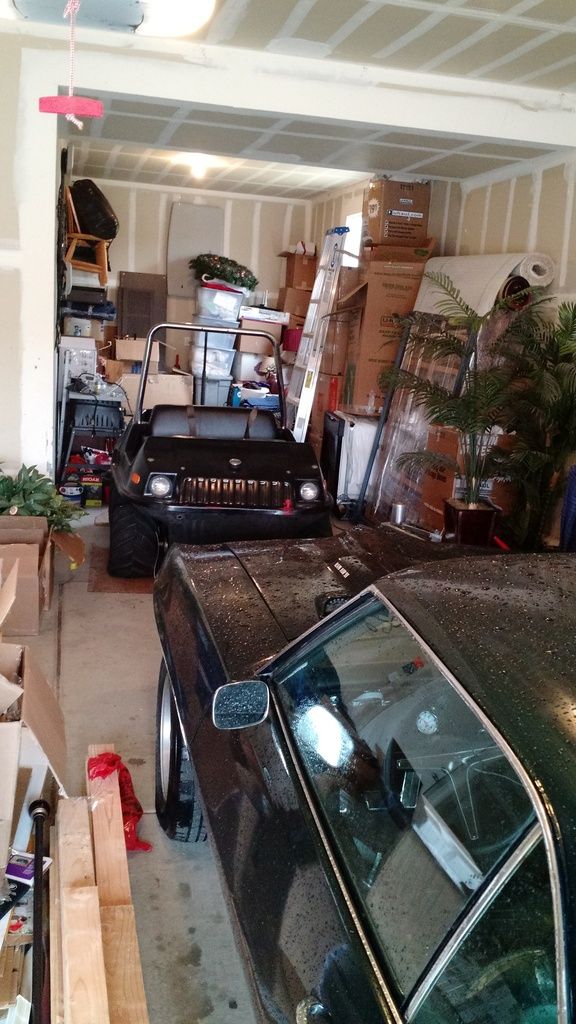
    I thought my garage is only one that was crowed LOL. Good luck with your project!

  9. #39
    Join Date
    Nov 2009
    Location
    Michigan
    Posts
    730
    I've had some pins that I could not cook out. I did find this trick online with heating the piece and melting candle wax in to lubricate. Worked on a few.

  10. #40
    Join Date
    Feb 2017
    Location
    Sparks, NV
    Posts
    85
    Quote Originally Posted by dgeiman View Post
    I thought my garage is only one that was crowed LOL. Good luck with your project!
    I had a nice and big 65'x65' barn with some concrete in it before and career opportunities moved me across the state to a much nicer house but a significantly smaller work area! I have a decent backyard and waiting to get an RV gate installed so I can get some sheds out back to clear out more of the garage. Almost all the stuff on the right wall needs to go to recycling or landfill. It's just boxes full of packing paper, a bed set that was left in the house when we moved in and the old dishwasher that I may keep for a parts washer.

+ Reply to Thread

Posting Permissions

  • You may not post new threads
  • You may not post replies
  • You may not post attachments
  • You may not edit your posts