You are currently viewing our boards as a guest which gives you limited access to view most discussions and access our other features. By joining our free community you will have access to post topics, communicate privately with other members (PM), respond to polls, upload content and access many other special features. Registration is fast, simple and absolutely free so please, join our community today!
If you have any problems with the registration process or your account login, please contact us. Looking forward to seeing you in the forums and talking about AATVs!
Hi all,
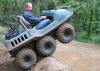
have bought a 2007 MAX IV , well optioned with 26' wheels and the 27 HP Kawasaki engine, winch, roll cage and bilge pumps.
Intend to use the MAX in coastal area here in Australia.
Beaches and some saltwater crossings.
As a result I have ended up pulling the MAX apart for a program of corrosion treatment
and prevention to allow uses in this environment.
I also have a 2007 Honda F12X jet ski and a 19 foot fiberglass half cabin jet boat with a
Ford V8 351.
These 2 machines have been a challenge to maintain in a saltwater environment,
and I have experimented and learnt a lot about which paints, greases etc to use.
My background is in Aircraft Maintenance, so also have access to aircraft use corrosion
materials and techniques.
So pulled wheels, axles, axle bearings inner and outers, chains, sprockets and tensioners for both bearing replacements and repainting.
here are all my axle parts on the clothesline letting paint set.
hey oz..you should have plenty of fun riding in such a great area, beaches etc. the corrosion treatment is a good idea. it would be nice to see some videos of your area if you ever get a chance when your out riding. have fun down under !! johnboy va. u.s.a.
Link above is my you tube videos,
Mainly diving and boats, but this particular place could only get out of creek
In jetboat for less than an hour at low tide.
This is less than 10 mins in boat from where I live.
The Max can get here by crossing river and driving on beaches.
I had removed all axles except the 2 rears, and experienced the hassle of set screws,
Bearings stuck on axle etc.
Thinking of using stainless bolts instead of the set screws/Allen keys for both inner and outer bearings.
Pressed 2 outer bearings off at work with a 10 ton press and still needed propane torch heat as well.
I read other members have cut axles in situ to remove.
There is another way to remove axle assemblies without destroying them.
Splitting the hub and removing it after grinding off weld between shaft and hub would save destroying any parts image.jpg
Cut the hub as close to axle as you dare then finish off with a hacksaw,
I used a puller on hub and some propane heat and the hub came off pretty easily
Still unable to remove rear axle assembly with sprockets attached,
So removed engine mount nuts and lifted up one side of the engine to allow
The axle complete with sprockets attached to slide up and out of the tub. image.jpg
Grind weld off sprockets and I see why it had been welded, no spline material left from wear,
Axle spine was fine image.jpg
Cleaned it all up and decided to drill thru sprocket assembly and axle and secure with a 1/4 Grade 8 bolt. Which is how the earlier sprockets were attached.
I do want to replace sprockets, they work out about $200 AUD plus freight from USA.
Thinking of making my own axles and hubs out of stainless steel 304 grade, my approach
Is any part that contacts salt water needs to be stainless steel.
image.jpgSo using 1/4 " grade 8 steel bolt, carefully drill thru both sprocket hub and axle.
The drill. Used was 0.003 " smaller than bolt so allows an interference fit and bolt fits
Tight.
So fa so good, weld hub back on axle with an arc welder, clean it all up for painting. image.jpg
My approach is 4 steps for painting steel.
1. Phosphoric acid 30 % or stronger for 15 mins., the wash off thoroughly.
2. Used red oxide based primer spray can next.
3. Finish with silver/zinc top coat, more zinc the better,leave for 2 Days to set.
4. Paint thick fish oil on to finish and let it dry for a week.
Finally any exposed metal like axle and hub coates with Bigfoot EP2 waterproof grease
This stuff sticks well, paint on my jetboat pump, and lasts for at least 2 months doing
30 knots in The ocean. image.jpg
The 1/4" grade 8 bolts are a bad idea. The older generation of max machines (mid 1970's to late 1990's) had axles that were not splined with 7/16" through bolts. Grade 8 may be too hard and therefore too brittle, you may want to stick with grade 5. Your worn sprocket tubes could be bored out to round and the addition of grease zerks helps with seizing. Instead of set screws to hold everything in place the inner bearing should be smaller dia. and the axle tuned down to fit. A bolt in the inner end of the axle holds it tight to this bearing and the axle in place. The sprocket tube can be held in alignment by cutting PVC pipe and using as spacers. I've often thought that the addition of a keyway would help the through bolt axles and their tendency to get sloppy by enlarging the holes......this causes the bolts to shear and can get very frustrating.
If you went to Stainless steel axles, I'd upsize them. Stainless is not as strong as the chromoly. How about a thin stainless sleeve from the outer bearing to the hub?
Thanks BM1,
Had another look at photos of older style sprocket, and agreed the hole seems larger than 1/4".
I don't agree the axle material is chrome moly based (wish it was though)
Seems more like a 1030 or 1330 medium carbon steel .
Makes sense as this is easier to machine and weld.
This is why the surface is soft and can't be hardened, a negative for inner race wear.
Here are some materials comparing tensile strength, the 4140 chrome moly is way ahead of carbon steel, but the SS 410/416 are comparable. Other considerations are welding and machining qualities.
Previous forum threads have mentioned shaft cracking/embrittlement.
This would also be a sign of medium carbon steel that has been cooled to quickly.
Here is a hub split I arc welded. You can see the surface flaw that looks like a crack
Thru it, but is only on surface. I needed to preheat this to 300 degrees and it probably
Wouldn't of occurred.
No quenching just let this air cool, although I read sand can also be used.
I haven't got a photo to upload of completed axles, but I have covered the exposed shaft with a rugged heat shrink and utilised the PR1422 "liquid rubber" on the exposed hub and hub backplate. So no steel is actually directly in contact with the salt water.
Limitation is 300 RPM max or else material can overheat.
Did an experiment today estimated the MAX4 hub rpm to be under 300
That's with wheels off ground and flat out on throttle.
I rarely open it up full throttle, no need and steering is more sensitive at high speed.
We semi guessed we would be closer to 200 RPM at 3/4 throttle which sounded like my normal cruise rpm.
They are not as strong 560 lb static load compared to nearly 2000 lb for steel bearings.
I'm going to replace just the Center axle outer bearings with these plastic ones and see
How I go.
If they work, my saltwater fears can be put to bed.
Also figured wouldn't be too hard to make SS axles out of 405 SS, I'm toying with the idea of a different stud pattern if I make them up, to suit generic alum alloy wheel hubs.
These are my tires Goodyear Terra 26x12x12
Which from previous threads identify them as good swimming tires.
Just to confirm please , the "V" on tires needs to face up at the front for best swimming.
This is contrary to the arrow symbol on the sidewall of the tires.
Correct, when viewed from above you want the point of the V-tread to point to the back of the machine so the thread pattern acts as a scoop to grab water (V up from the front). Those Goodyear Terra tires are a great match to the Max IV, they swim fast and work very well in mud and sand. You should be happy with those.
I'll be following your thread, I'm onto a synthetic bearing project again now for my Max IV. This time around I will be making them from Nyloil instead of UHMW for longer life and lower maintenance.


 Reply With Quote