2003 Max IV resurection

  1. Welcome to 6x6 World.

    You are currently viewing our boards as a guest which gives you limited access to view most discussions and access our other features. By joining our free community you will have access to post topics, communicate privately with other members (PM), respond to polls, upload content and access many other special features. Registration is fast, simple and absolutely free so please, join our community today!

    If you have any problems with the registration process or your account login, please contact us. Looking forward to seeing you in the forums and talking about AATVs!
+ Reply to Thread
Page 3 of 4 FirstFirst 1 2 3 4 LastLast
Results 21 to 30 of 33

Thread: 2003 Max IV resurection

  1. #21
    Join Date
    Mar 2015
    Location
    Pickering, Ontario
    Posts
    633
    A buddy and I headded out this morning to do a little calling and enjoy what was supposed to be a nice day. The weather was great and the views were even better. Lots of wildlife around us, just puttting along a ridge at the farm were hunting and then BLAM! A good day turned to complete crap lol.


    Snap!


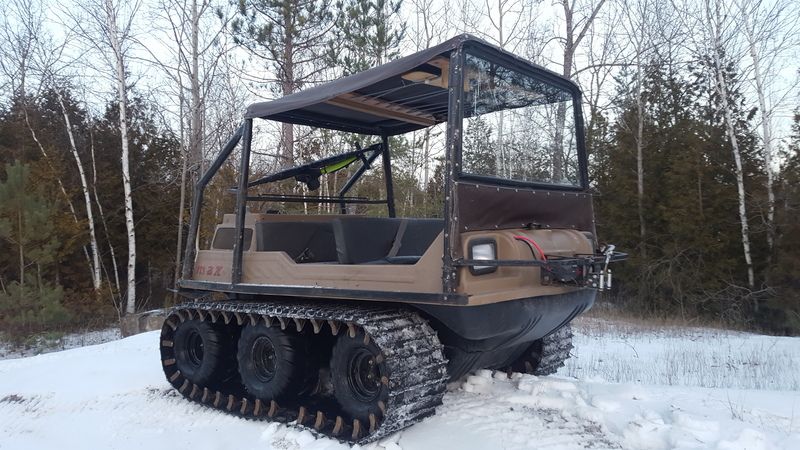
    I was cruising along doing maybe 15 MPH when it happened and when it broke that whole side bucked up in the air. I'm not sure why it broke, it was just a flat stretch of field, we had been in challenging terrain earlier without breaking a sweat or 3000rpm. We tossed the track on the roof and I had my friend stand on the opposite corner for the trip back to the truck to help with balance. We made it back in pretty good time and only lightly rubbed the ground twice.

    I guess I'll be ordering at least 1 new axle, some bearings, flanges and other odds and ends tomorrow. Really wish they had someone in Canada to order parts from.

  2. #22
    Join Date
    Jan 2011
    Location
    northern Wisconsin
    Posts
    892
    Might as well order some bearing cages for all six axels or its liable to happen again. At least put them on the front and back. It's crucial to have that extra support when running tracks. The third bearing supports the axel all the way out to the hub. Hope this helps.
    What it lacks in ground clearance it makes up for with traction.

  3. #23
    Join Date
    Mar 2015
    Location
    Pickering, Ontario
    Posts
    633
    Yeah, I will probably be ordering the whole set up from Mudd Ox within the next week. $860 USD is just a lot of money to shell out after Christmas this was after just five gentle kilometers, I had no idea they would be this fragile without the extensions.

  4. #24
    Join Date
    May 2009
    Location
    NJ 08533
    Posts
    5,052
    Just curious as to if you are running front chains?


    My new beer holder spilled some on the trails - in it's hair and down it's throat.
    Joe Camel never does that.

    Advice is free, it's the application that costs.

  5. #25
    Join Date
    Mar 2015
    Location
    Pickering, Ontario
    Posts
    633
    Yes, the front chains are installed still. I will probably remove them from now on with the tracks on. I ended up with 6 new tires that were almost all exactly the same diameter at 5psi so I felt safe leaving them on. There was no chain wind up that I could hear.

  6. #26
    Join Date
    Mar 2015
    Location
    Pickering, Ontario
    Posts
    633
    New parts arrived, I ended up with a new "C-clip" style axle. Man, it took me a lot longer to figure out how this goes together than it should have. I ended up having to flip both my sproket and brake rotor around opposite to how they had been installed originally. If I had reinstalled everything as it came out, both the brake rotor and sproket would only be in contact with one C-clip each. I now assume what most people are doing is adding solid spacers between the rotor and sproket or between the bearings somewhere (hindsight). I just couldn't get anything to line up without flipping them. I also had to surface the hubs a few thou to provide enough clearance for the C-clip to firmly seat in the relief. Luckily the brake caliper mounting holes are slotted sufficently to accomodate the move on the rotor. My other "issue" was trying to get the second snap ring on after the sproket and rotor were installed, there isn't much room down there and I was having no luck with the 90deg tips(kept slipping out). I was able to position the axle in a way that allowed me to use the straight tips but this made it more difficut to get the assembled axle back into the inner brearing lol. 6 hours to replace a broken axle. ugh.

    I don't plan on doing this very often so bearing cages are definately a must.

    to get the inner snap ring on I held the axle in this position from the outside with my boot


    This gave me the room I needed to install the C-clip usintg the straight tips while applying downward pressure.


    New axle, bearings, bearing flanges, gaskets and strip caulk installed and ready to go again.


  7. #27
    Join Date
    Oct 2007
    Location
    Texas
    Posts
    2,161
    Those rubber tracks are notorious for destroying the front axles, chains, & sprockets. You'll have a much better set up now, but when running the rubber tracks always remove the front chains.

    Look at the upside, it was probably time for some major service anyway. I'm glad you had a friend to help with the balancing act to limp the machine home.

  8. #28
    Join Date
    Mar 2015
    Location
    Pickering, Ontario
    Posts
    633
    Well I managed to break another axle so I'm finally making some bearing cages. I'll keep all my failures and solutions in this thread I guess.

    I really wanted to make these from UHMW but my hands are tied at the moment so I'll have to use what I have available to me. I went with 5" seamless 3/16" mechanical tube cut 4" long with bearing flanges welded to either end. Simple but proven method, I'll paint them prior to installing.

    They will be grease filled and both bearings will get their lube from within the cage.


  9. #29
    Join Date
    Mar 2015
    Location
    Pickering, Ontario
    Posts
    633
    My parts just came in, time to start putting it back together.


  10. #30
    Join Date
    Sep 2012
    Location
    Hanover,PA
    Posts
    1,012
    Very nice job on the bearing cages !!!

+ Reply to Thread

Posting Permissions

  • You may not post new threads
  • You may not post replies
  • You may not post attachments
  • You may not edit your posts