You are currently viewing our boards as a guest which gives you limited access to view most discussions and access our other features. By joining our free community you will have access to post topics, communicate privately with other members (PM), respond to polls, upload content and access many other special features. Registration is fast, simple and absolutely free so please, join our community today!
If you have any problems with the registration process or your account login, please contact us. Looking forward to seeing you in the forums and talking about AATVs!
Thanks for joining the post everybody! I am glad it is helping more people than just me!!
On the pull cables, if you can get some PB blaster and spray the cable it will soak into the cable and help free it up. If you can keep soaking it daily and move the cable back and forth and forth it should help free it. I was able to free one of my cables by doing this. If you don't use PB Blaster, use a lubricant that will not collect dust, otherwise you will not be gaining anything and it will gum up again.
I did not remove my jack stands on my KID as the farmer have welded them in place, welded them to the bottom floor, so I am assuming he must of had one move on him and to bear the same task of getting it back in place. When I do my metal work to fix the floor I will probably clean up his welds and make it look better since I have easy access. I will also redo the additional alternator mount as it doesn't look the best.
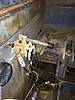
I was not going to change my idler bearings or triple chain sprocket needle bearings, but after reading your posts above I did take them apart last night. and glad I did! those needle bearings in the triple chain sprocket were in pretty rough shape and the idler bearings were in okay shape, but if I am this far I better change them. I was able to get all axles removed from the machine except for 3, which will now require some heat and a puller in hopes to save them. Will work on getting the hole fixed and shafts removed. Will post some more pictures later.
Good info, now I am really sorry I didn't totally pull apart the jackstand when I had the one out. It was an absolute bear to remount it when the body halves were together. Now more than ever I feel like I will need to get those shafts out to check the needle bearings. At least the idlers look pretty easy.
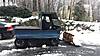
Spent a number of hours replacing chain, greasing axels etc in prep for plowing tomorrow. We got slammed up here in NH, and this will be a big test for the KID. I have a 310 foot driveway with a 17% slope and a right angle turn mid way up. Hope it goes well.......
How did your KID handle in the snow MyNewKID?? Did you still have the clunking chain noise after replacing the chain? Where did you go to get your chain and what did it cost? I haven't started looking for mine yet. Can you post some pictures of your plow setup? I am really thinking about adding one to mine also.
Thanks for asking! We had about 2' of snow and the KID did well. I was able to clear the driveway without too much trouble, but had to watch to keep the RPMs above 2000 or it would tend to bog down. I was able to move piles almost 3-4' high to make more room. I did still have the clicking sound which really seems like the chain is binding than snapping free. It is most noticeable driving down hill in a gentle left turn. I have replaced 7 of the 10 chains so far, all on one side, and the front and triple on the other side. I'm thinking it probably is related to one of the old remaining stretched chains. It is hard to diagnose while driving.
I was able to pick up a nice Diamond 35-3 on ebay that worked great for the main chains, the 60H chains I picked up at Tractor Supply, they go for about $50 per 10 foot section. Reading some forums suggests that you should only buy high-quality chain, Tractor Supply uses Tru-Pitch, but I don't know where it stands in the ratings. Maybe someone reading this will chime in.....Let me see what I can do about posting a pic or two - the insert pic icon above doesn't seem to be doing anything.
s winkler,
One other thought. I learned from a mechanic friend that PB Blaster will absorb and hold moisture. I had used it on some parts when I first got the KID and was amazed that water beaded up and stayed on the parts. I ended up having to dry all the parts. Not sure if it will do the same in the cable sheath, but something to consider.
Bob
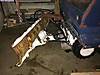
Sorry for the some being upside down or sideways. I rotated them and saved the changes, but they still loaded into the thread upside down or sideways anyway. The plowing shot was from the first attempt to plow snow, not the recent big dump. At that time I had not mounted the last two wheels and had only two wheels chained up on the one side. The machine is in better shape now, though there is a ton of body work to come once I am happy with it mechanically.
Last edited by MyNewKID; 01-30-2015 at 11:51 AM.
Reason: additional info
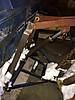
image3.jpgimage4.jpgimage2.jpgimage1.jpgTime for an update, it has been a while. I bought a sand blaster (new project new tools) and sand blasted the entire under carriage. I didn't get every piece of paint and dirt off but it definitely cleaned it up. Then I cut out all the rust in the floor plan and fabricated a new floor pan. To get a tight fit, I bolted it into place as my bends were completely true to help have a nice contact. I used some Loctite super sealant (not sure number) to prevent any water protrusion. I then sprayed the inside and outside with some flex seal (as seen on tv) to prevent an water ingress. I decided not to weld the pan in as the bolts are working good and the sealant should prevent any debris ingress.
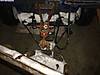
I cleaned up the engine and was able to put some paint down on it, it is turning out really good. I am not completely done but wanted to get some coverage to see how it would look. I think I will keep the same scheme. More updates to follow.
I have the engine and powertrain completely painted and ready to drop in. The paint scheme turned out really well and cleaned up nice. All new carrier bearings and seals are replaced. Axle shafts are installed and bolted into place. I purchased a 50ft role of 60 chain to start replacing chains. Once that is complete I can set the engine in place. Then my next step is to work on the upper body.


 Reply With Quote