Used ATV Buyer's Guide

  1. Welcome to 6x6 World.

    You are currently viewing our boards as a guest which gives you limited access to view most discussions and access our other features. By joining our free community you will have access to post topics, communicate privately with other members (PM), respond to polls, upload content and access many other special features. Registration is fast, simple and absolutely free so please, join our community today!

    If you have any problems with the registration process or your account login, please contact us. Looking forward to seeing you in the forums and talking about AATVs!
+ Reply to Thread
Results 1 to 10 of 10

Thread: Used ATV Buyer's Guide

  1. #1
    Join Date
    May 2007
    Location
    Kings Mountain, NC
    Posts
    7,788

    Used ATV Buyer's Guide

    General
    Purchasing your first six wheeler can be exciting and it is something that many of us remember well; Seeing it for the first time, the test drive, towing it home, taking it for a spin around the yard and realizing how quickly you can tear up the grass. But it can also be an intimidating process especially if you are not purchasing new.

    For some a new six wheeler is simply out of the question. Whether it is financial concerns or simply that the six wheeler you are looking for is no longer being manufactured, the used market is a great way to get into the hobby. Being that our hobby is over 40 years old there are all kinds of ATVs available. From the common Argo and Max brands that are still being made today to rare models that were only built for a few months and had production limited to a couple dozen ATVs.

    This thread will serve as a simple buyer's guide and pre-purchase inspection checklist for anyone looking to purchase a used amphibious ATV. While it is intended to help those purchasing their first used ATV it should be a good guide even for experienced buyers. I owe a huge thank you to LarryW and jpswift1 for their help in creating this article. Without them this wouldn't have been possible. On top of that I owe a special thank you to LarryW for suggesting that we develop a quick checklist that you can print off and take with you when you go to look at a six or eight wheeler.

    So without further ado here is the checklist that you can print off to carry with you or take with you on your mobile device. It is in PDF format so if you do not have Adobe reader yet you can download it here for free: Adobe - Adobe Reader download - All versions

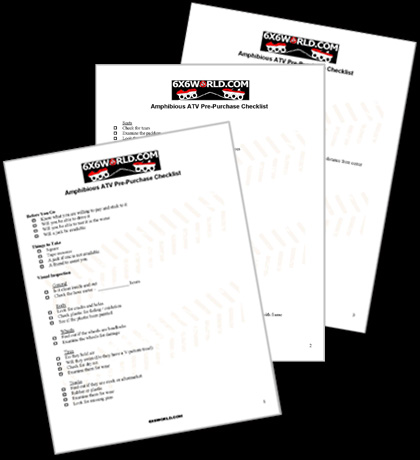
    ATV Pre-Purchase Inspection Checklist
    (Click the image to download the PPI Checklist)


    Models / Manufacturers
    When purchasing used if this will be your first six wheeler, you will be best to stay with a brand of ATV that is still being manufactured today and that limits your decision to Max or Argo. A few of the other manufacturers still being made today such as Land Tamer, Hydrotraxx, and Mudd-Ox would also be a fine choice but they are a little less common especially in the used market and harder to get parts for on the secondary (used) market too. With that said, the popularity/availability of the Attex and the interchangeable parts of the Hustler with other ATVs make them great choices as well. The key here is parts availability as you can still purchase parts for many older Max and Argo machines direct from the manufacturer and if you are looking for cheaper alternatives they are the most popular brands so parts will be available through others. Also if you aren't mechanically inclined the decision to choose a more popular brand of ATV will increase the likelihood that someone else will be able to give you help if you ever get stuck with a mechanical question.

    Before you finalize your decision on the brand of AATV that you will be purchasing based solely on information you are reading on your computer screen, try to get together with other members of the site for a ride and test out a couple of different machines for yourself. See how they handle and how they fit you. Look at how they perform and use that combined with your research here on the site to make an informed final decision.

    If you have decided on a six wheeler the next step is to locate one as close to you as possible. If you are patient ebay and craigslist will usually turn up some good deals and while you are waiting you can always post a wanted ad here in the classified section of the site or browse the for sale ads.

    So now you have located the six wheeler of your dreams and have set up a time for a test drive. When you show up to look at it be calm and don't let your emotions take over. It's often easy to convince yourself that a problem isn't there if you are impulsive. Remember, you are there to make a simple decision based on facts.

    Finally before we get into some detailed components, one good rule of thumb when buying a six wheeler is to always purchase one that is running so that you can test everything for yourself. Otherwise if you purchase one that is in pieces you must assume that the components actually don't work. If you take the owners word or assume that everything operates properly you will often end up spending much more money than you planned to. Please take this advice to heart and do not jump at a disassembled ATV because of the price.

    Regardless of the brand of ATV that you are looking at purchasing, a good indicator of how well the car has been maintained is simply how clean the ATV is, especially inside the tub. While anyone can take a machine that has never been maintained and clean it up really well to give the impression of being properly maintained, if the tub is full of dirt, grime, and grease that is a good indicator that it hasn't been taken care of.

    Let that be your first indicator and now we can break the process down by category but before we do, here is a list of tools you may want to take with you:

    Tools
    A square and tape measure for checking frame straightness.
    A jack for getting the ATV up in the air so you can rotate axles, tires, wheels, chains, sprockets, etc.
    A ratchet and socket set to remove the wheels.
    A compression tester
    A friend to help you inspect the ATV

  2. #2
    Join Date
    May 2007
    Location
    Kings Mountain, NC
    Posts
    7,788
    Body
    Depending upon which six or eight wheeler you are looking at the body may be made out of HDPE, ABS, or Fiberglass. HDPE (aka poly or polyethylene) is usually the most forgiving material followed by ABS and then Fiberglass. Regardless of the material you will want to look for any signs of cracks or holes in the body. It is particularly important on the lower tub even if you do not plan to use the six wheeler in water because the lower tub is your first defense to preventing mud, dirt, and debris from entering your ATV.

    If there is a hole or crack in the tub or on the upper body that is not the end of the world. Depending upon the size and place it may be easily repaired. Just know what you are getting yourself into before you buy. Search the site for info on body repair based on the material you are working with.

    Wheels
    Wheels are pretty straightforward. If you are looking at an old ATV that still has balloon tires just realize that they are no longer produced and if you choose to upgrade in the future or even just replace worn tires that you will have to purchase new wheels. Outside of that there are really three different wheels that you will most likely find on ATVs.

    Standard wheels will be something similar to those found on garden tractors and other non-skid-steer vehicles. These wheels weren't designed for our uses and usually require that you run a higher pressure in your tires to keep the bead seated. At lower pressure when you skid steer it is easy to bump a tire on a rock, limb, etc and knock the tire off the bead.

    Bead-lock wheels offer an advantage over standard wheels as they offer a bead (usually outer only) physically rolled into the wheel from the factory. This bead sandwiches the tire's bead between it and the outer lip of the wheel. The advantage of a bead-lock wheel is the ability to run lower pressure in your tires ( <5psi ) for a better ride and more grip without having to worry about losing a bead out on the trail. You will find these wheels on newer Argos.

    Aggressive bead-lock wheels such as the K-Lock wheels found on Max ATVs since somewhere around 1998 and Matt O's wheels offer a deeper bead-lock which just about completely prevents losing a bead on a tire even at 0 psi. These wheels allow you to run the lowest pressure possible providing the best ride, most grip, and most of all they prevent you from losing a bead on the trail.

    Here is a picture of a K-Lock wheel:


    So, how do you tell which wheels your ATV has? On all of the bead-lock wheels you simply reach down and physically feel the bead that has been rolled in the wheel with your finger during inspection. It will be a small groove near the outer lip. Differentiating between bead-locks and K-locks is a little more challenging. On a Max IV regular bead-locks have square centers on the wheel and K-locks are a solid center with no holes. All other wheels are more difficult to distinguish unless you have two different ones side-by-side. For max II's if you know that it is a '98 or newer then you most likely will have K-locks.

    Tires
    Usually when looking at an ATV there is only one question that comes to mind when looking at the tires. Do they hold air? While that is of course an important question you will want to inspect the tires a little more closely. Look first for dry-rot. While a little dry-rot is typical especially on some of the harder compound tires, a lot will eventually lead to premature failure and you will be chasing down leaks and replacing tires. If the tires do not have any dry rot make sure that they also do not have any tubes in them. Tubes will not work on AATVs. Over time the tire will spin on the rim and rip the stem out of the tube leaving you with a flat. While inspecting the tire closely also look for patches or repairs. It's not uncommon to have plugs in our tires as we typically travel through some unforgiving terrain but ensure that the repairs are done properly and will last over time. If you find a 1" hole in the tire with 12 plugs in it you should plan on replacing it.

    On top of that you should look at the type of tread on the tires. Since we utilize the tread to propel our ATVs through the water, a tread that doesn't swim well will leave you stranded. Even if you don't plan on going in the water at all, if you ever end up in a mud hole that is deep enough to cause you to float you will have little to no control once you achieve buoyancy.

    If the tire on the ATV is a stock tire with V-shaped tread then you should be fine. If the tires are knobby tires or any other non-V pattern there is less of a chance that they will move you through the water. If you are unsure at all then you should search the site to find the brand of tire you are looking at and see if they will swim.

    Frame
    When looking at any used 6x6 or 8x8 pull out all of the floorboards, remove all engine covers, and closely inspect the frame. The frame is the heart of your ATV and any misalignments regardless of how small can dramatically affect the handling and safety of your machine. It can also be attributed to premature wear on parts and if severe enough, mechanical failure.

    Check the frame carefully to see if it looks bent in any place. See if the frame rails line up properly, are at right angles to each other, etc. It's not a bad idea to carry a small square with you too. Aside from the straightness of the frame look carefully for any cracks particularly around the perimeter of the frame from collisions with obstacles outside the tub. The last thing to check would be the condition of the metal. Is the frame rusted badly from salt water, is it pitted, etc. A badly rusted frame will eventually require some major surgery to replace the bad places and if it is drastic enough may need to be replaced all together.

    A little surface rust on the other hand is nothing to worry about and can be easily sanded / wire-brushed and then painted.

    Axles
    When inspecting axles you are looking at several things. Are the axles hollow or solid? How do the sprockets attach to the axles? Are they straight or bent? What size are they? Do the hubs have any play in them? The ultimate goal is to ensure you have the best axles available and to make sure that the axles themselves are in great working condition.

    To start with you can sometimes manually inspect whether the axles are solid or hollow by simply placing your finger on the inside end of the axles. Hollow axles are less desirable as they are the weakest axle you will find. Solid axles are more desirable of course because they are stronger.

    Standard round solid or hollow axles usually utilize sprocket tubes that slide over the axles. The most common method for attaching sprocket tubes to the axles utilizes a hole through the axle and sprocket tube that can accommodate a bolt and nut. (The sprocket section below will elaborate on things to look for if you have bolted sprocket tubes)

    Splined axles take the solid axle approach one step further by giving sprockets something to engage against. The splined axles have parallel grooves on which a sprocket can slide onto and engage. All of the force of the chain is transferred directly from the sprocket onto the splines of the axle instead of through a bolt like a non-splined axle. Usually sprockets are held in place by a simple set screw which allows for easy adjustment of individual sprockets. While you are inspecting the axles also look at the hubs. Make sure they are all attached in the same manner and that they appear to be sound. You may need to take a wheel off to get a good look.

    Probably the most important thing to look for regarding the axles is whether or not they are straight. It is recommended that you jack the six wheeler in the air one side at a time if you have to and rotate the tires. Watch them carefully to see if they wobble at all. If everything appears to run straight and true, have someone take the six wheeler down the road while you ride along leaning over the side watching each tire. At full speed if you have zero or little wobble then most likely the axles are straight.

    Bearings
    With the machine up off the ground, try to wiggle each axle. If there is any up and down or side to side play you probably have a bad bearing. There are normally 2 bearings per axle, an inner and an outer bearing. The outer bearings also have to seal water out so if that one has any play in it, the six wheeler will more than likely leak. Have a helper wiggle the axle while you feel for the play. Then spin each axle/tire and listen for any "gritty" or "bumping" sounds coming from the bearings.

    It Should be easy to tell which bearing is bad. Bearings are relatively simple to replace on most models but if the machine needs 12 new bearings, it can get costly.
    Last edited by Mike; 02-28-2010 at 01:32 PM.

  3. #3
    Join Date
    May 2007
    Location
    Kings Mountain, NC
    Posts
    7,788
    Chain and Sprockets
    The first thing to check when looking at the chains and sprockets are the chain adjusters (if there are any). If the adjusters are almost out of adjustment then you will soon be replacing chain. This isn't a big deal in itself but you should also check the adjusters and sprockets for wear. If the adjusters are a teflon / nylon sliding or rolling adjuster make sure that there is plenty of material left on the adjusters. If the adjusters are sprockets with bearings make sure that there isn't much side-to-side play in the bearings and that they roll freely. The best way to check the chains, adjusters and sprockets is to have at least one side of the ATV off the ground so you can watch the chains move as you manually rotate the tires.

    When you spin the tires listen to and watch the chain / sprockets carefully to make sure that you don't hear any popping or grinding. Both can be indicative of misalignment or worn componants. Also take a close look at all of the sprockets and see if any of the teeth look worn. Sometimes instead of replacing chain when it is worn owners incorrectly take out a link or half-link of chain to get back the adjustment. While this seems like a quick and cheap short-term fix it actually can wear the sprockets out.

    When inspecting the sprockets look for teeth that are shaped differently on the drive side of the sprocket. Instead of being straight the teeth will be curved or bent in one direction aka "shark fins". If the sprockets are held in place by bolts through the axles make sure that the nut is tight on the sprocket tube and that the the holes are not elongated. One problem you see with bolted sprockets comes from owners replacing the stock bolts with ones that have a shank that is a little too long so that when the nut is tightened on the bolt it stops on the shank instead of the sprocket tube. Over time that will allow the sprocket tube to rotate slightly on the axle which can elongate the hole and cause you to have to replace the sprocket tube assembly.

    Finally look to make sure all of the sprocket assemblies look the same. If one is bolted through the axle and another is welded on the axle that should be an immediate flag to you that something has been replaced with non-stock parts. It will be up to you to examine the replacement part and ensure that it is up to par and structurally sound. Otherwise you may be replacing the jerry-rigged parts and replacing sprockets can be an expensive repair.

    Motor

    Before you start any motor check the oil. Make sure it is at the proper level. If the oil is dirty that may be an indicator that the motor wasn't properly maintained and could fail prematurely. If it is clean then you at least know the owner changed it before trying to sell it.

    The first obvious indicator regarding the condition of the engine is whether or not it will start and run properly. If it starts up fine and seems to idle at a low and steady RPM then you can rev the motor slightly to see how it reacts. Check to ensure that it is revving properly and coming back to about the same idle relatively quickly.

    2-stroke
    If the two stroke motor starts easily listen for any misfires or popping. The motor should of course idle smoothly. If the motor is out or will not start and you have a willing seller you can perform a compression test but do not rely solely on compression to determine if the motor is good. While little compression can indicate a worn out motor, one with good compression can still have other problems.

    When running, look for white smoke which is indicative of a coolant leak in a water cooled motor or a bluish white smoke which could mean that you are burning oil. That could be from a bad piston rind or valve stem seals. It could also be blow by from oil entering through the air cleaner. If it has black smoke then it is running rich. That could be a partial choked engine from the choke not properly adjusted or the carburetor may need adjusting or cleaned. Black smoke could also be from a dirty air cleaner. Finally while the engine is running listen for any unusual knock or other noises that may be an indication of internal engine wear.

    Transmission
    With the multiple transmissions produced in the various ATVs manufactured over the past 40+ years it can be hard to give a cover-all statement about them but there are a few things that apply across the board. Whether the ATV is controlled by a steering wheel, handle bars, or laterals you will want to make sure that the movement is the same on the right and left side. If not, that could be as simple as an adjustment to the linkage, band, or puck or as a worst case it could be early signs of something wrong internally.

    Have someone move the sticks, steering wheel, or handle bars left to right while you watch the mechanical linkage. Listen for any weird sounds and look for any bindings in the linkage. Make sure that both the right and left side physically look the same and that they do not hit any obstructions. With two identical systems side by side it is easy to see if one side is bent or misaligned. Once you are comfortable with the linkage take the ATV for a spin.

    Test the brakes first at a low speed to make sure that the ATV will stop. Then you can get up to speed and try to turn both directions. Make sure that you can turn equally to the left and right. Then stop, put it in reverse and make sure that it can turn equally both directions in reverse too. If it is more difficult to turn one direction compared to the other that could be signs of trouble.

    If you have never driven a skid steer ATV before then it is sometimes hard to judge the sounds coming from the transmissions. Since they use braking as a way of turning the transmissions will often make strange noises. T20's will chatter a little when you have them partially engaged. Systems that use pads will sometimes squeal. But if you hear any loud clanks or steady bumping / wobbling coming from the transmission it would be advised to take a closer look and perhaps have someone familiar with those transmissions take a look before you purchase.

    Seats
    While seats aren't really a big concern since they can cheaply and easily be repaired or replaced just check the wooden base if you can. They are prone to rotting from water damage and can be a pain in the butt (pun intended) if they start to break or disintegrate. If there is a rip, tear or puncture anywhere in the seat material it can let water get to the seat foam where it can stay moist for days accelerating the rotting process. It can also expedite the rusting process on a metal seat frame so be sure to check it for structural stability before you take a seat.

    If the ATV has a formed plastic or poly seat make sure that it isn't cracked or missing. Covered foam seats are simple to replace but a formed seat that is no longer made is a little more difficult. There would be nothing worse than having to pay a premium to get a seat on the used market just to complete your ATV.

  4. #4
    Join Date
    May 2007
    Location
    Kings Mountain, NC
    Posts
    7,788
    Accessories
    Accessories are always an added benefit when you go to buy a used AATV. Winches, windshields, tops, plows, etc. can add to the value and attractiveness of an ATV but be sure to ask yourself how useful they really are to you. If you don't think you would really ever use a plow then it is probably more economical for you to look for an ATV without one. Aside from seeing that the accessories accompany the ATV, make sure that they actually work. Play with the winch and put it under a load, fold the windshield down, turn on the bilge pump, put the top up and inspect it for tears, test the headlights and taillights, watch the hour meter to make sure it is working, inspect the ammeter for movement, test the 12V power outlet, etc.

    Tracks
    Tracks are a great accessory that can increase the capabilities of your ATV but tracks also can add a lot to the price of a used six or eight wheeler. Again, as an accessory be sure that you really need tracks before you purchase a used ATV with them. If you are considering an ATV with tracks be sure that they are on the machine when you go to test it. Check the tracks carefully for cracks and wear. Look at the pins and ensure that they are all there and that they are in decent shape.

    Ask the owner if they came with the ATV new or were added at a later date. Are they stock tracks or aftermarket. Are they rubber or plastic. Does the owner leave them on the ATV year round or are they removed after the winter months

    Get Ready to Ride!
    Hopefully this guide was useful to you and at least gave you some points to think about when you go to purchase your ATV. Ultimately regardless of how closely you inspect the ATV just be aware that there can always be hidden problems but the more detailed you are in your pre-purchase inspection the better off you are. Purchase the best and newest 6x6 or 8x8 that you can comfortably afford and get ready to ride. Welcome to the 6x6 World!

  5. #5
    Join Date
    May 2007
    Location
    Kings Mountain, NC
    Posts
    7,788
    I have added this article to our how-to section here: General How-To Articles

  6. #6
    Perfect job!

    The only thing I would add is: Clear a nice area of your garage or barn or shed for the additional "Wheelers" you will purchase in the future!

  7. #7
    Join Date
    Apr 2009
    Location
    Brookfield, Wisconsin
    Posts
    191
    Great resource guys. Heck of a lot of time and effort (and knowledge). Thanks for your hard work.

  8. #8
    Join Date
    Jun 2007
    Location
    Northern VA
    Posts
    2,766

    Great work, guys!

    That's a great guide for anyone buying a used machine whether they've been around the things alot or have never seen one before. Nice work.
    Stuck in the seventies- not in the swamp.

    (6) Attex, a Hustler, a Super Swamp Fox, (2) Tricarts, (3) Tri-sports, a Sno-co trike, 3 Dunecycles, and a Starcraft! ...so far

  9. #9
    Join Date
    Jul 2007
    Location
    I live in Shreveport,,Louisiana
    Posts
    3,285
    Another great addition to the forum

  10. #10
    Join Date
    Oct 2007
    Location
    Québec, Canada
    Posts
    181
    Really well done Mike, it could'nt be more complete than this. I will keep this a a good refference buying guide. Nice work...

    Martwell

+ Reply to Thread

Tags for this Thread

Posting Permissions

  • You may not post new threads
  • You may not post replies
  • You may not post attachments
  • You may not edit your posts