You are currently viewing our boards as a guest which gives you limited access to view most discussions and access our other features. By joining our free community you will have access to post topics, communicate privately with other members (PM), respond to polls, upload content and access many other special features. Registration is fast, simple and absolutely free so please, join our community today!
If you have any problems with the registration process or your account login, please contact us. Looking forward to seeing you in the forums and talking about AATVs!
Max II - Axle and Bearing Replacement
(All pictures can be clicked for a larger view)
If you own an amphibious ATV for any length of time you will probably have to replace a bad bearing or bent axle especially if the machine is older and hasn’t been maintained properly. For first timers bearing or axle replacement can be a daunting task but it is really very simple (and rewarding). This article will walk you through the steps to replace an axle and the bearings in a Max II. While this article is specific to the max, the basic principles apply to multiple amphibious ATVs.
Edit: I put together a short video detailing the process. It should come in handy and help supplement the article.
Note: I took pictures of every axle I removed and will be using the best ones out of the group. I may jump from axle to axle but don’t let that throw you. The procedure is the same for every axle.
TIP: It is usually a good idea to spray all of the nuts, bolts, and axles with penetrating lubricant the day before you tackle this project. It can make the job much easier on you.
Note: After I wrote this article Dan from Recreative Industries gave some great tips that I'm going back to include throughout the article. The first one can be a real time saver. Before you start tearing things apart, measure the position of the axles relative to the frame. This way you can set them back to where they were when you reinstall them and know that they will be running true.
Let’s Begin
Remove the wing nuts that hold the body to the tub and raise the upper body. Now raise the ATV until all tires are off the ground and make sure you secure it properly. Then remove the tires and wheels.
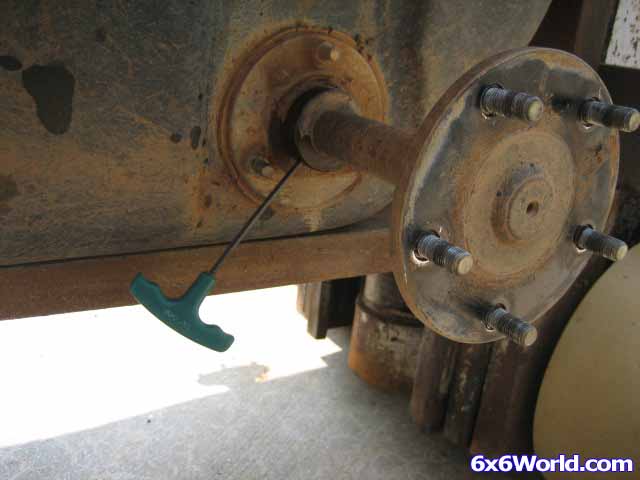
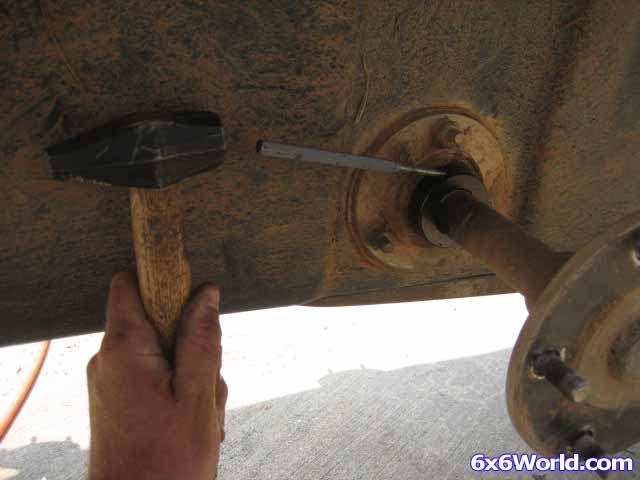
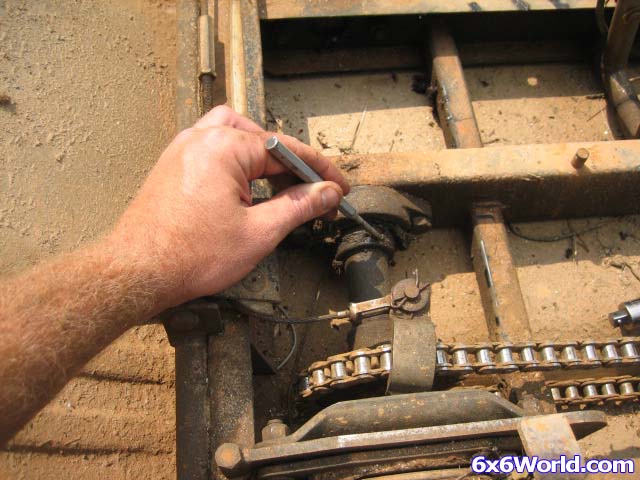
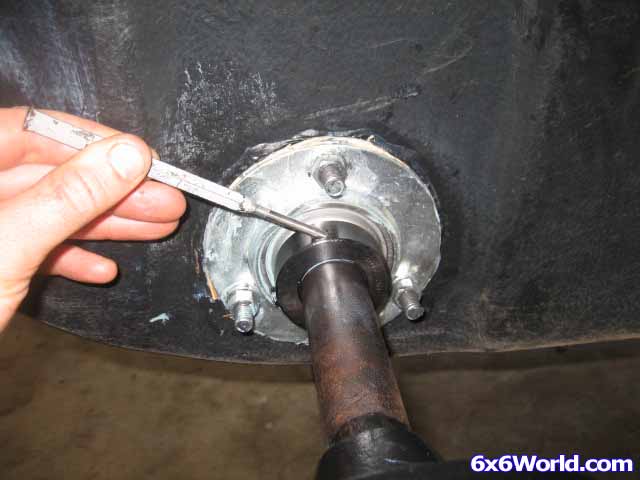
On the outside bearing, you will find two holes in the eccentric locking collar. One has a set screw in it and the other doesn’t. Loosen or remove the set screw. On my Max II, the set screw took a 5/32” allen wrench.
Once you have the set screw loose, locate the other hole on the collar. Use a punch and hammer on this hole to rotate the collar and free the cam from the race. The collar could rotate either way so if you have trouble getting it to budge you may want to try hitting it in the opposite direction.
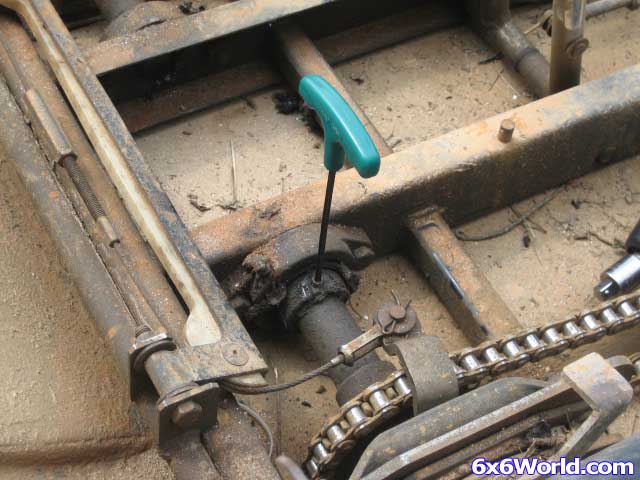
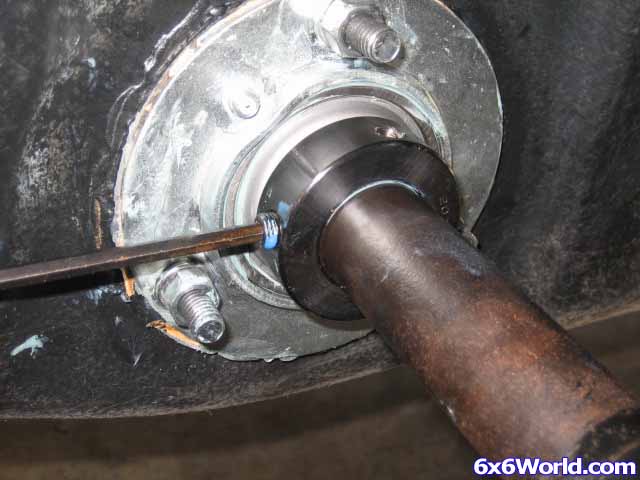
Now using the same procedure as before, loosen the set screw on the inner bearing. Note: Some of the earlier Max six wheelers didn’t have inner bearings so this step may be optional for you depending on your 6 wheeler.
Rotate the collar to free it from the inner bearing.
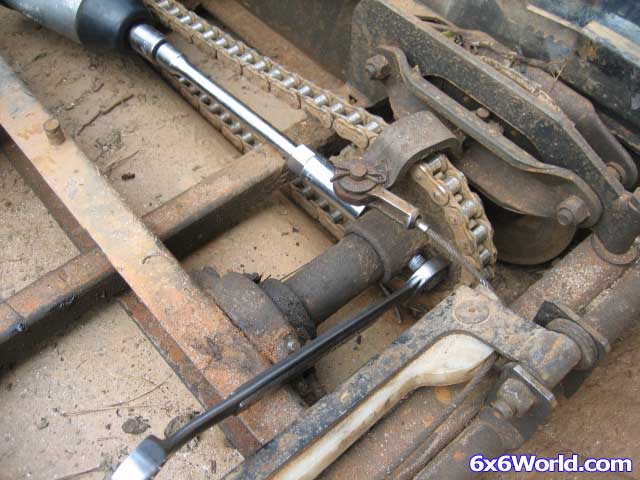
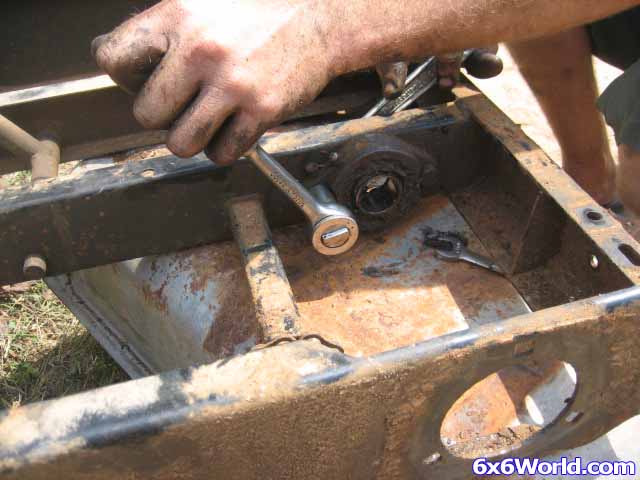
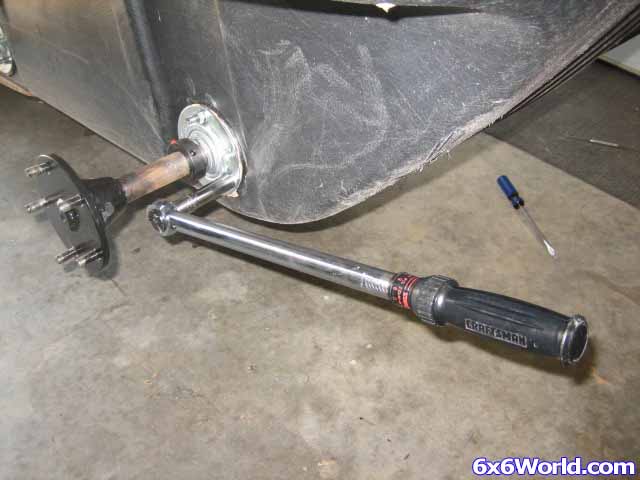
Remove the nut and bolt that holds the sprocket on the axle.
Now theoretically your axle should be free to just pull out however because many of our 6x6 ATVs are 10, 20, and even 30 years old it isn’t always that simple. Often, even after you remove the bolt that holds the sprocket on, the axle will not want to slide out. Sometimes spraying liberal amounts of penetrating oil around the ends of the sprocket tube can help but other times you just have to use brute force. A puller mounted to the lugs can give you that extra power that you need to break it free. Be sure that you put a crow bar or screw driver on the sprocket so that you have something to pull against and also so that you do not damage the tub.
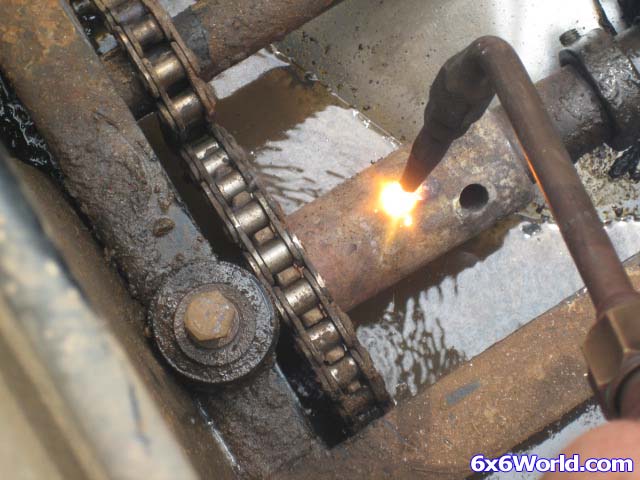
If that still doesn’t free the sprocket tube from the axle you can try using heat. Place a piece of tin under the sprocket and also put some water in the tub so that you don't melt it. Then you can carefully apply heat to the sprocket and try the puller again when it is red hot.
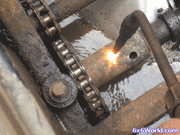
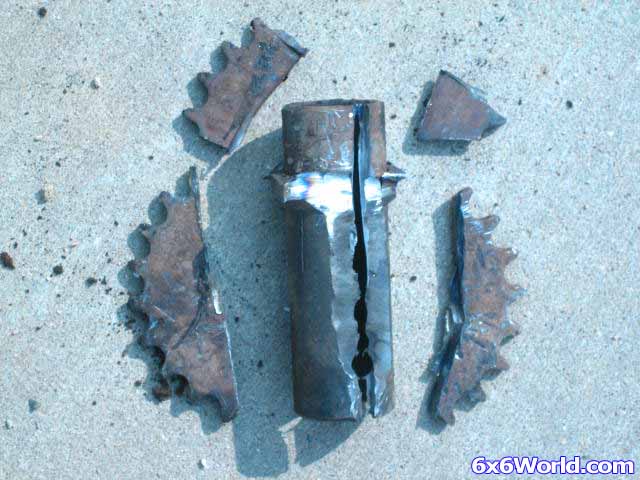
Finally if that doesn’t work you may have to cut the axle or sprocket off. The decision of which one to cut is up to you. If you are replacing the axle the I would just cut it. Later you could put the sprocket in a press to free it. I chose to cut the sprocket with a die grinder since I was replacing them anyway.
[BREAK=Bearing Removal]
Now that the axle is finally out you can remove the bolts that hold the inner bearing housing to the frame.
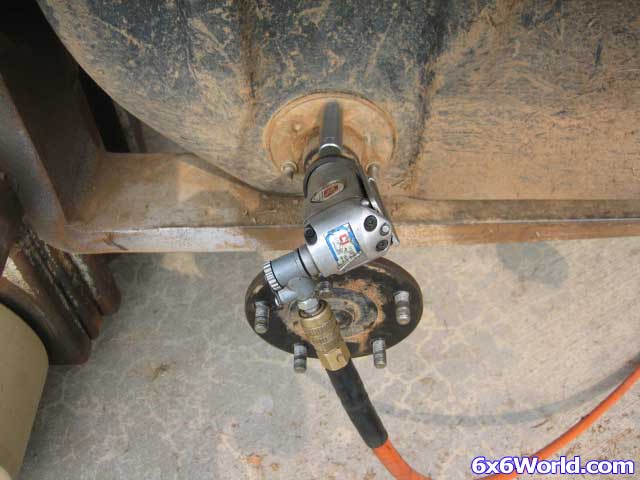
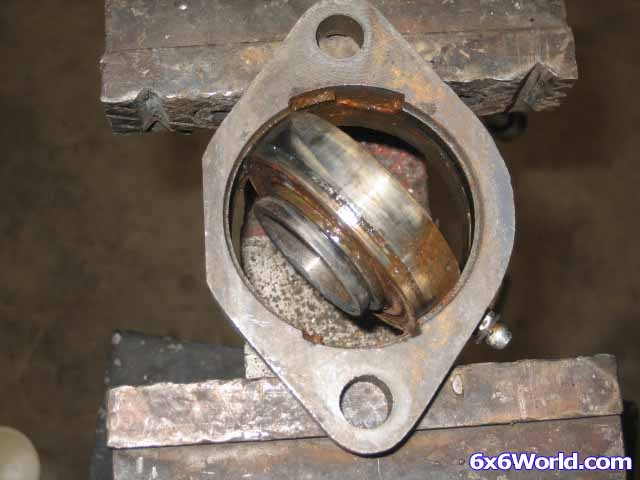
To remove the outer bearing you have to remove the three nuts that sandwich the bearing between the flanges. Then remove the outside flange and you can just pick the bearing out by hand. (This picture was taken out of order just to show you which nuts to remove)
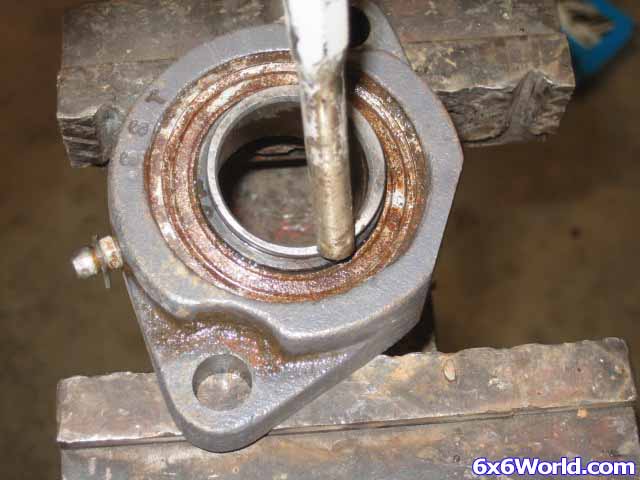
Take the inner bearing housing and place it on a vise so that you can tap the bearing with a punch to get it to rotate away from the housing. Note: After I wrote this article Dan from Recreative Industries gave me a good tip on these bearings. He said to put the flange in the vise and use a pry bar inside the inner race to rotate the bearing in the flange. Do this when removing the old bearing and when you install the new one. That is a better way than I have shown here.
Once the bearing starts to rotate out flip the housing over and turn the bearing until it can slide out of the reliefs on the housing.
[BREAK=Bearing Replacement]
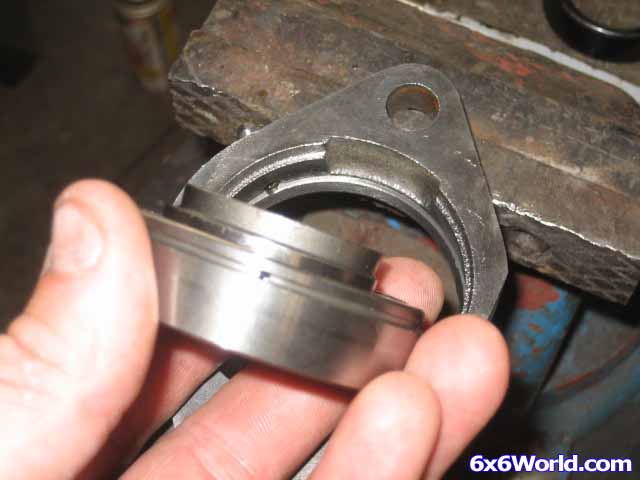
If you are reusing the bearing housing be sure to clean it very well and remove all of the old grease, dirt, grime, etc. especially in the inside groove. This is where the grease enters the bearing from the grease zerk. I used a wire brush on a drill to get in the groove and then soaked the entire flange in a parts cleaner overnight.
Once you have the flange/housing clean insert the new bearing from the back. This is just a reverse procedure of the way you removed the bearing. Be sure that the lip of the inner race is facing the outside of the housing so that the locking collar can be reinstalled correctly.
TIP: If you look in the picture below you can see a small hole in the groove of the bearing. This is the only place that grease enters the bearing from the flange. I always make sure that this hole is as close to the grease zerk as possible to ensure that grease has the best chance of entering the bearing when you grease it.
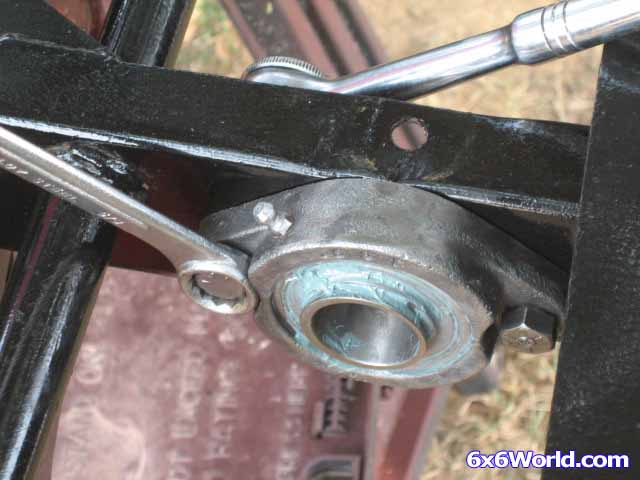
Now bolt the clean housing with the freshly installed bearing back on the frame with the grease zerk pointing up.
TIP: Just torque the bolts a little by hand at this point so that the axle can slide in the bearing easily when everything goes back together. Also, you may want to go ahead and grease the bearing to make sure that the grease is getting to the entire bearing. I use a marine grade grease on all bearings.
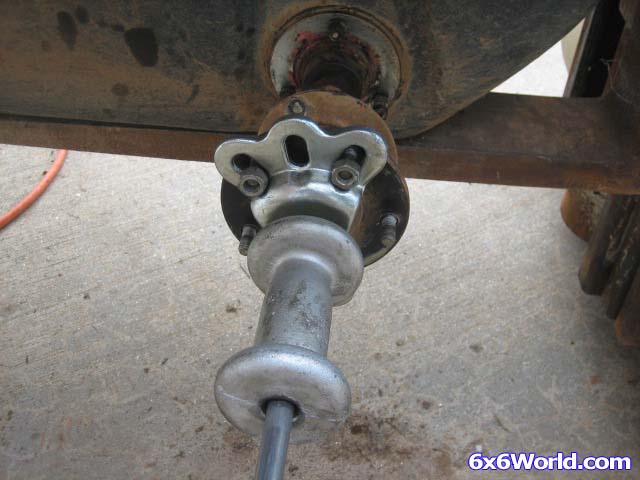
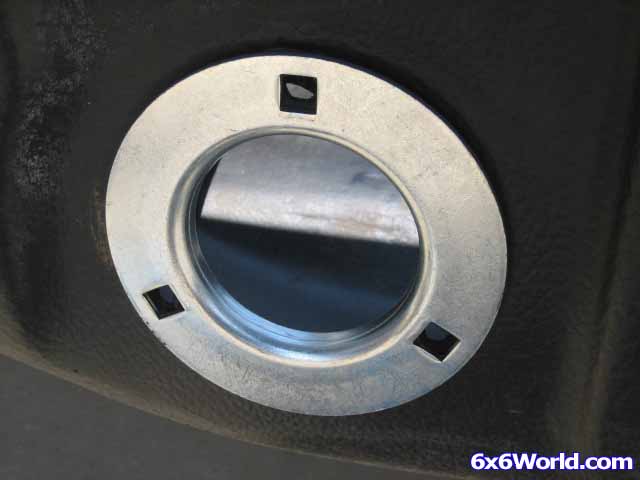
Now let’s move to the outer bearing. I am installing new flanges in this article but if you are reusing your old ones you should clean them thoroughly. Also clean the tub around where the flange mounts. Then you will need to seal the inside flange from water. I used strips of 3M strip caulk that I got directly from RI to create a seal around all three bolt holes and the main opening. Use a liberal amount to be sure that it seals properly.
Now place the inside flange (the one without the grease zerk) in the axle hole and be sure to line up the bolt holes.
Next is where I deviate a little from the recommended assembly procedure:
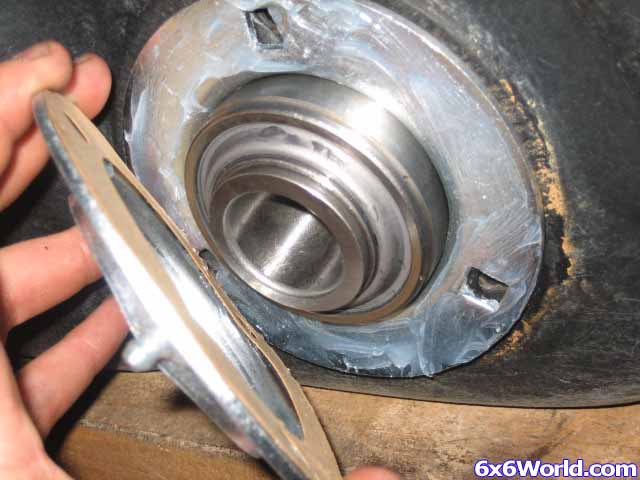
There are several ways to seal the outer bearing flanges from water. Recreative Industries used a paper gasket between the two flanges for a while. Some people use grease and just apply it liberally between both flanges. I went a little further and used silicone in conjunction with the paper gasket supplied by R.I.
I applied silicone to both sides of the bearing flange. Then I placed the new bearing in the housing being careful not to get silicone on it. Finally I placed the paper gasket on the outside flange and sandwiched it in the middle.
Note: When you put the bearing in place be sure that the lip of the race for the locking collar is facing the outside.
Now you can insert the carriage bolts from inside the tub. Put the washers and nuts on from the outside to hold everything in place. You should just torque them a little for now until you get the axle installed. I also put some silicone on the backside of the nuts just for some added waterproofing and peace of mind. The paper gasket is really not necessary when using silicone.
[BREAK=Axle Installation]
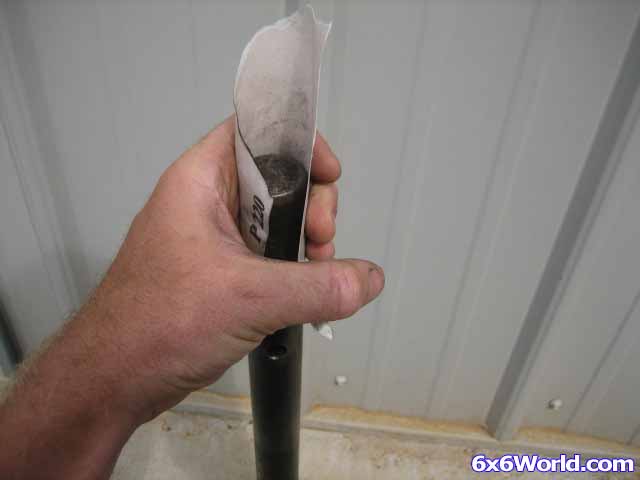
If you have a new axle it shouldn’t be a problem but if you are reinstalling an old axle you will want to take some sandpaper to it so that it is smooth. Pay close attention to the end of the axle and where the outer bearing is going to ride.
Now that the axle is clean, you can place the outer locking collar on the axle and then begin to slide the axle in the bearing. Note: Dan gave another great tip on the axle installation. He suggested covering the axle with anti seize. This allows for easy removal if you ever have to do it again. If you have ever had a sprocket that wouldn't come off you will appreciate this tip
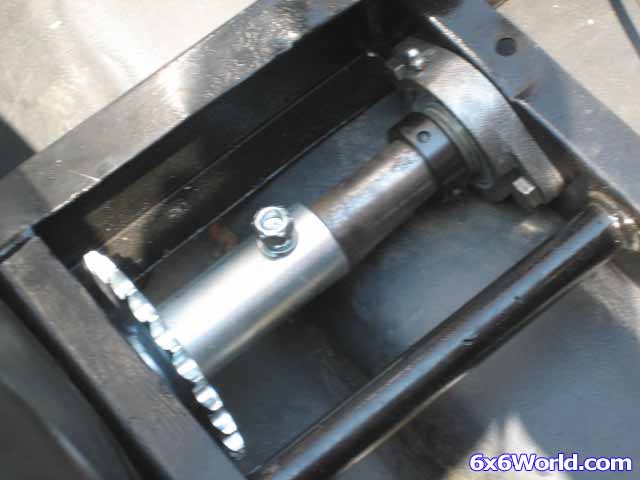
On the inside of the tub slide the sprocket on the axle. Then place the inner locking collar on and finish sliding the axle into the inner bearing.
Put the bolt, washer, and nut back in the sprocket tube and tighten it down.
If you just removed one axle then you can put the chain back on to align the axle where it needs to be. If you have removed all of the axles then you may want to get them all to this stage before you lock the collars onto the bearings. This will allow you to slide the axles in or out to get proper chain placement and alignment.
You can actually move the axles in and out a good bit so if you are starting from scratch, as a rule of thumb just place your finger on the inside of the inner bearing and push the axle in until the end of the axle is flush with the inside edge of that bearing.
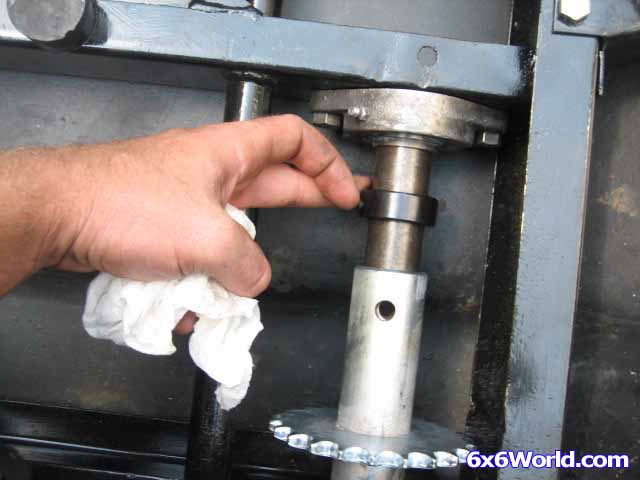
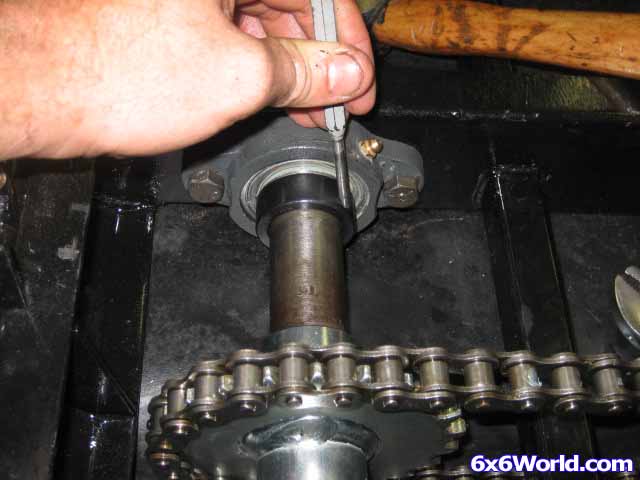
Now you can place the inner bearing collar up to the race and use a punch to rotate/lock it.
TIP: Be sure that you are not placing the punch in the hole with threads where the set screw goes.
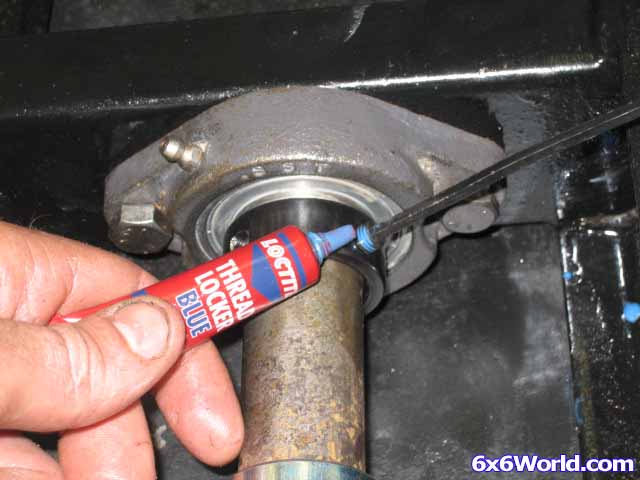
Place the set screw in the collar and apply some thread locker to keep it from backing out. Tighten the set screw.
Repeat the same procedure on the outer bearing’s locking collar. Note: You could put silicone around the outer locking collars to complete the watertight seal.
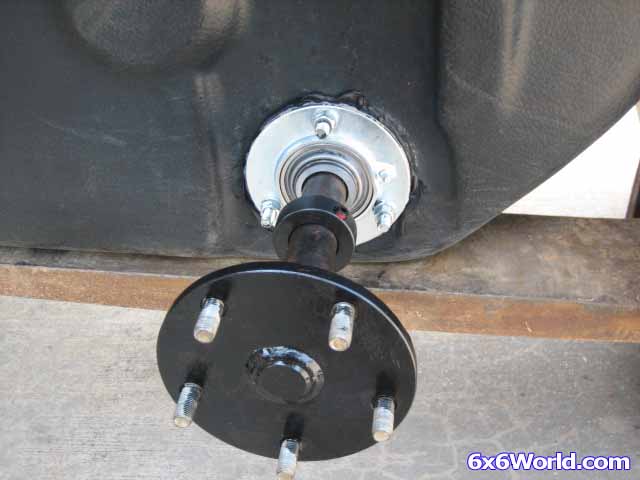
Now the axle is held in place and you can finish the job by torquing the flange bolts to 32 foot pounds. Be sure to torque your inner bearing flange bolts down too but unfortunately I do not have specific torque specs for those.
Grease all bearings again and replace the tires, wheels, and upper body. It is always a good idea to recheck the bolts again after an hour or two of use.
Using this procedure, I replaced all bearings, flanges, and sprockets in my Max II. After I got everything together I immediately proceeded to the pond to test for water tightness. I didn’t have even one drop of water in the tub after 10 minutes of use and still don't to this day! Plus it rolls and turns so much easier on land now too.


Happy 6 wheeling!

 Reply With Quote