You are currently viewing our boards as a guest which gives you limited access to view most discussions and access our other features. By joining our free community you will have access to post topics, communicate privately with other members (PM), respond to polls, upload content and access many other special features. Registration is fast, simple and absolutely free so please, join our community today!
If you have any problems with the registration process or your account login, please contact us. Looking forward to seeing you in the forums and talking about AATVs!
Skid Steer Transmission Rebuild
(Note: All pictures can be clicked for a larger view)
A large percentage of 6 wheelers utilized the Borg Warner / Skid Steer T20 transmission. While they are virtually indestructible when properly maintained many of these skid steer transmissions have been around for over 30 years. It is only natural that at some point in their life whether it is due to improper maintenance or old age, they will need new seals, bands, drums, o-rings, or bearings.
This article will walk you through a tear-down and rebuild from start to finish of the T20 including the installation of a seal kit from Recreative Industries that includes new seals, thrust washers, and o-rings. It will also show how to install new bearings in the T20 while you are in there. All of the parts that you need to rebuild your T20 can be purchased directly from Recreative Industries. Give them a call 1-800-255-2511.
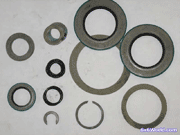
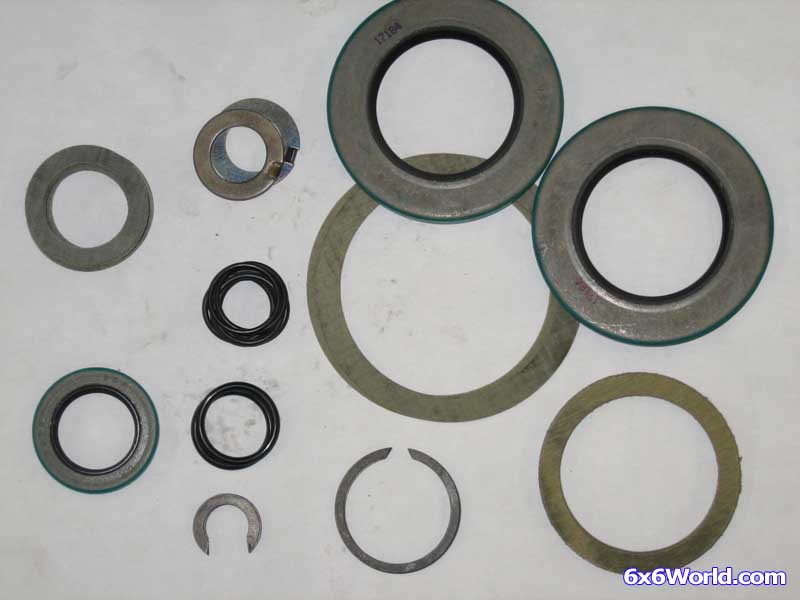
Here is a picture of the seal kit. Not shown are the main housing gaskets that are also included and the two bearings which must be purchased separately.
While this article is lengthy, the process (and transmission itself) is very simple. Not only is the rebuild rewarding it also allows you to view the inner workings of the transmission to better grasp how power is applied to the wheels. The T20 used in this article is from a late 90’s Max II. While there are several variations of the T20, the basic steps still apply.
Before you begin if you would like to view the T20 manual you can find it in our literature section or just follow this link: T20 Skid Steer Manual. It has a factory recommended procedure for rebuilding the transmission if you would like to follow that instead.
If you haven’t already, remove the transmission from the six wheeler and we will start from there. If you need help getting the T20 out of your 6x6, you can read the article on Removing the Skid Steer T20 right here in our How-To articles section.
Let’s Begin:
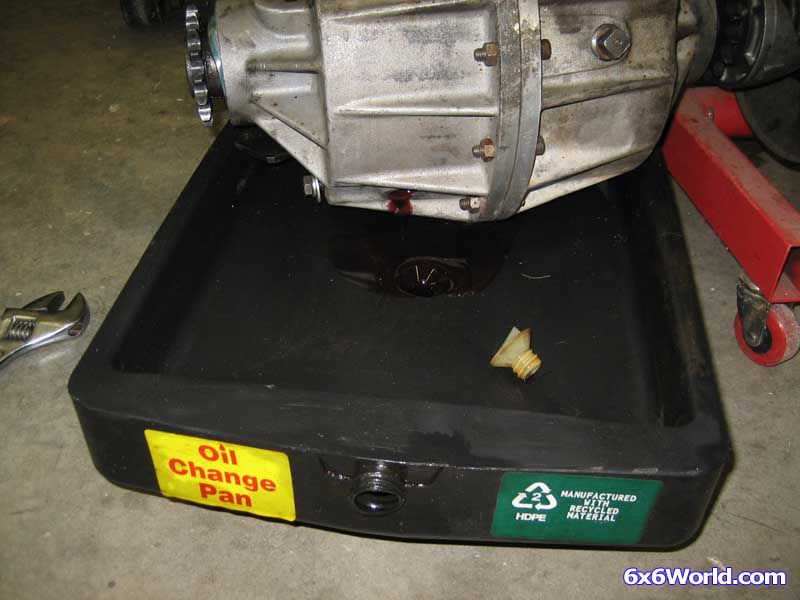
Drain the fluid from the T20
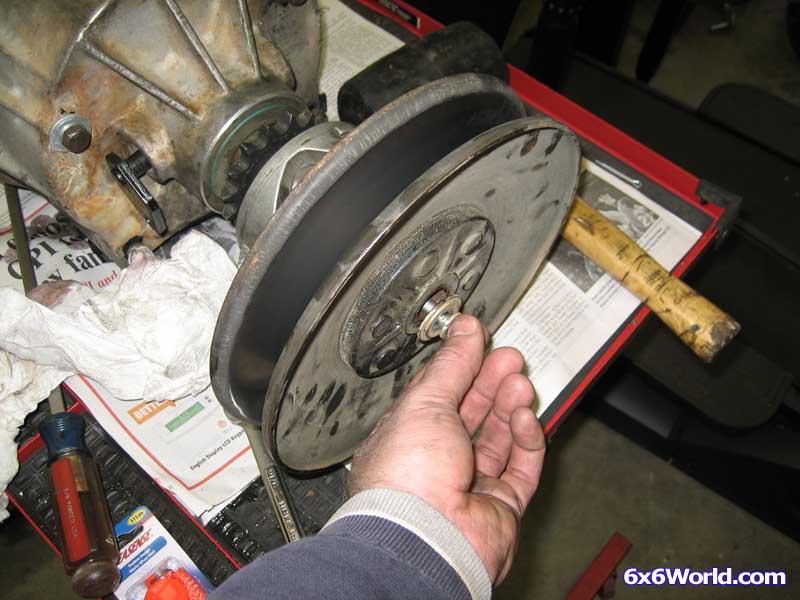
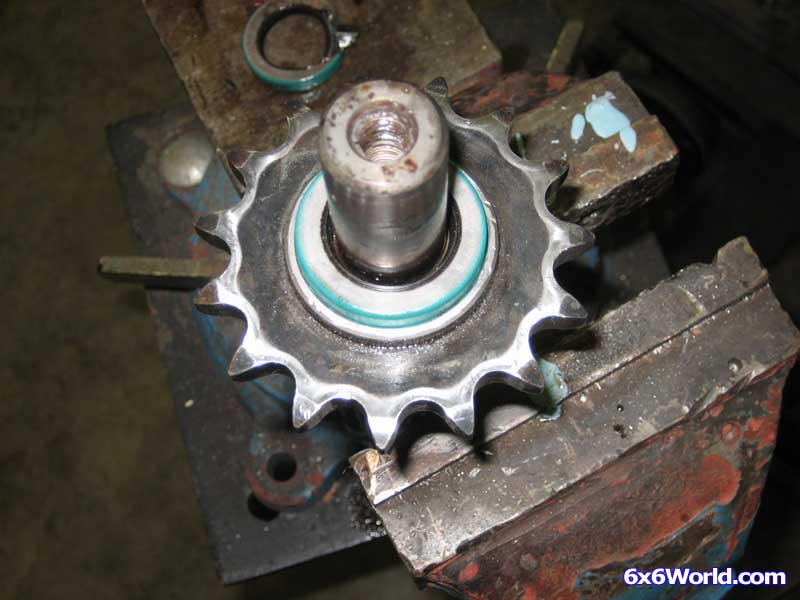
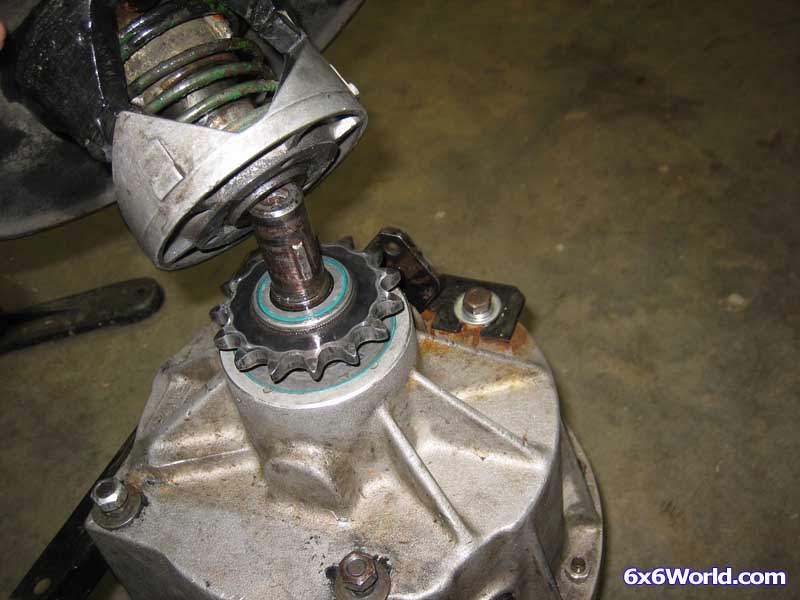
If you haven’t already, remove the bolt that holds the clutch to the T20.
Remove the clutch from the input shaft. This is a keyed shaft so you may have to use a screwdriver to pry it off.
Pry the hair pin clips out of the brake levers (U channel).
Remove the bolts and the washers that lock them into place.
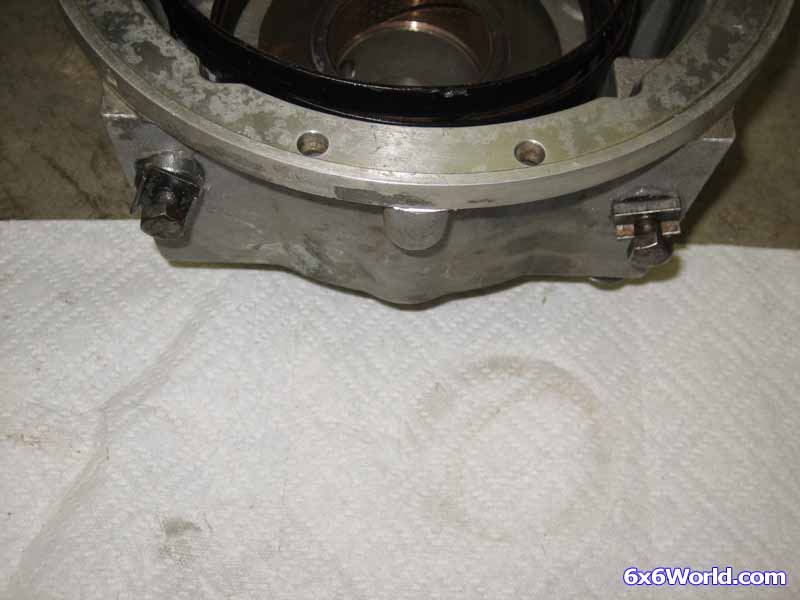
Now you can remove the brake levers.
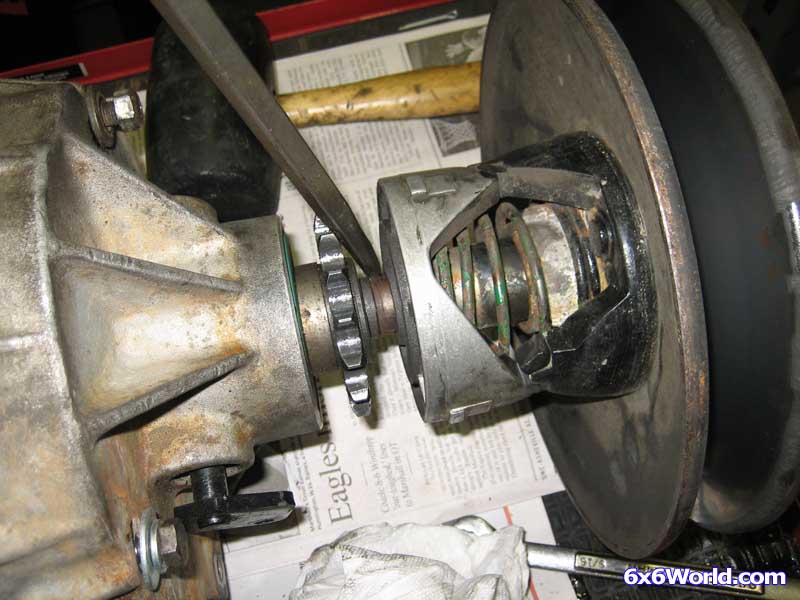
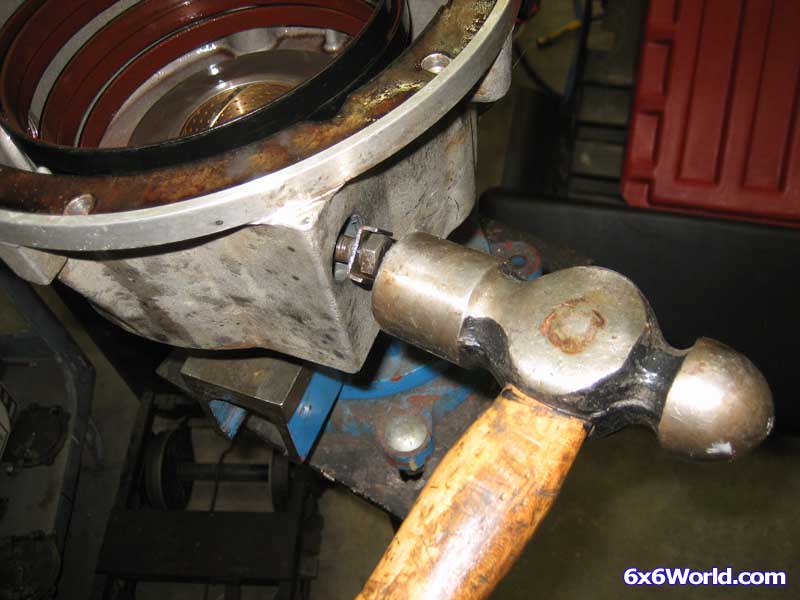
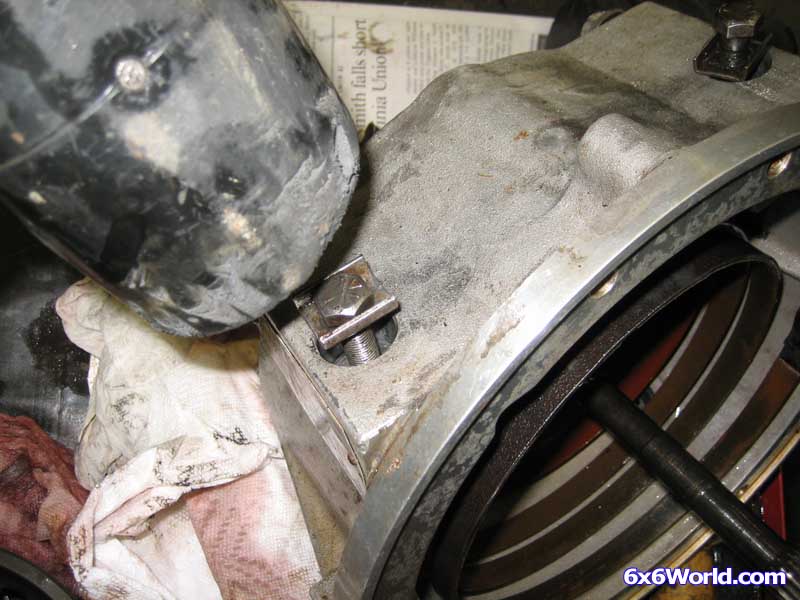
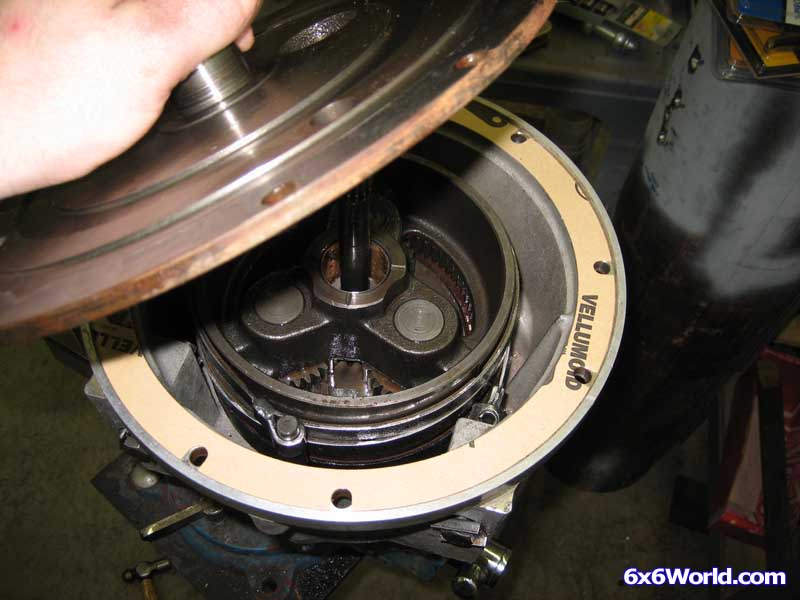
Remove the 9 hex head screws that hold the two housings together. These take a 1/4" allen wrench.
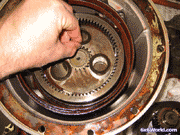
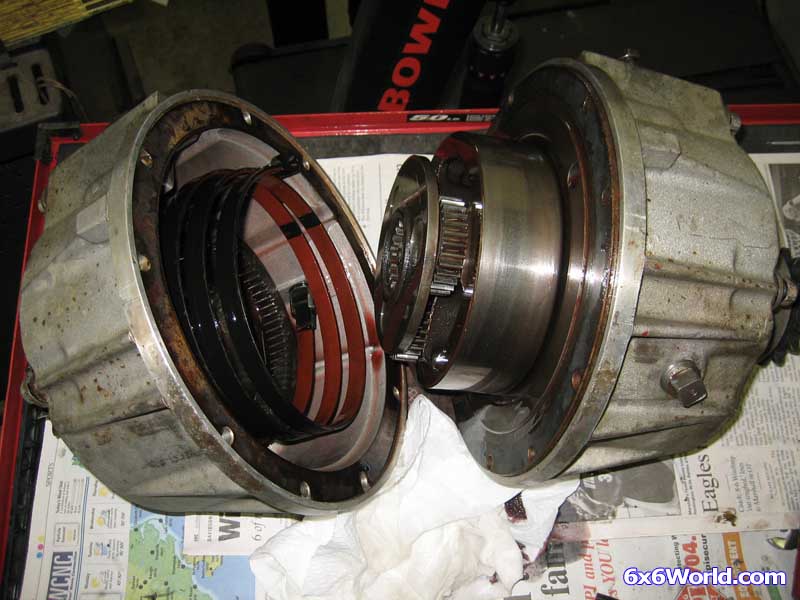
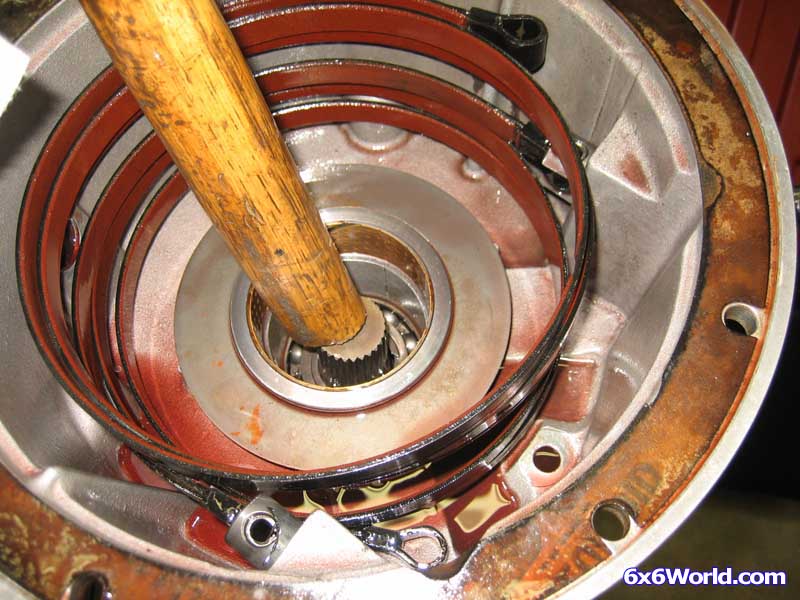
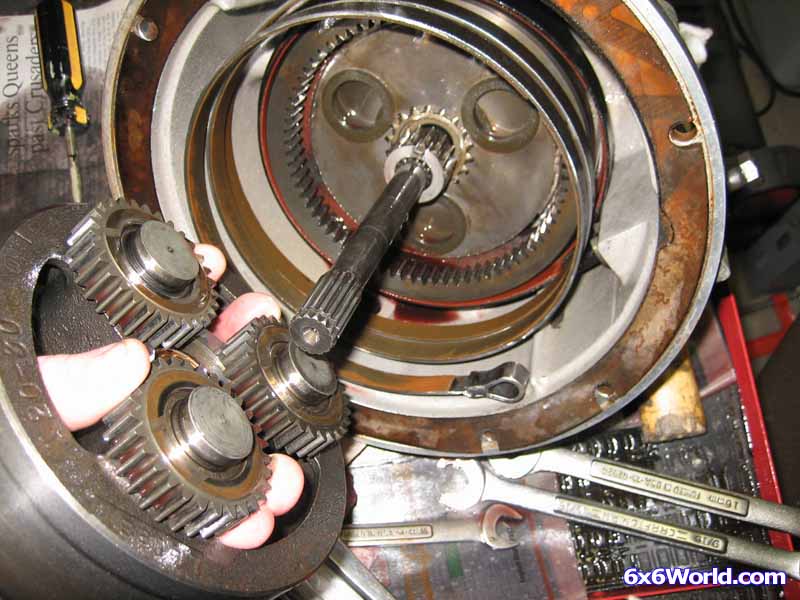
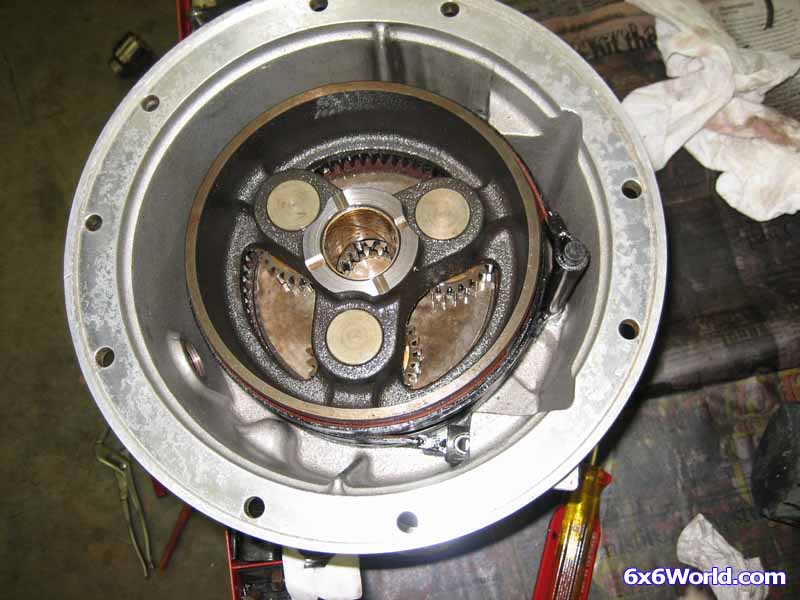
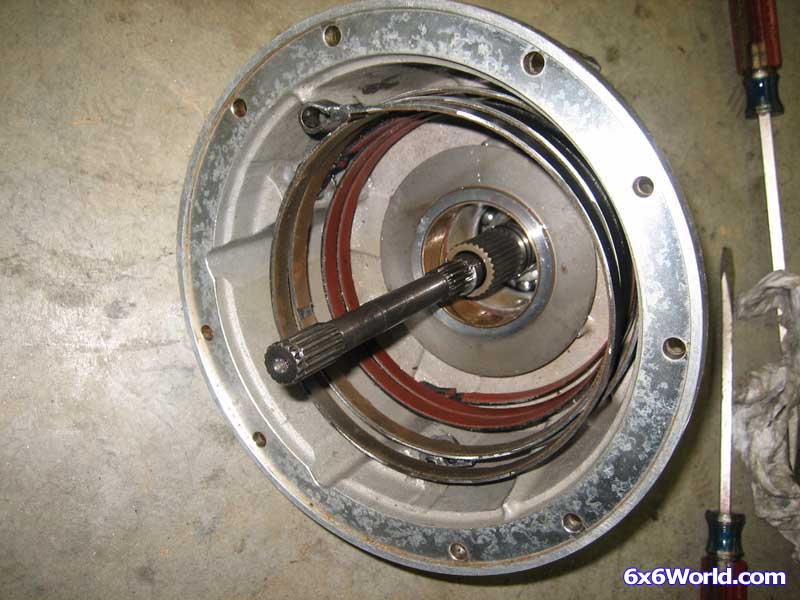
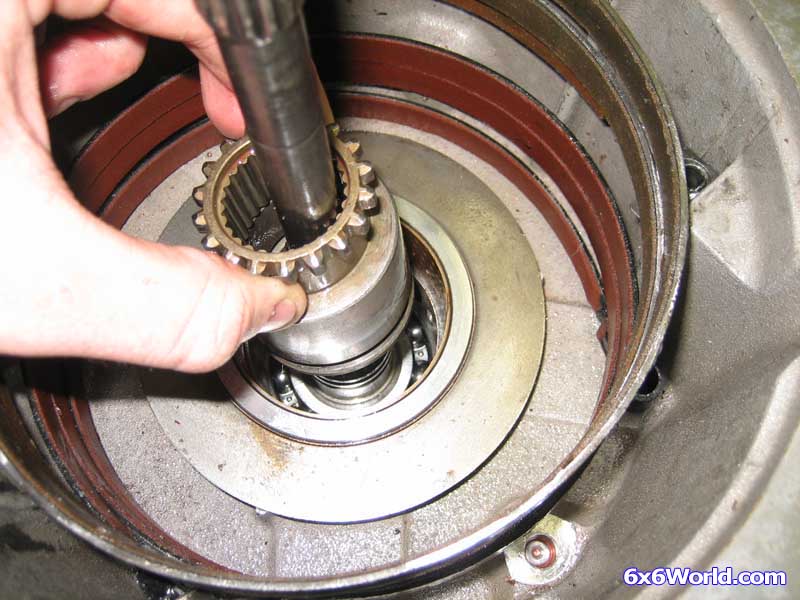
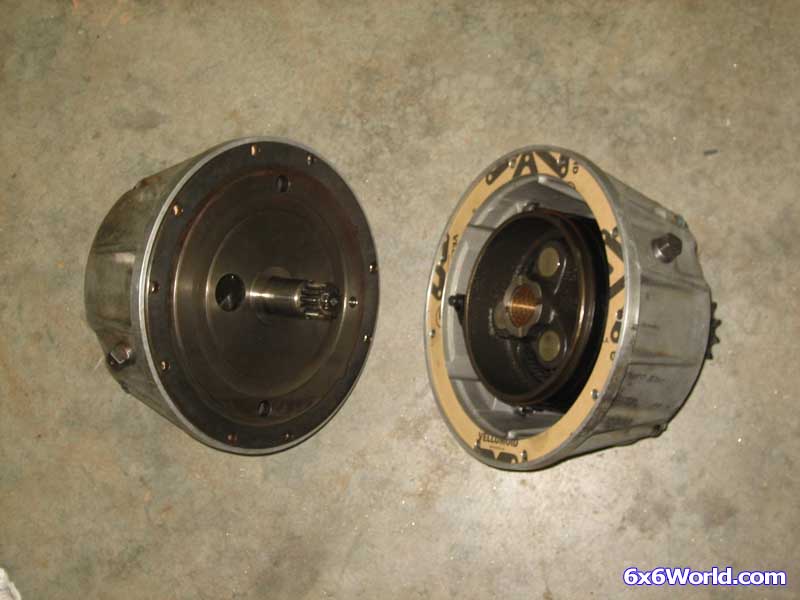
Once the bolts are removed you can pull the two halves of the transmission apart. If it doesn’t immediately want to come apart, you may have to gently tap one side with a rubber mallet to get them to break loose. You really want to be careful when you pull them apart so that the drums, gears, etc. don’t fall out. In the following picture you can see that I made a mistake and the drum came out separate from the housing. Luckily the planet gears and carrier plate stayed on.
Tip: If you set the T20 on its right side you can pull the left side straight up and not have to worry about losing any parts. The left side drums, gears, etc. will be held in place by the center housing plate.
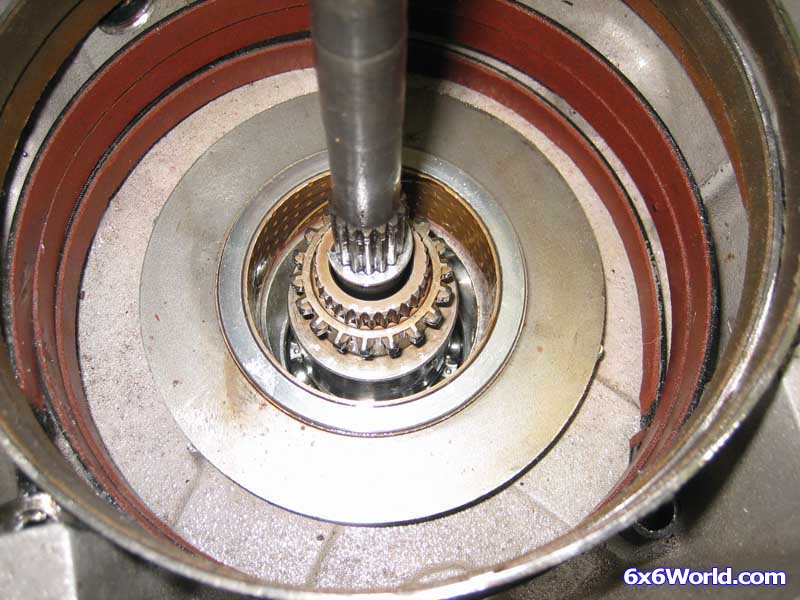
Now that the transmission is in two parts we will start working on the right side of the transmission without the center housing plate or input shaft.
[BREAK=Disassembly - Right Side]
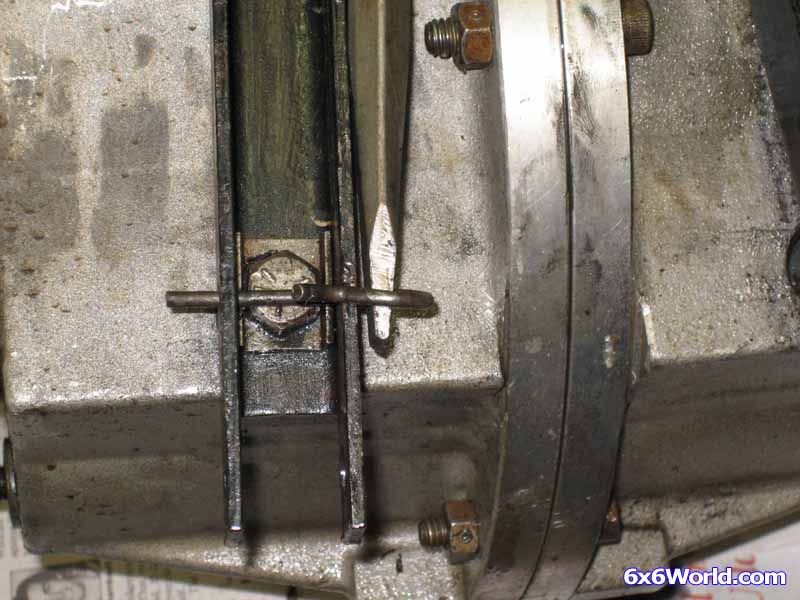
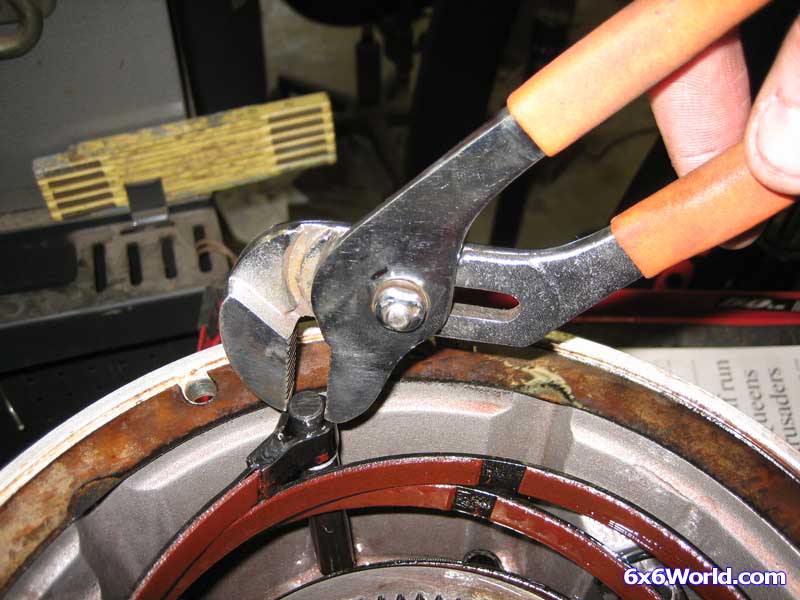
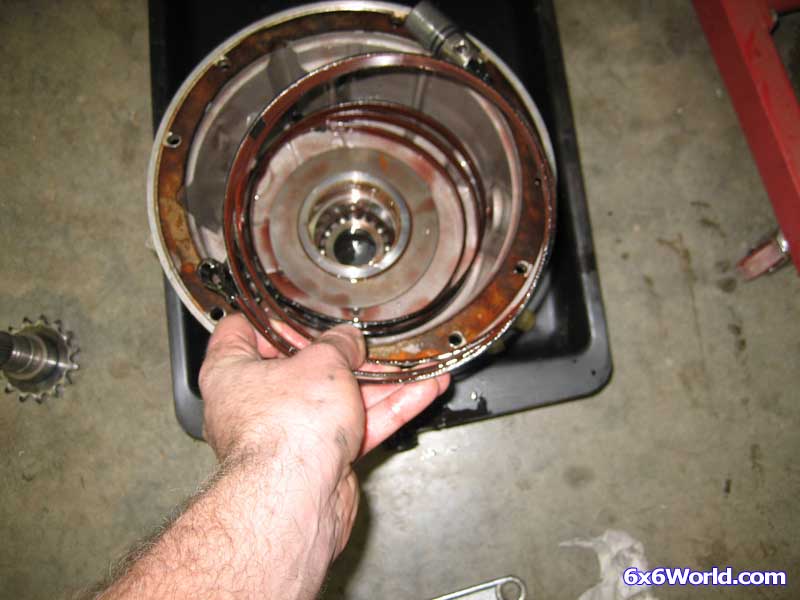
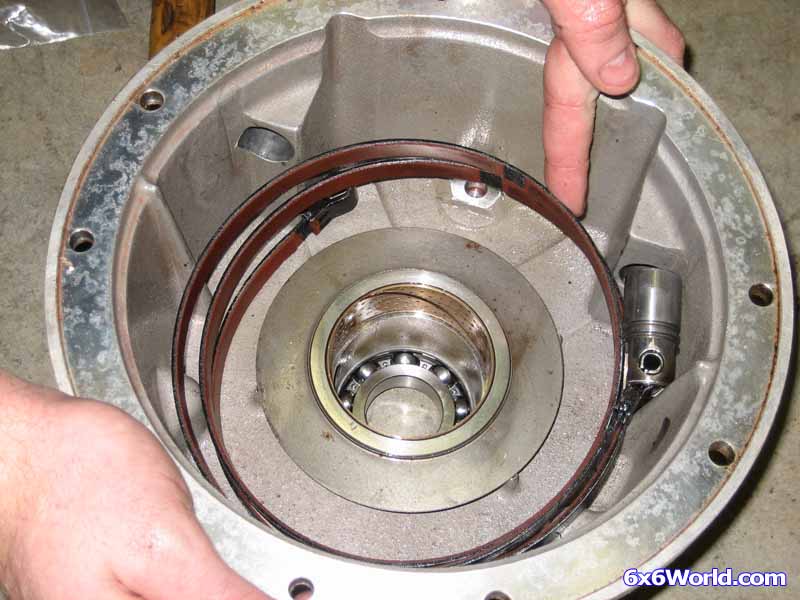
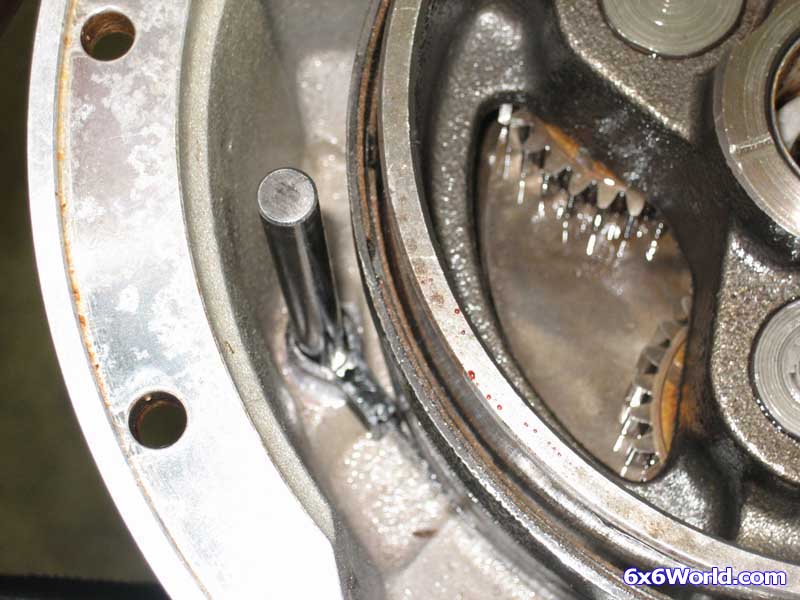
Start by freeing the band anchor rod that holds the brake bands to the housing.
Remove it along with the band anchor sleeve
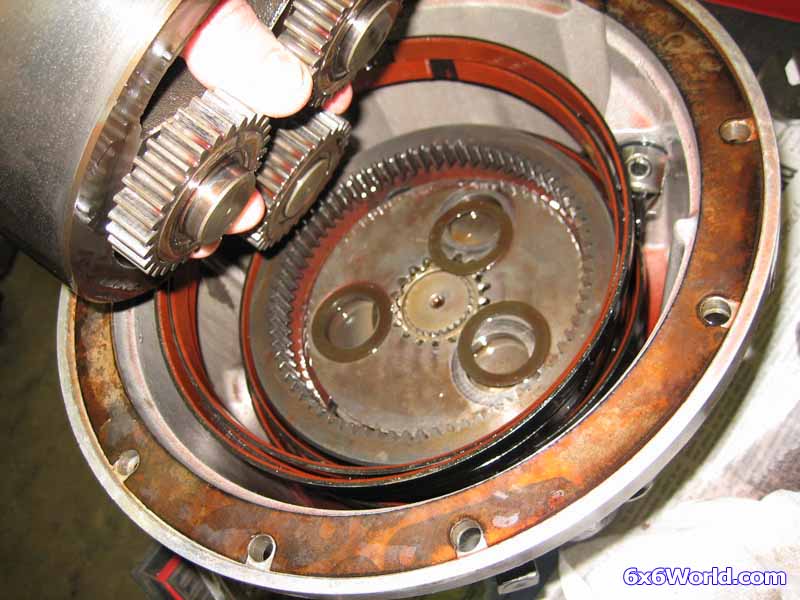
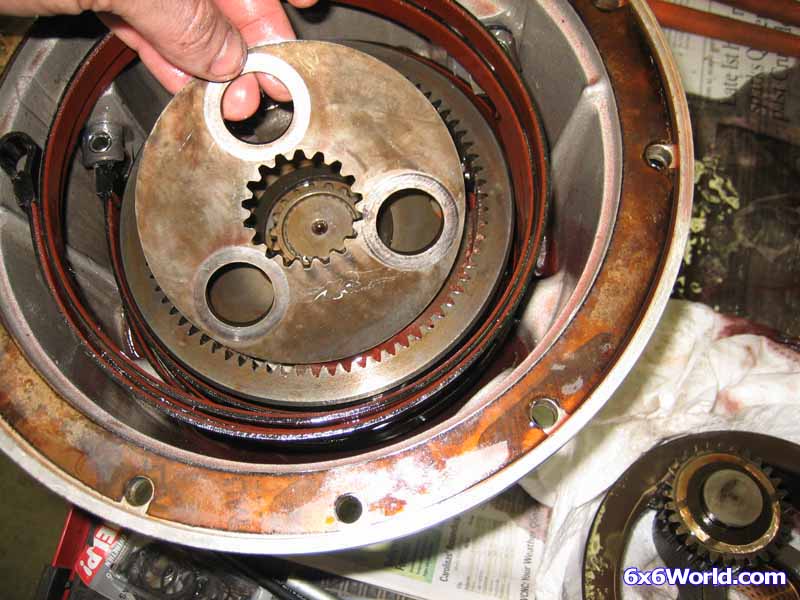
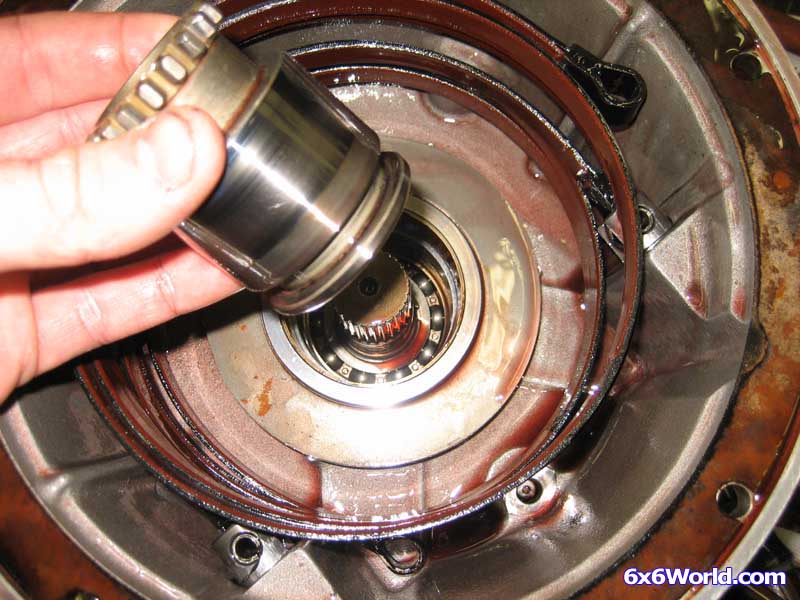
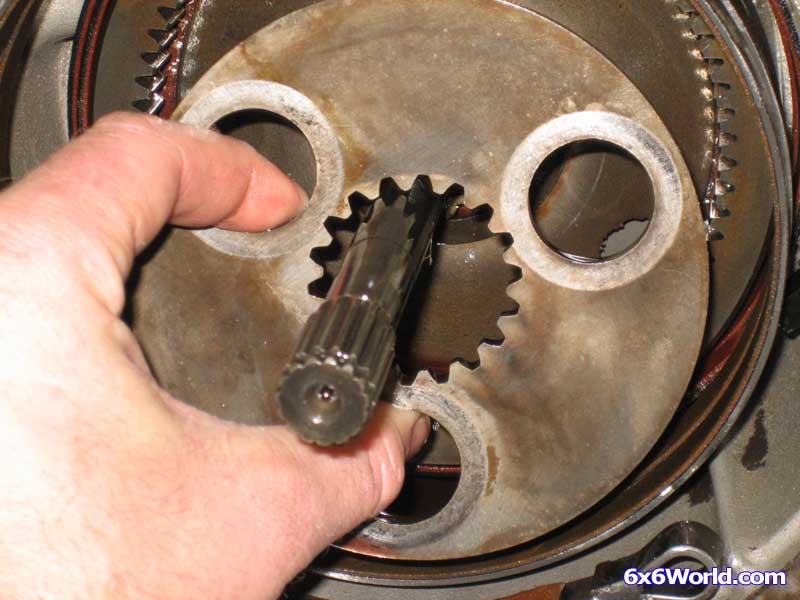
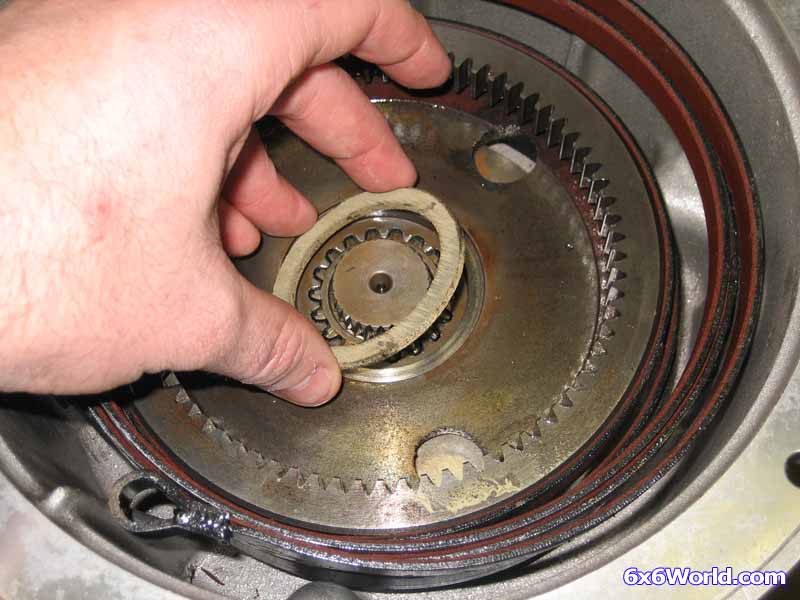
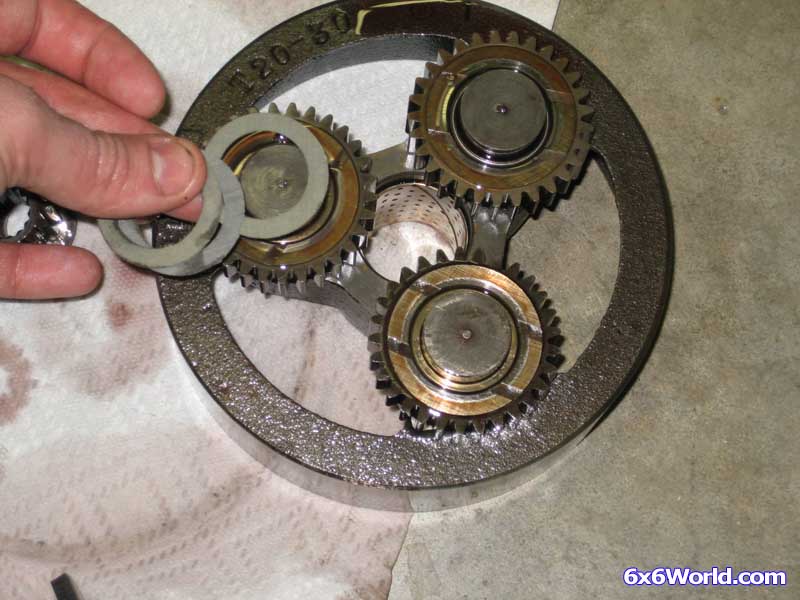
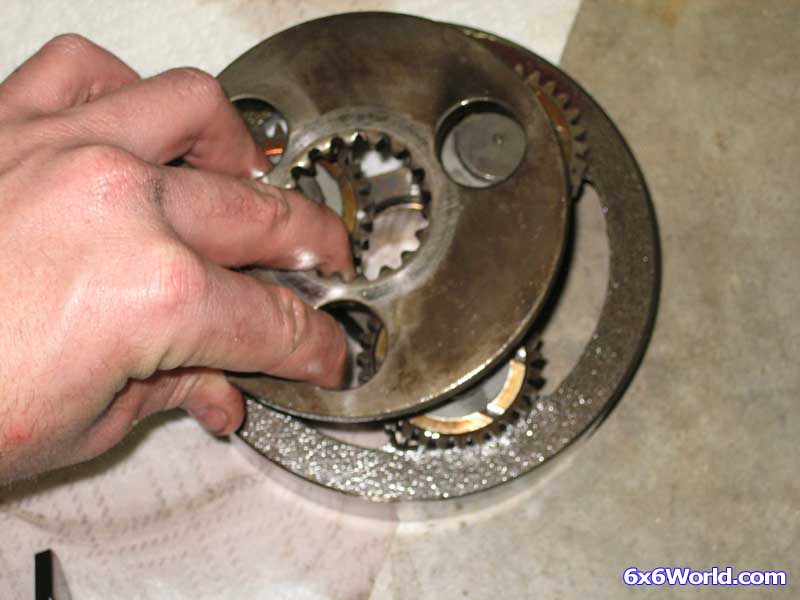
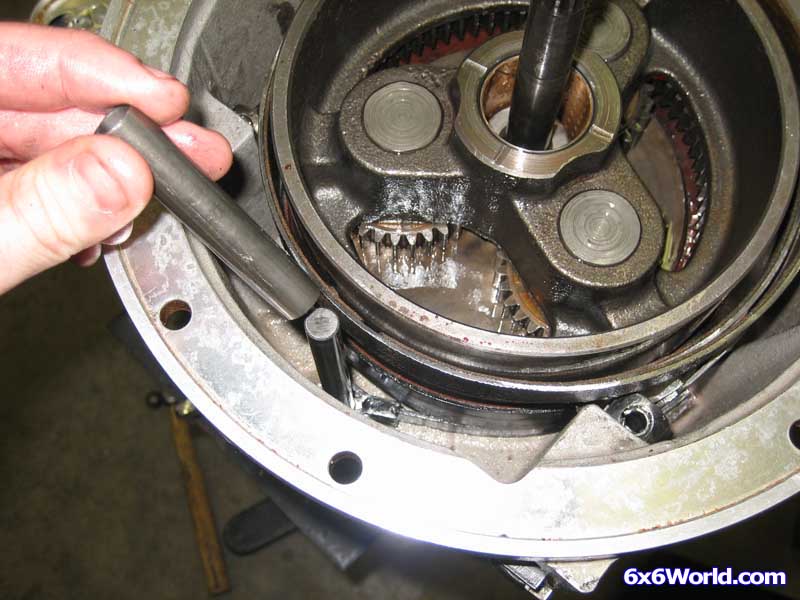
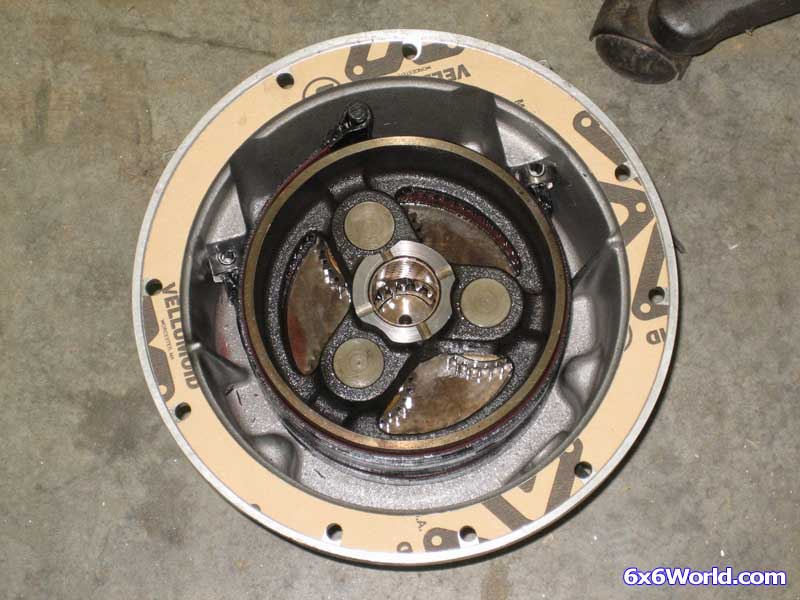
Reach in and grab the carrier drum and the three planet gears all at once.
The three planet gears have needle bearings that can easily come out so if you pull them all at once you don’t have to worry about losing them.
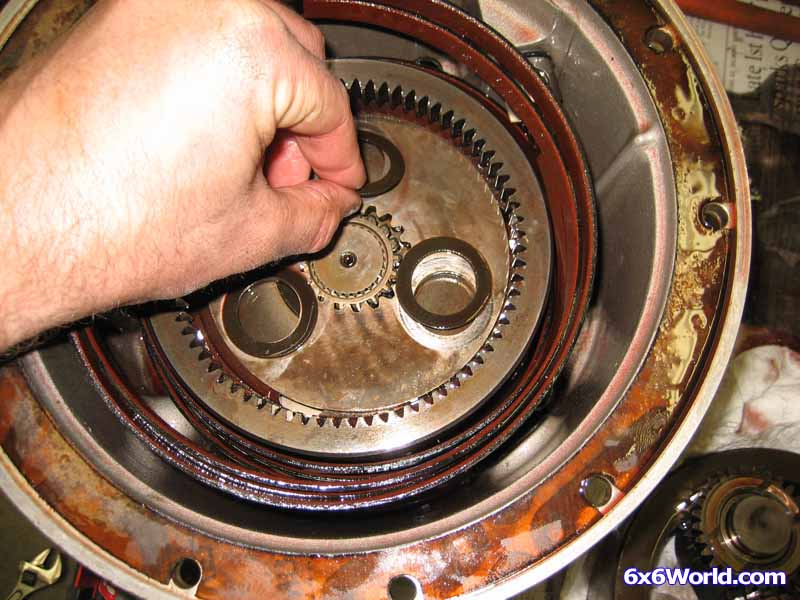
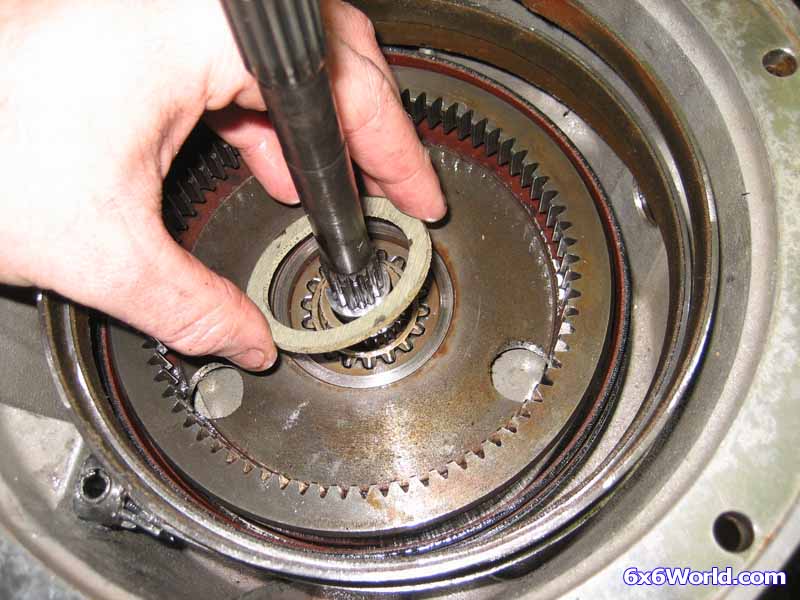
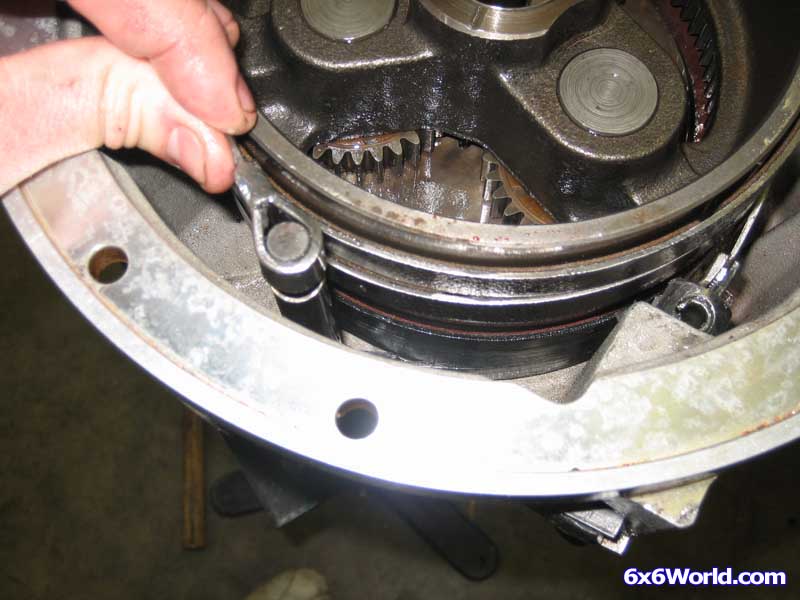
Remove the three thrust washers that separate the planet gears from the carrier plate.
Remove the carrier plate.
TIP: To make installation much easier and to avoid losing any parts I always reassemble everything that I take out of the T20 upside down on a table. Not only does it speed up reassembly it also keeps you from wondering if you left something out.
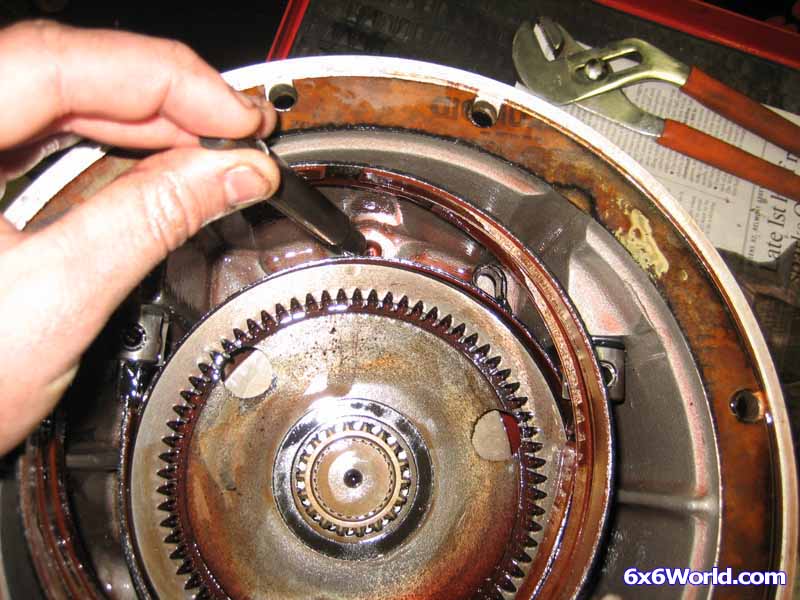
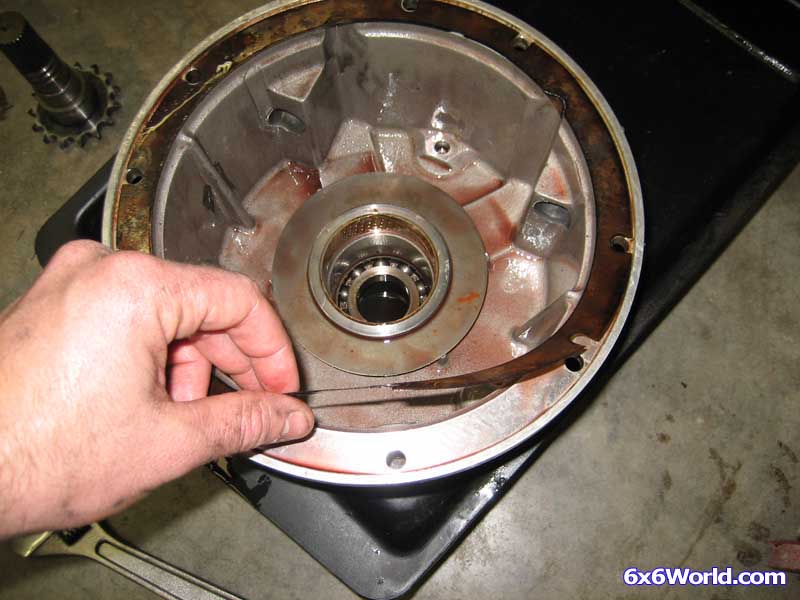
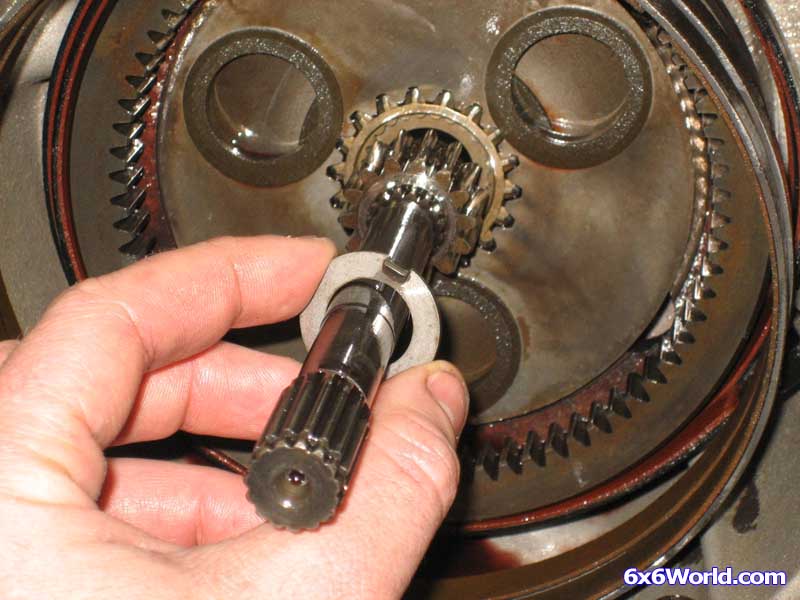
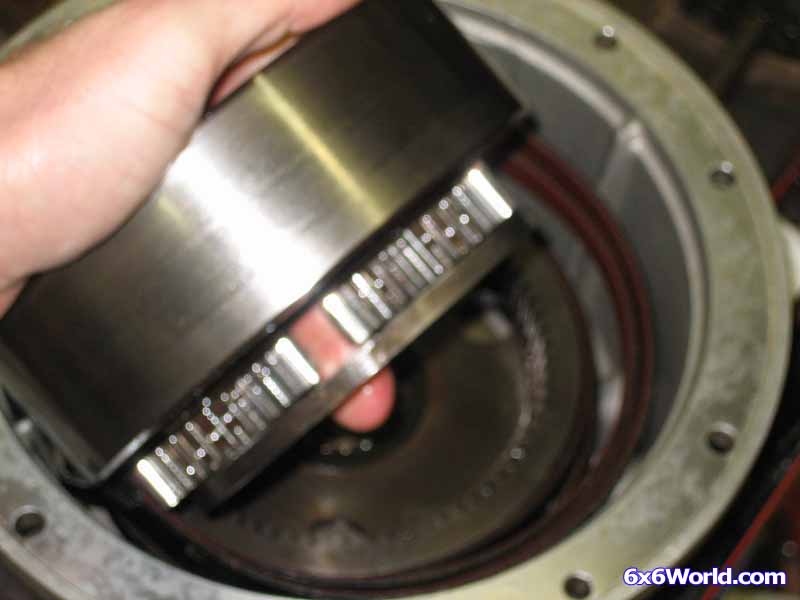
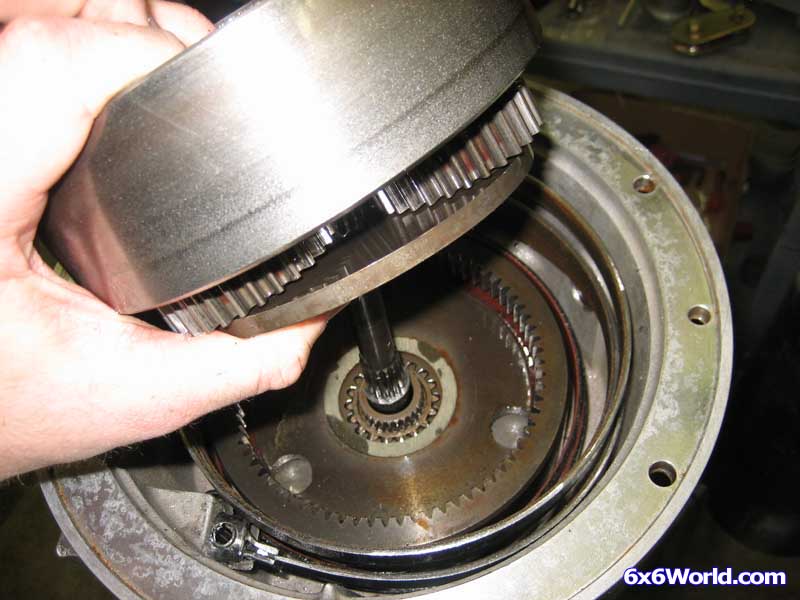
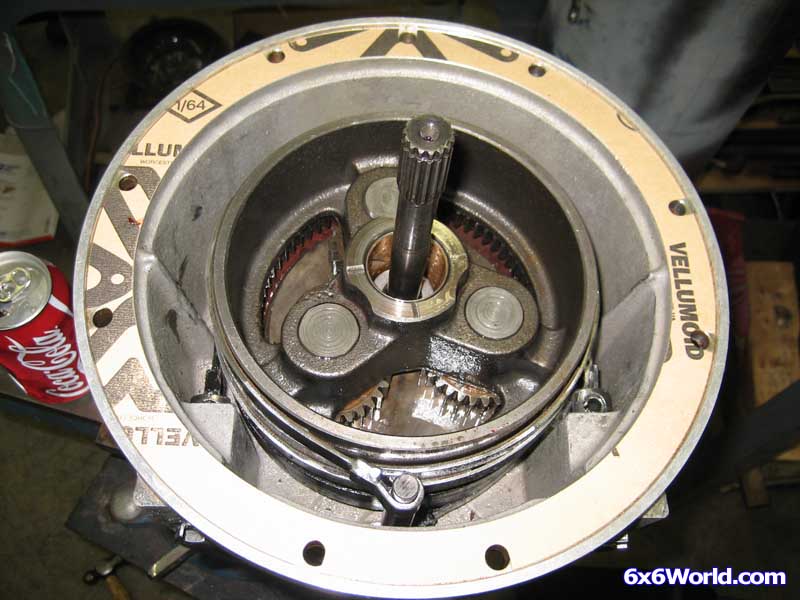
Remove the ring gear drum and thrust washer.
Remove the shift lever.
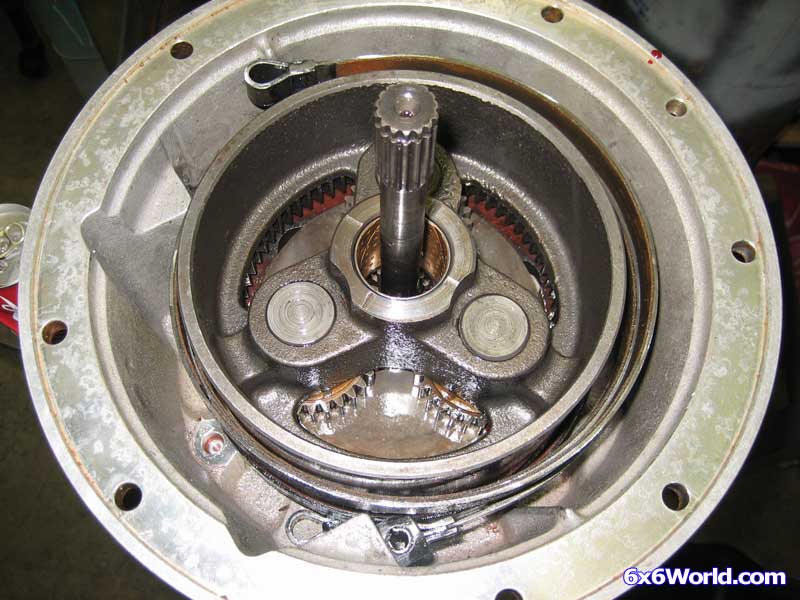
Remove the shift collar from the output shaft.
The shift collar has a detent spring inside that holds it on the output shaft. In order to remove it you just have to give it a quick jerk.
Remove the shaft retainer ring.
[BREAK=Disassembly - Right Side 2]
This ring can be a little tricky to get off. A set of pliers made for snap rings can really come in handy.
Tip: Once you get the ring out of the groove, if you have trouble getting it off the output shaft you can put the housing in a vise and tap the output shaft out. The snap ring should come right off.
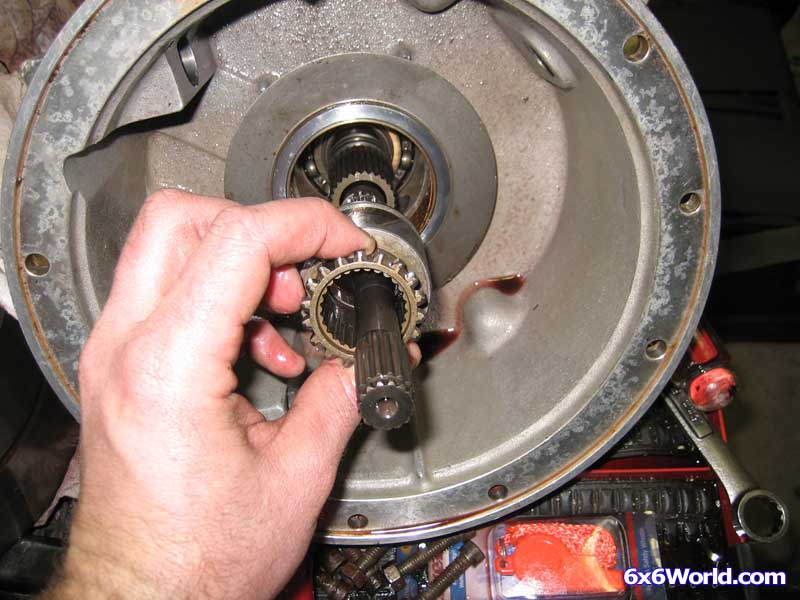
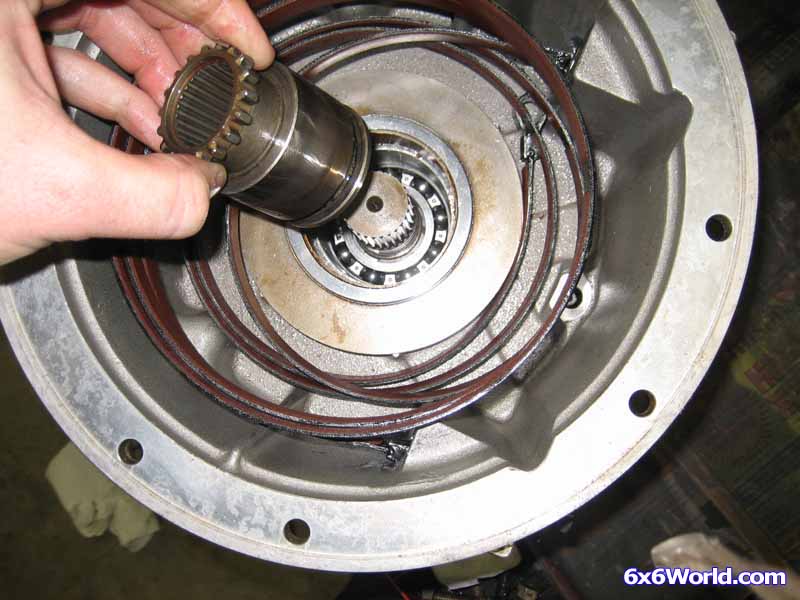
Finish removing the output shaft.
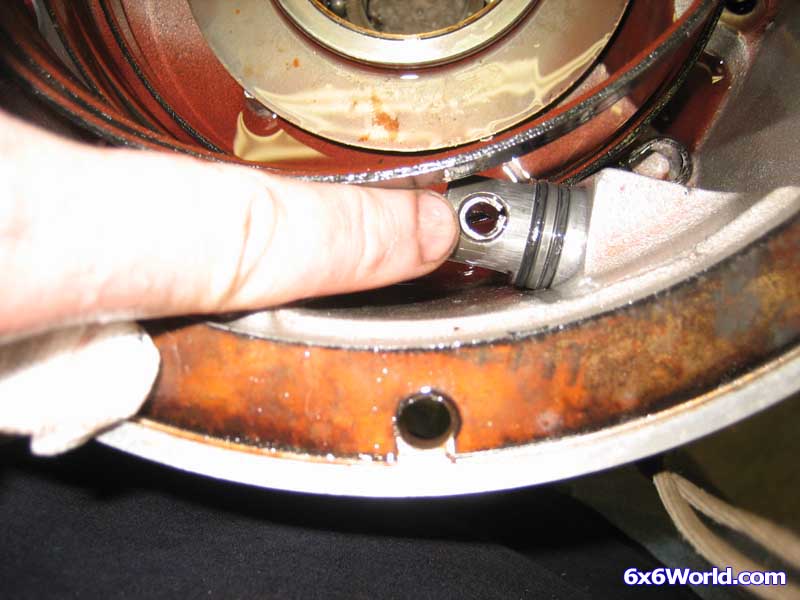
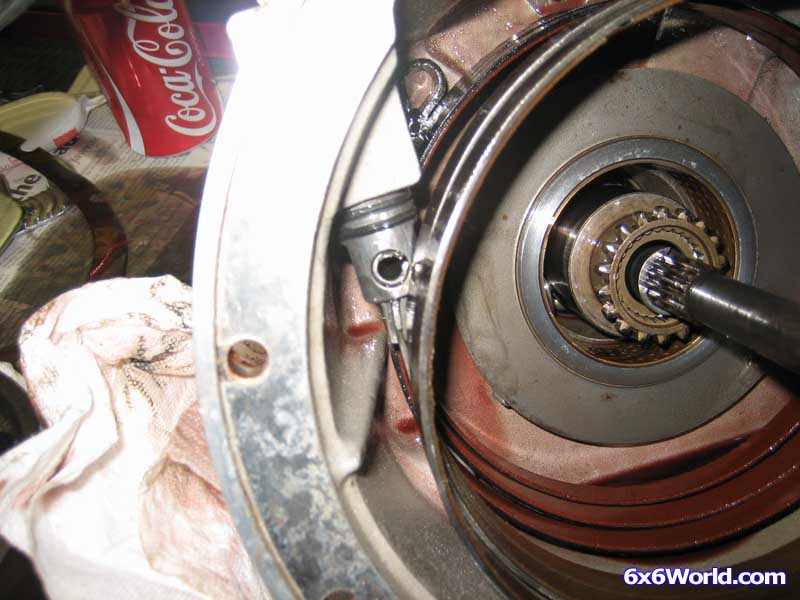
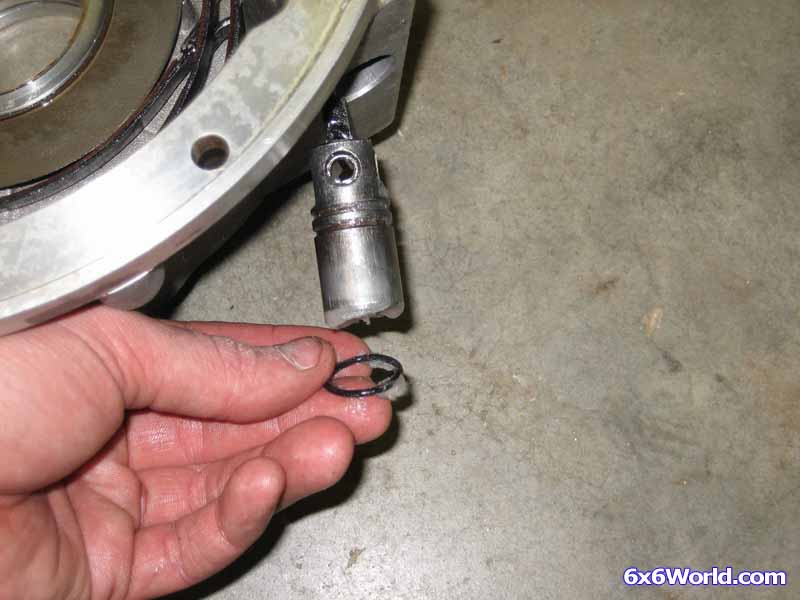
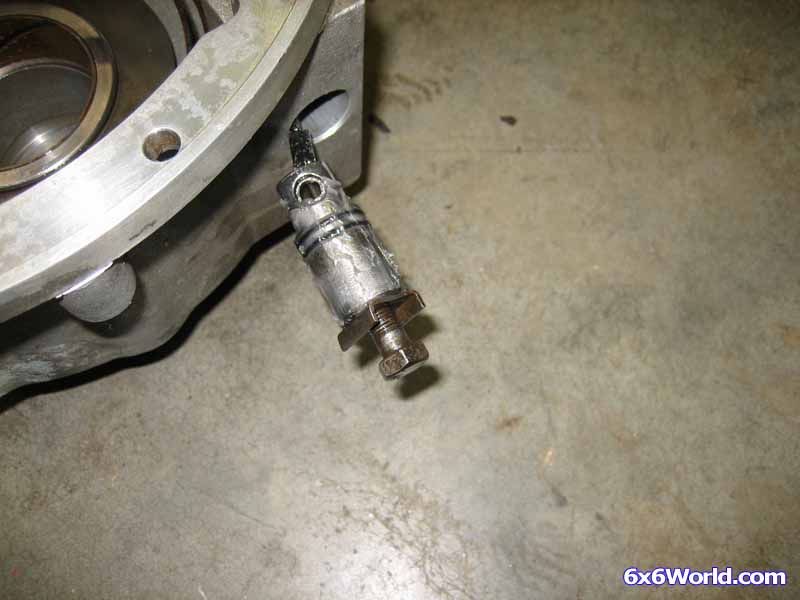
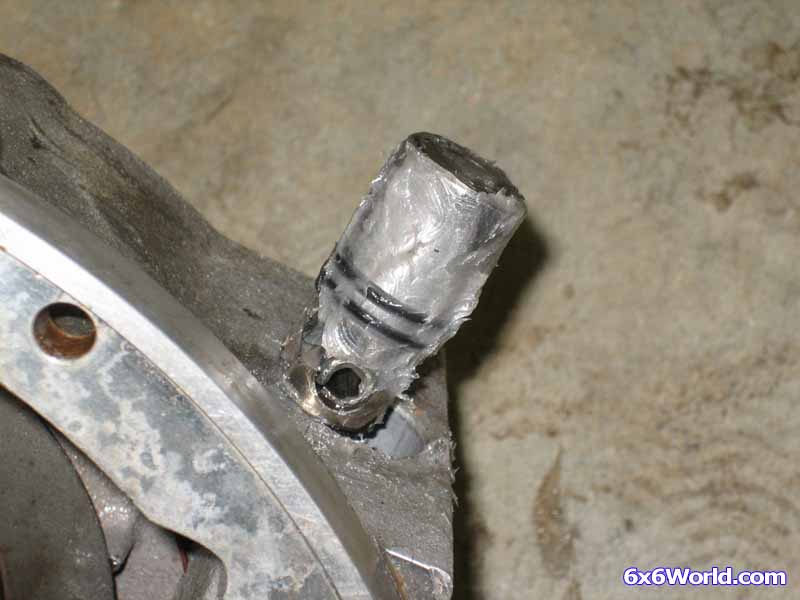
Remove the band plunger through the inside of the transmission. Insert the bolt back in the clevis and tap it through with a hammer. Then remove the bolt and finish pulling the plunger through from the inside of the transmission housing.
Note: If you are not planning on replacing the o-rings on the clevis then you don’t want to push the plunger through on the inside. Once the o-rings and plunger come out of the hole the hole in the housing, they will get torn trying to go back in because that is a sharp edge. They have to be installed on the outside of the transmission and pushed to the inside where the edge is beveled.
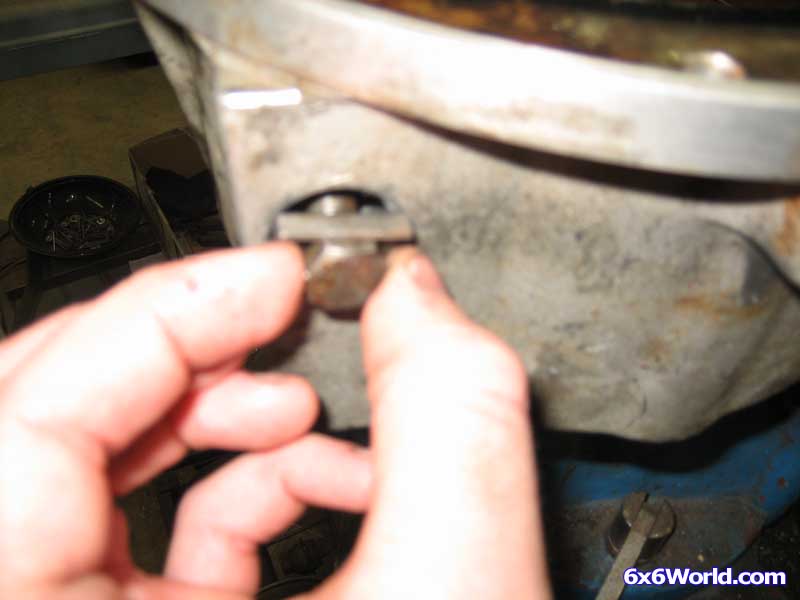
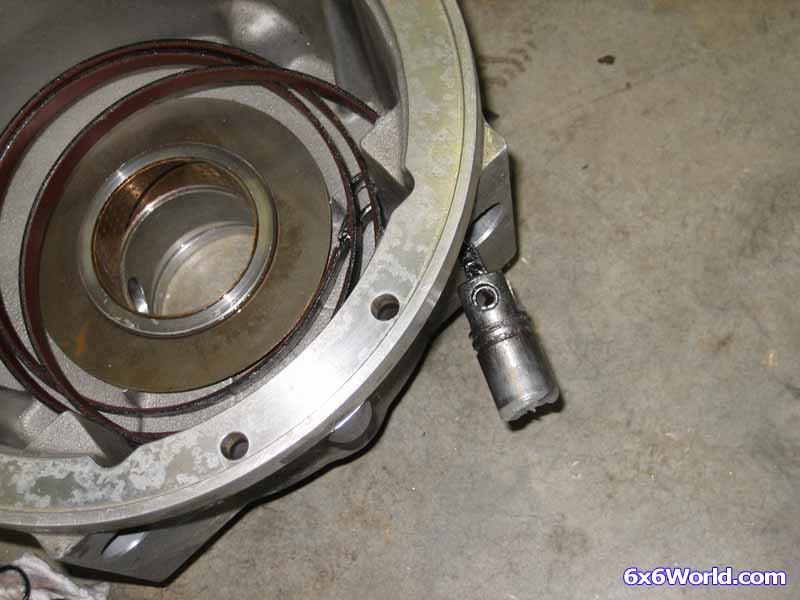
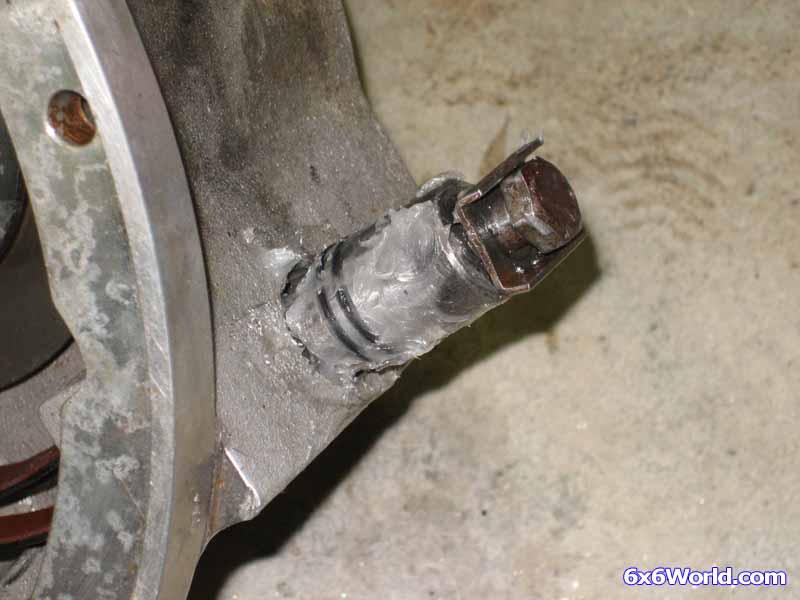
If you are going to change a band, you will need to remove the pin that holds the band to the clevis. Then the band will slide out. You can do this once the band and plunger assembly is removed from the transmission housing but here is a picture of the pin just for reference.
Take out the other plunger and remove the band from the transmission.
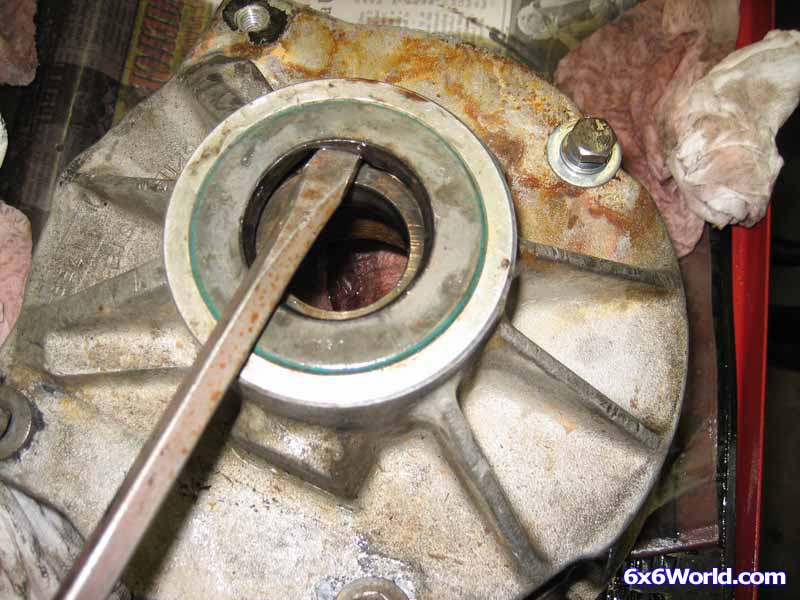
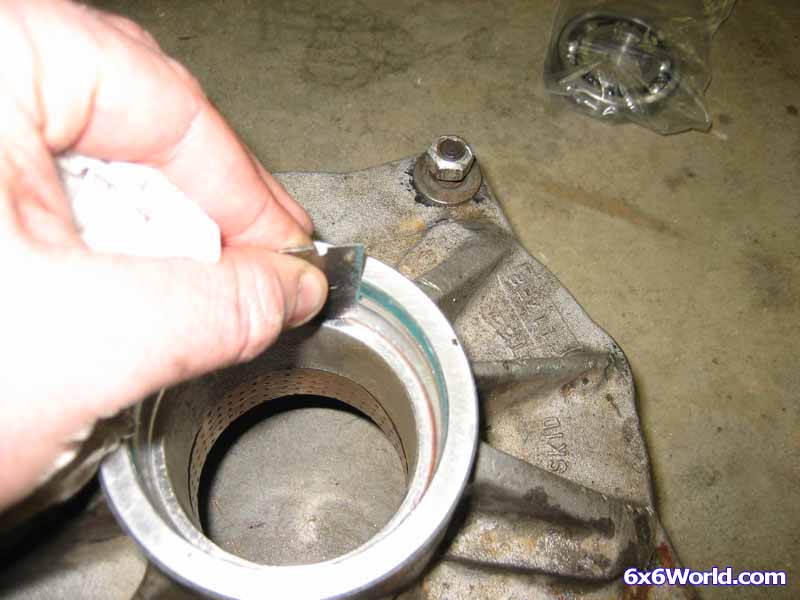
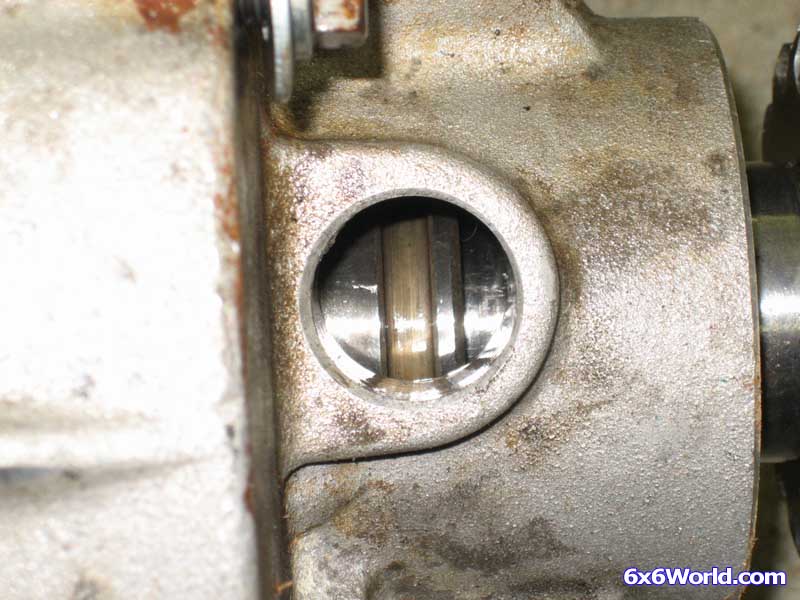
When I pulled my output shaft, the oil seal came off with it. Most of the time this does not happen. So the next step is to remove the main output shaft oil seal. Usually a small screwdriver can do the trick. Just be careful not to damage the housing.
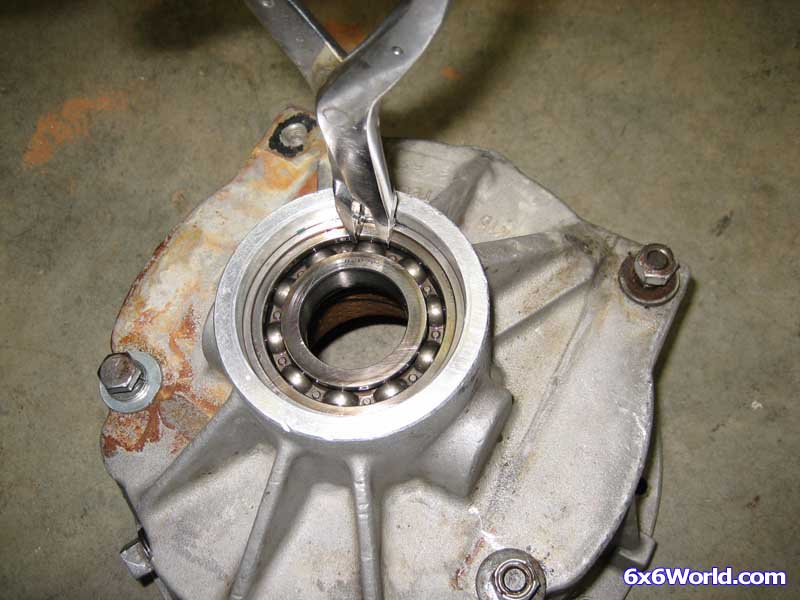
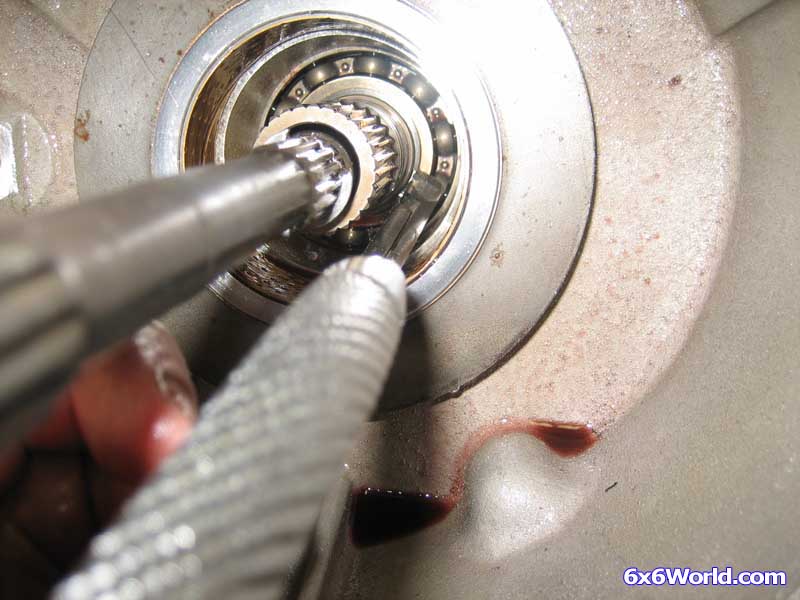
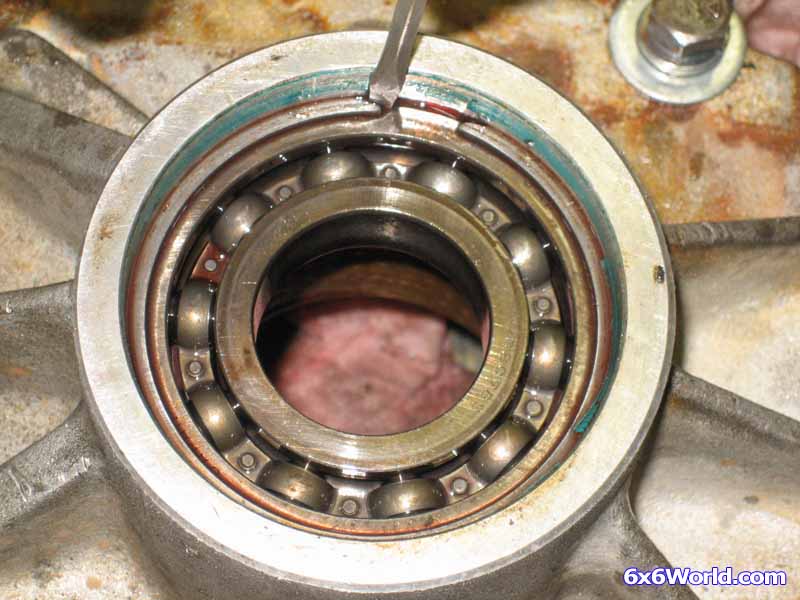
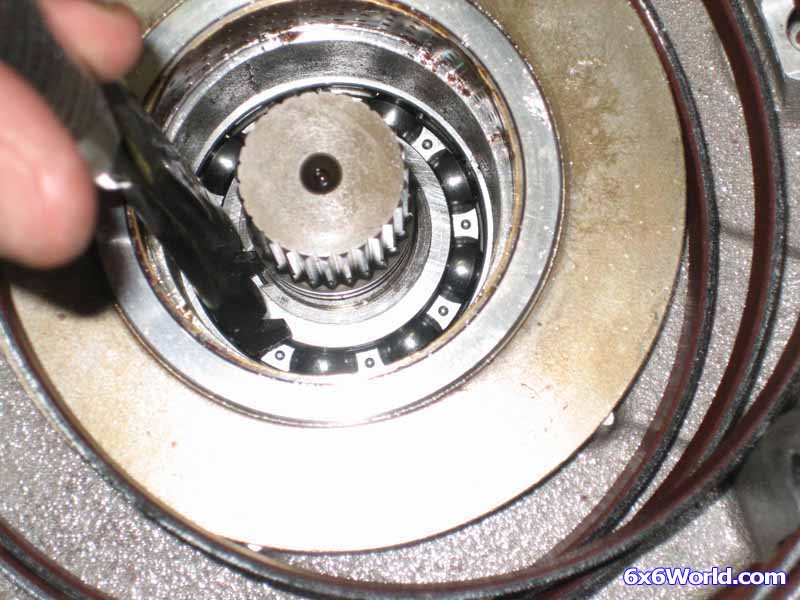
Once the oil seal is out you now have to remove a large snap ring that holds the bearing in place. Utilize the same pliers as before and walk it out of the housing.
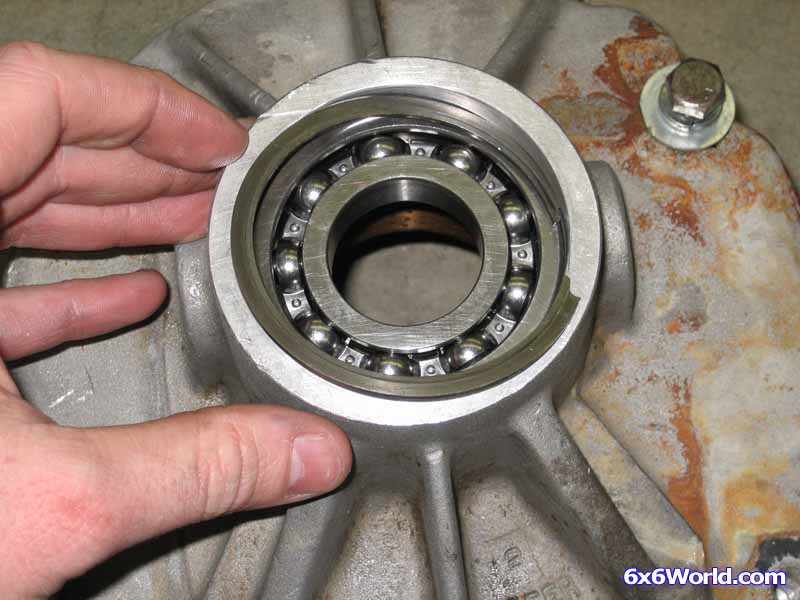
The bearing is now free to come out.
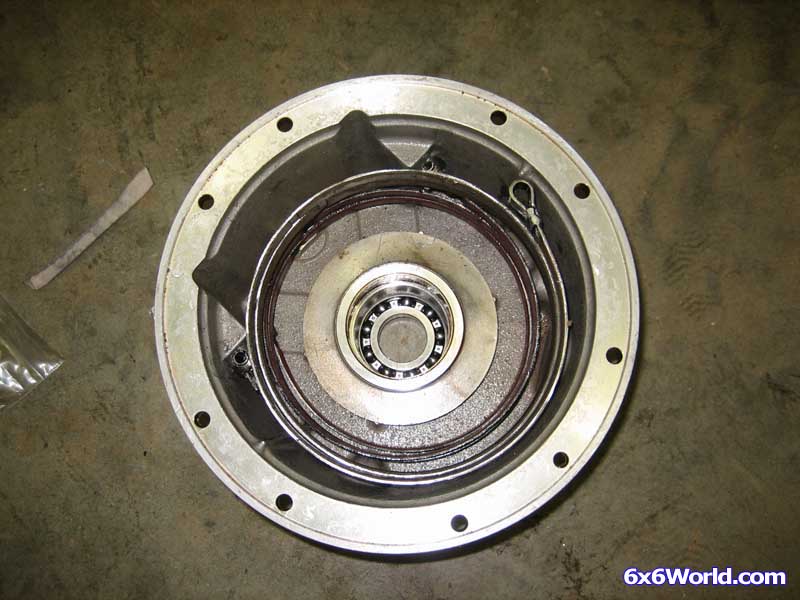
Remove the main housing gasket.
Now you need to clean the housing good. Be sure to remove all of the old gasket. Also where the output shaft oil seal goes be sure to remove any remnants of the old seal. I find a razor blade to be the most effective but you have to be careful not to damage the surface.
If you are just replacing seals, now is a good time to check your brake bands. Make sure they have a uniform thickness and no cracks anywhere. Usually if you have problems you will immediately know it because one band will look much different than the other.
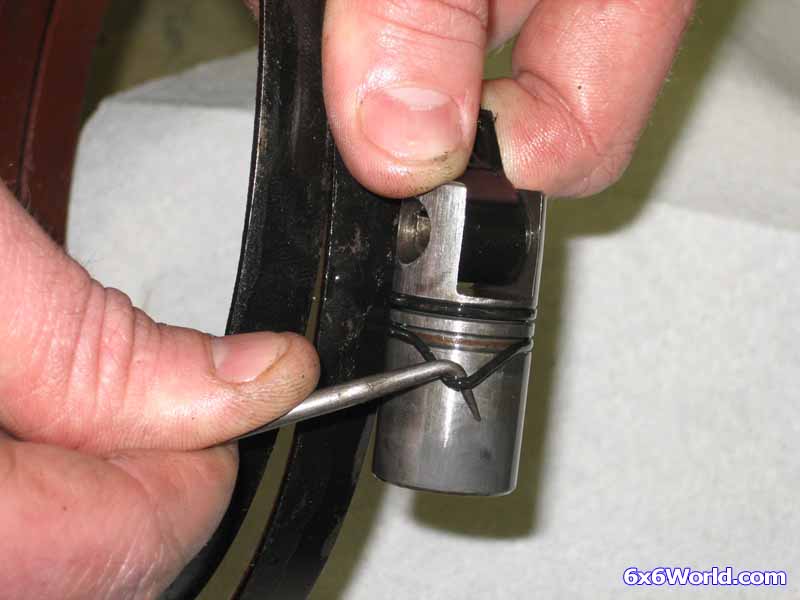
Remove the o-rings from the plungers and the shift lever. Be careful again not to damage the surface of the plunger. If you scratch it, it can be detrimental to the performance and seal of that plunger.
So far, so good. We are half way through the disassembly so don’t give up now. Let’s start on the other half of the T20 transmission with the center housing plate still attached.
[BREAK=Disassembly - Left Side]
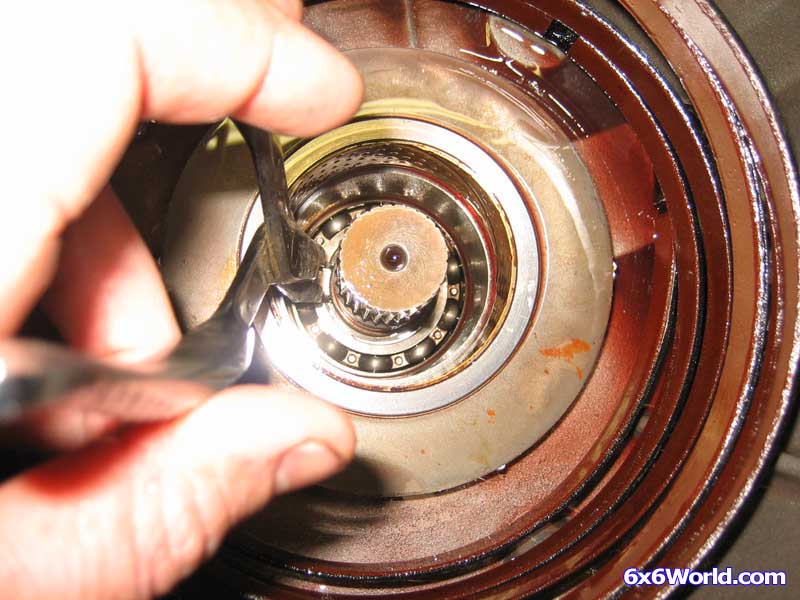
Remove the c-ring on the T20 input shaft. Jeff has a great picture of a tool that makes it easy to remove these in his T20 article. I just used two screwdrivers, one on each ear of the clip and hit them at the same time. Just be careful because this clip usually comes flying off.
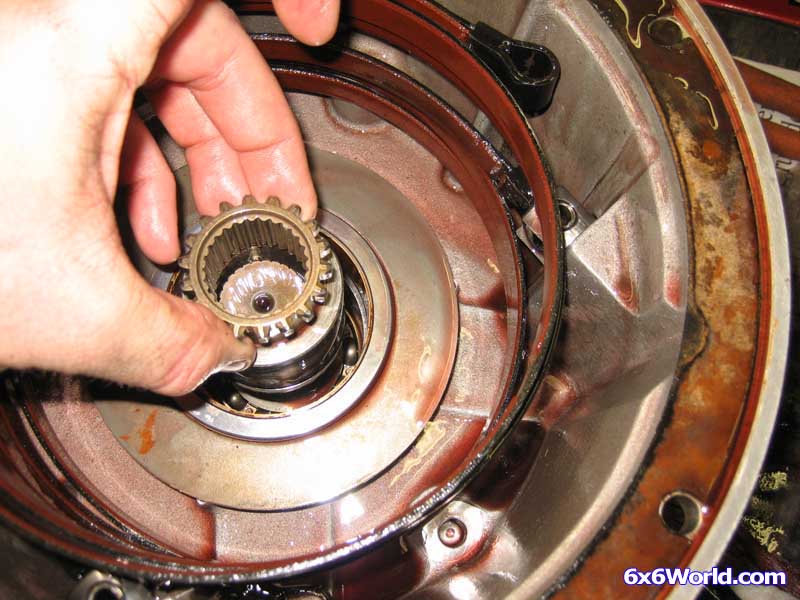
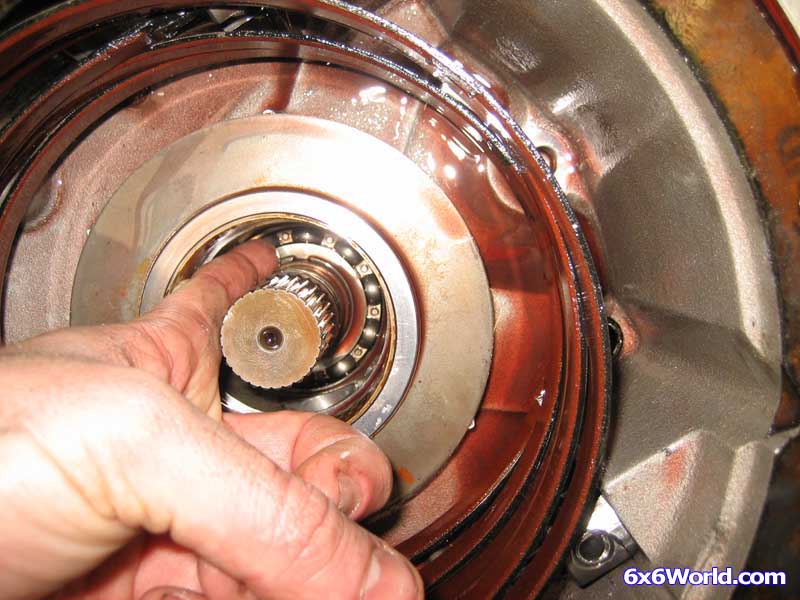
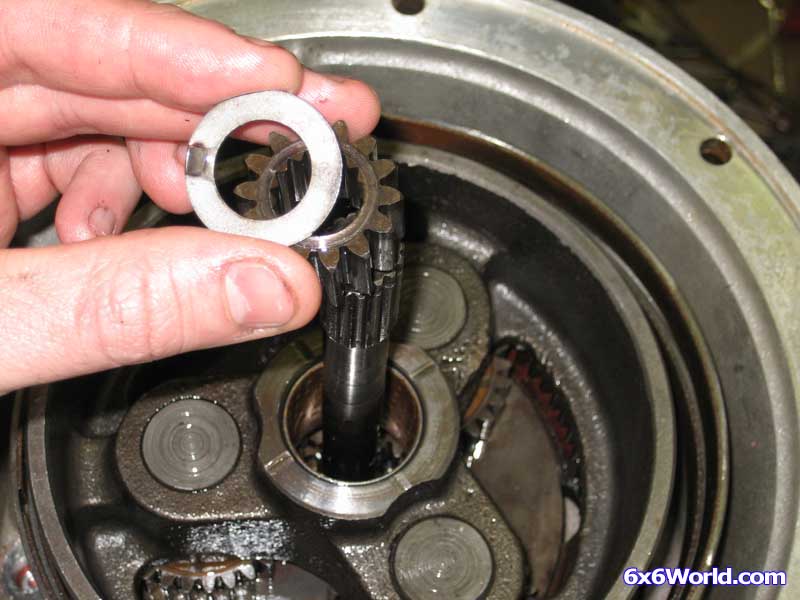
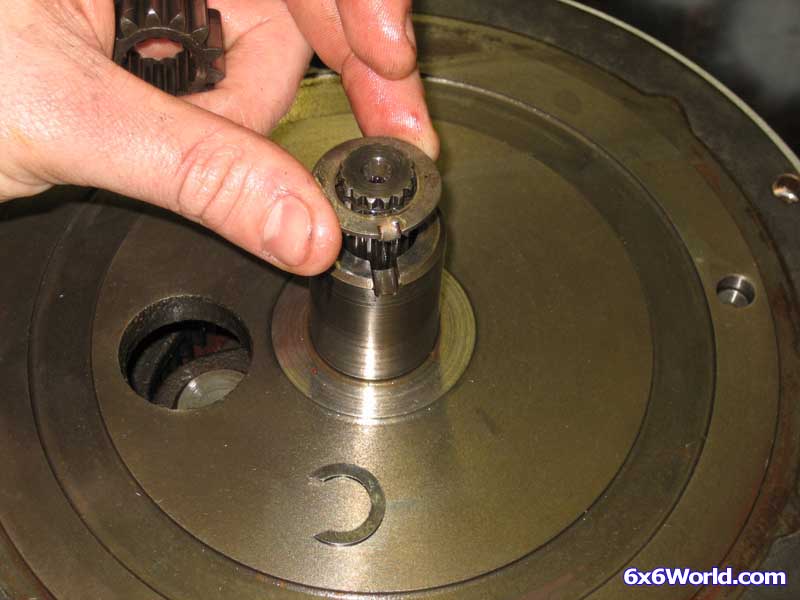
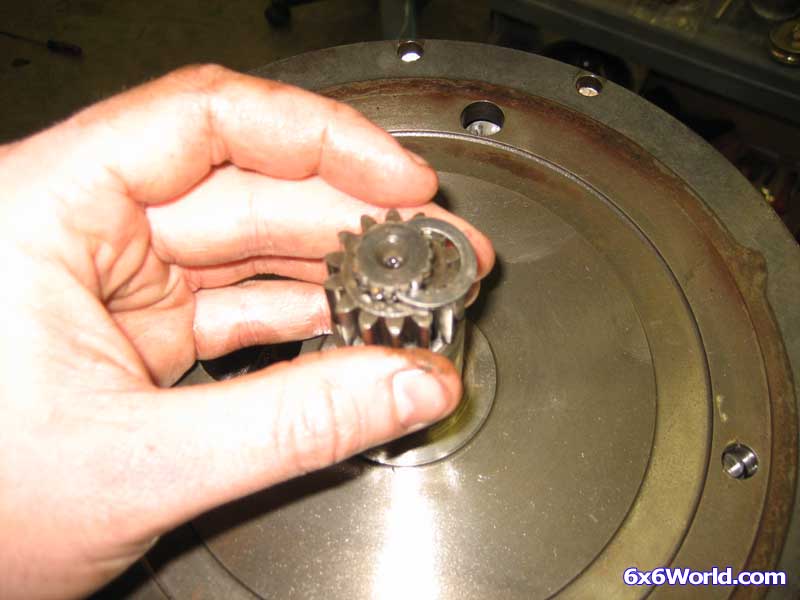
Remove the sun gear.
Remove the washer with the ear on it.
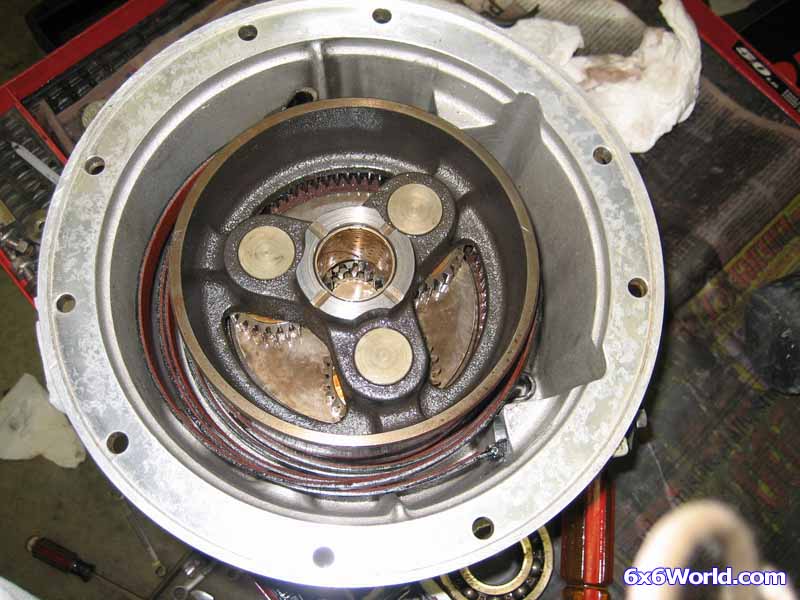
Remove the center housing plate.
Again remove the band anchor rod and sleeve from the brake bands just like before. Then remove the carrier drum, sun gears, and needle bearings as one unit.
Remove the washer with an ear.
Remove the three thrust washers.
Again make sure to reassemble everything upside down so that you don’t lose any parts.
Remove the sun gear.
[BREAK=Disassembly - Left Side 2]
Remove the carrier plate.
Remove the ring gear drum
Insert a bolt back into the plunger and tap it gently to push the plunger towards the center of the housing.
Pull the plunger through the inside of the transmission and remove the brake bands this way.
Remove the shift lever.
Remove the shift collar. Just use a quick jerk to free if from the output shaft.
Remove the snap ring from the output shaft. Utilize your pliers once again. (These are paying for themselves!)
If it is difficult to get the snap ring up the shaft you can put the housing in the vise as before. Luckily this snap ring slid right off after I got it out of the groove.
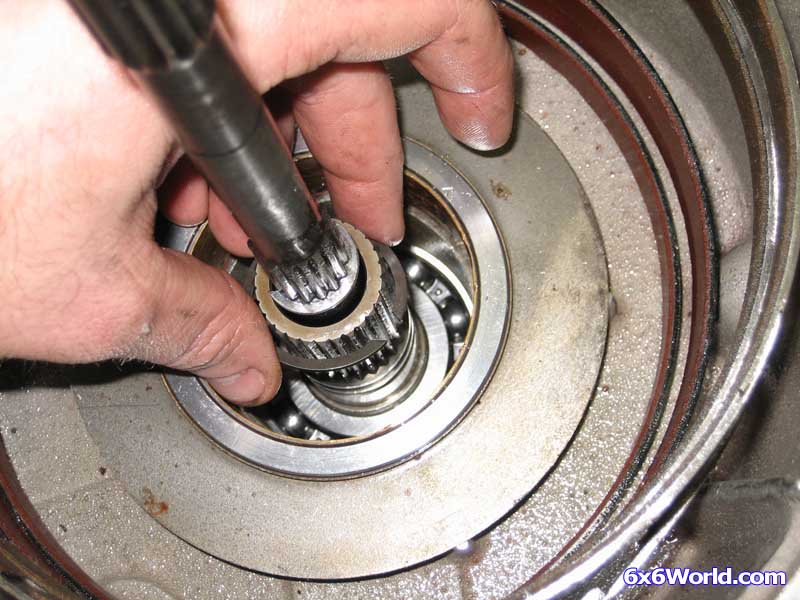
Remove the output shaft from the housing.
Remove the oil seal from the T20 housing.
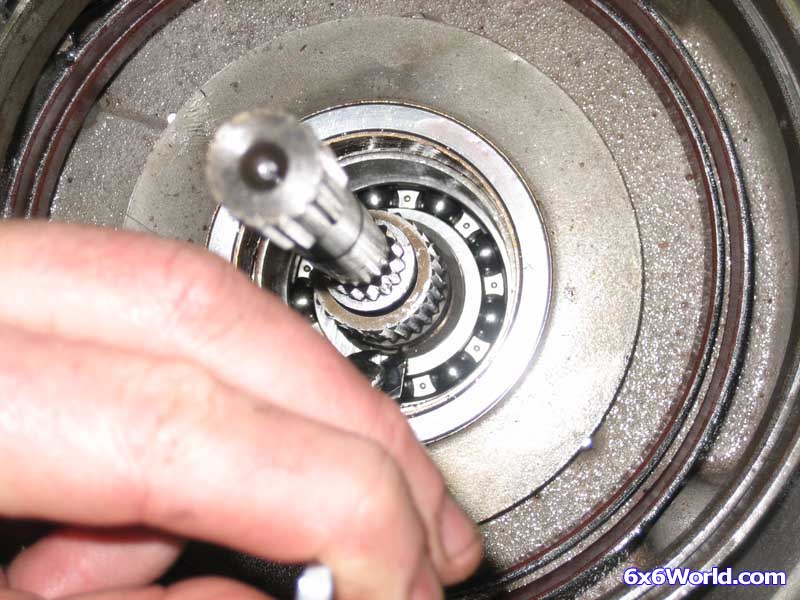
Remove the bearing snap ring. I found that the easiest way for me was to use two screwdrivers. One small one to get the ring out of the groove and another slightly larger one behind the snap ring so slide it up. I would then walk the snap ring out of the groove as I went around the housing.
Remove the bearing from the housing. Ideally it will fall right out but if your housing is scratched a little on the outside you may have to gently tap the bearing out from the inside.
Now you can clean this half of the housing once again making sure to remove any residue left behind by the gasket or the oil seal.
Now that you have every piece of the T20 apart pat yourself on the back. The hardest part is over. You should clean all of the parts really well and make sure not to get any dirt back in the transmission. Now let’s move on to the reassembly. We will begin with the first half of the housing that we tore apart (the right side without the center housing plate).
[BREAK=Assembly - Right Side]
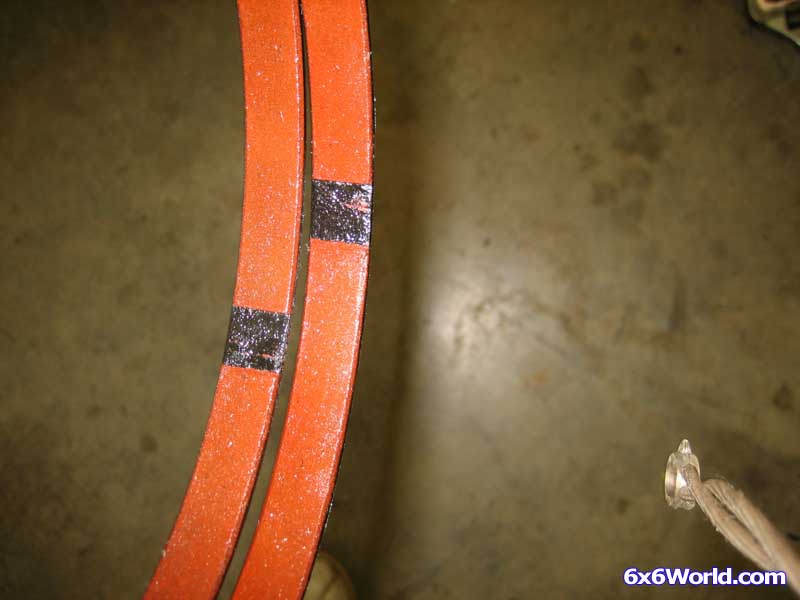
Let’s start by reassembling the clevis and bands. If you will notice there are two different bands. One has the plunger on top and the anchor point on the bottom while the other is the reverse. You want the plungers to be closest to one another in the center of the transmission so the first band should have the anchor point at the bottom.
Put the band and plunger with no o-rings into the T-20 transmission case. Apply a liberal amount of vasoline on the plunger and slide it through the housing from the inside all the way through to the outside. You may have to install the plunger bolt and pull it through from the outside to get it there.
Then you want to coat the new o-rings liberally in vasoline and slide them on the plunger into the appropriate grooves.
TIP: Next we will be pushing the plunger back into the housing. Before doing so I recommend putting the bolt and rectangular washer from the brake lever back onto the plunger. Without it, it is easy to accidentally push the plunger back into the inside of the housing. If you do this later in the assembly by mistake and try to push it back in from the inside of the housing you will most likely tear the o-rings and they will not provide a good seal.
Repeat the process and install the upper band. That band should have the plunger towards the bottom (or outside) of the housing and the anchor point near the top (or center) of the housing.
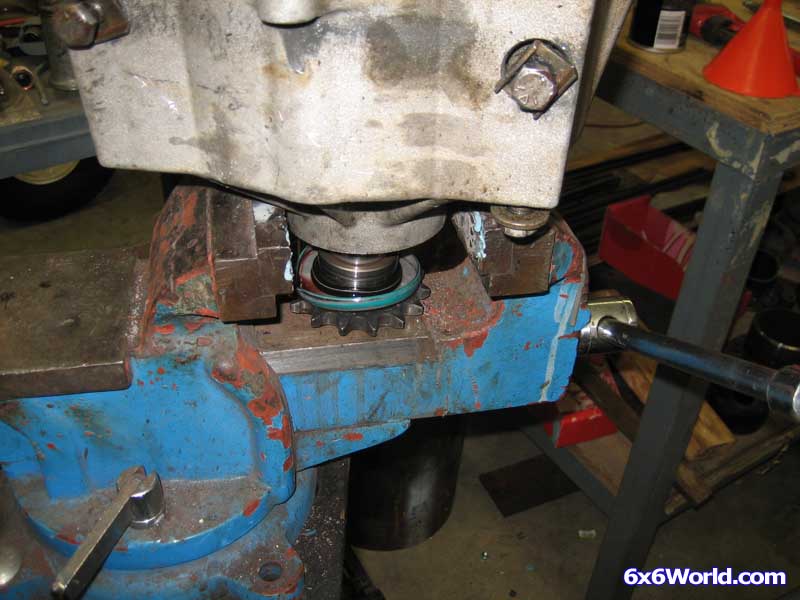
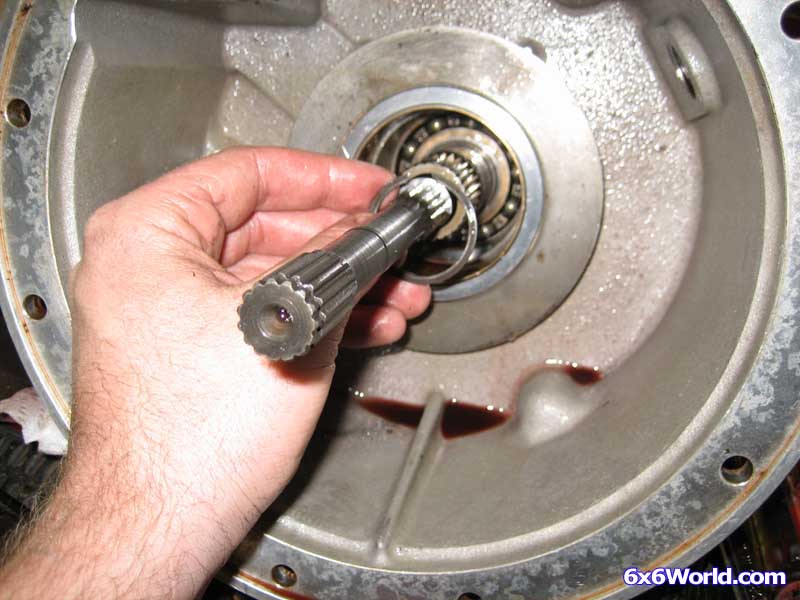
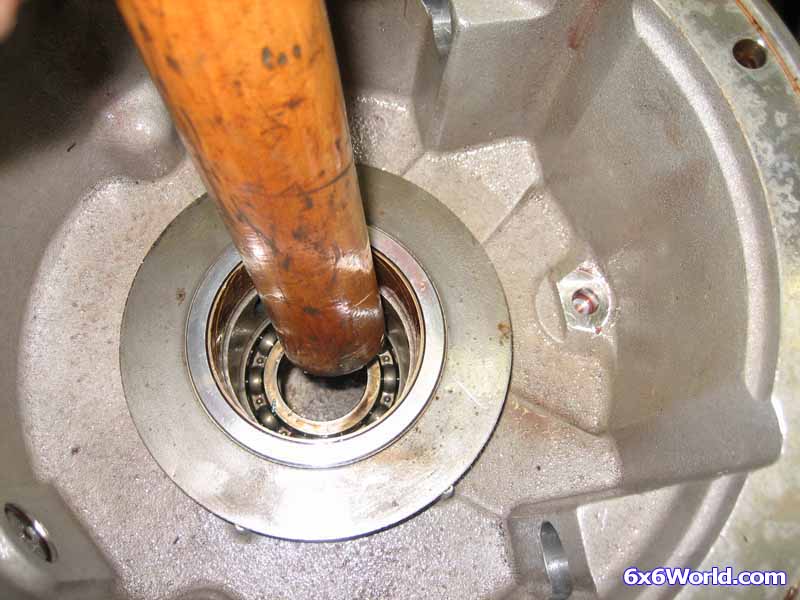
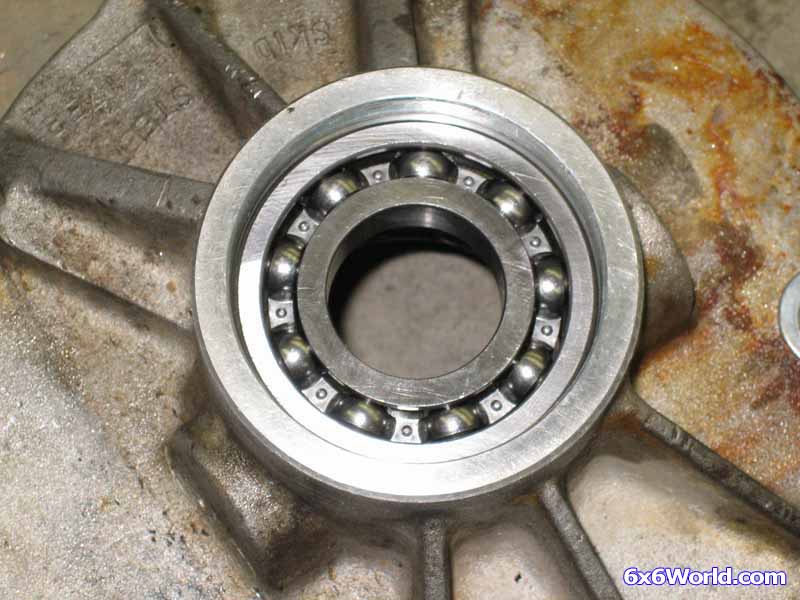
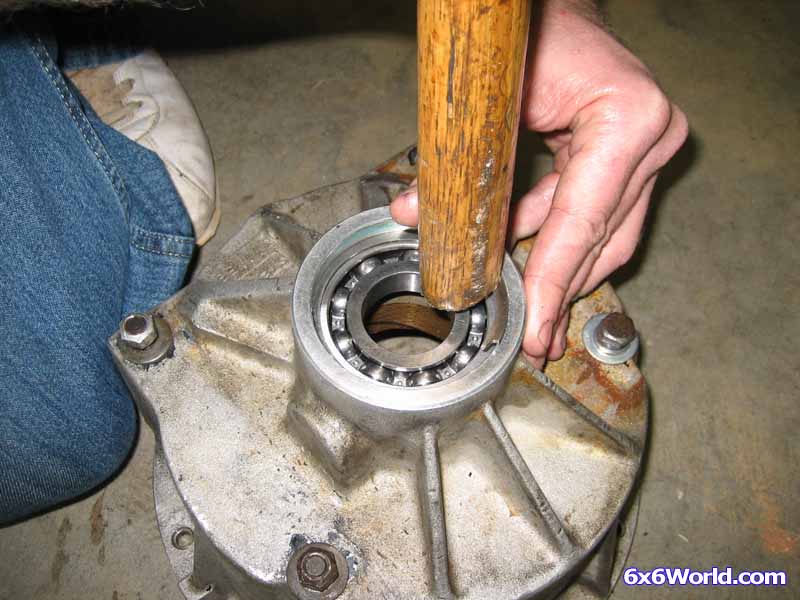
Install the new bearing.
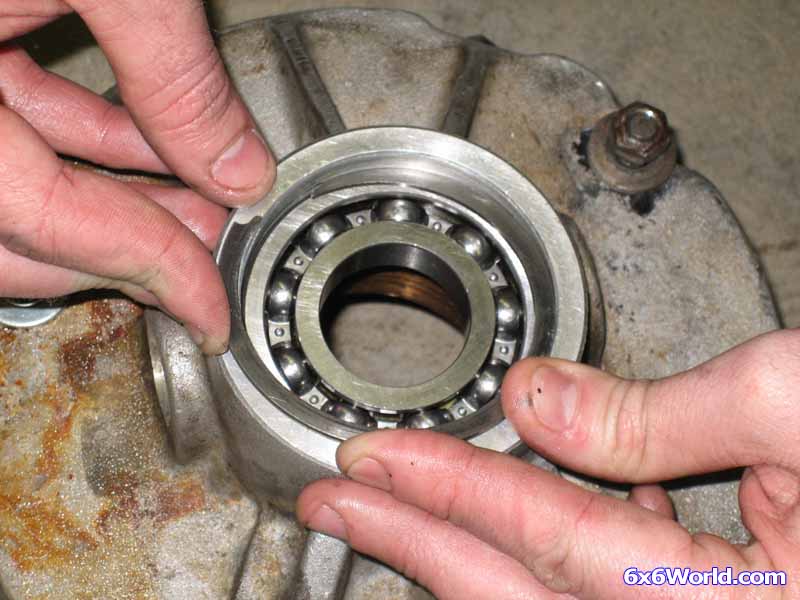
Install the bearing snap ring by walking it around the groove.
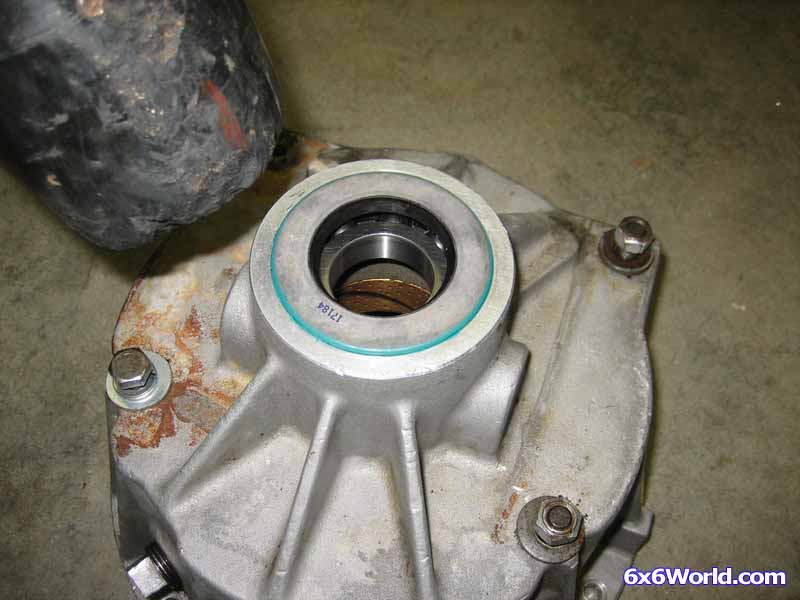
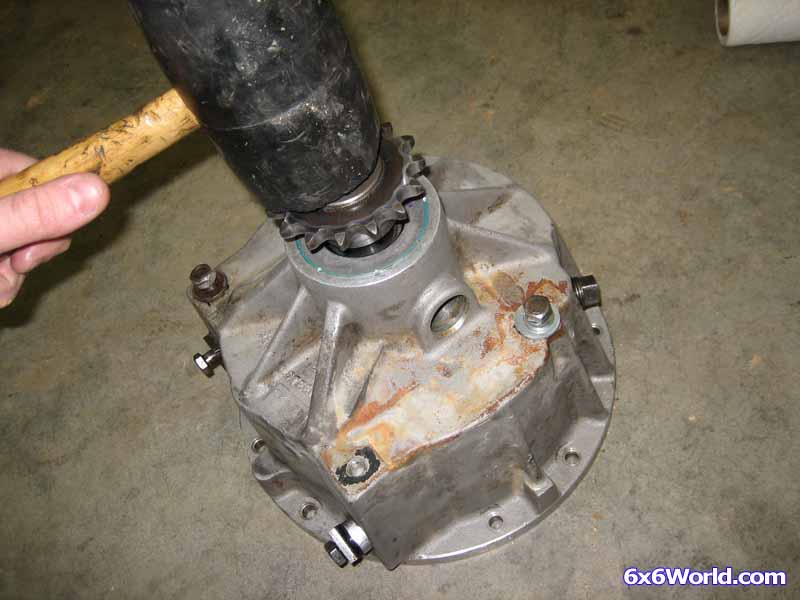
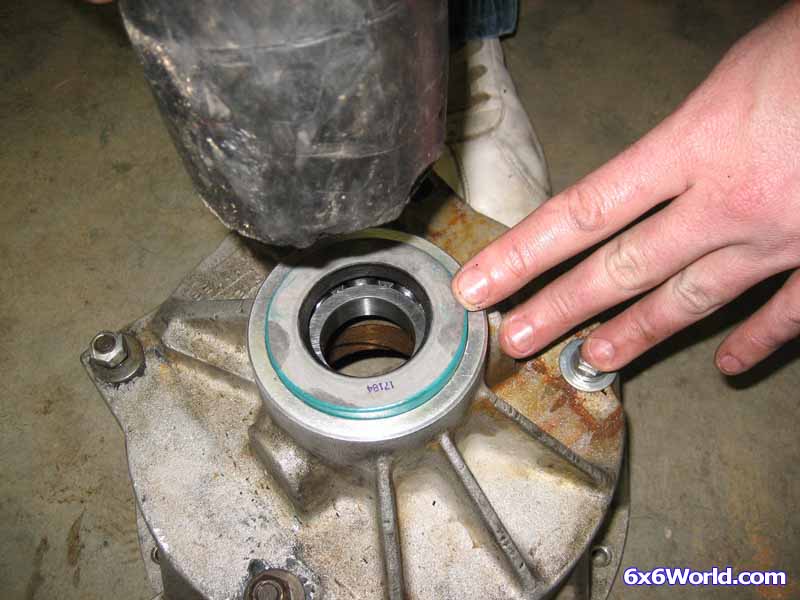
Install the oil seal. Make sure that you gently tap the seal in place in an even manner or you could risk damaging the seal.
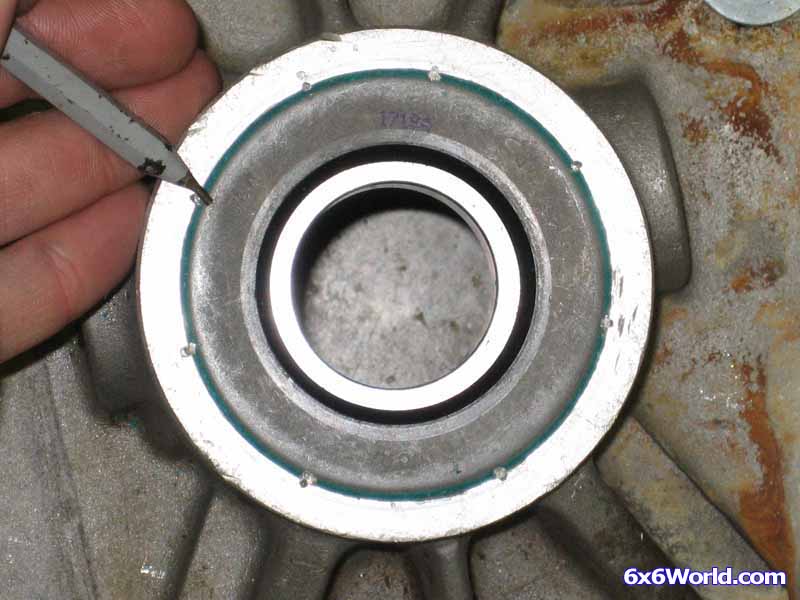
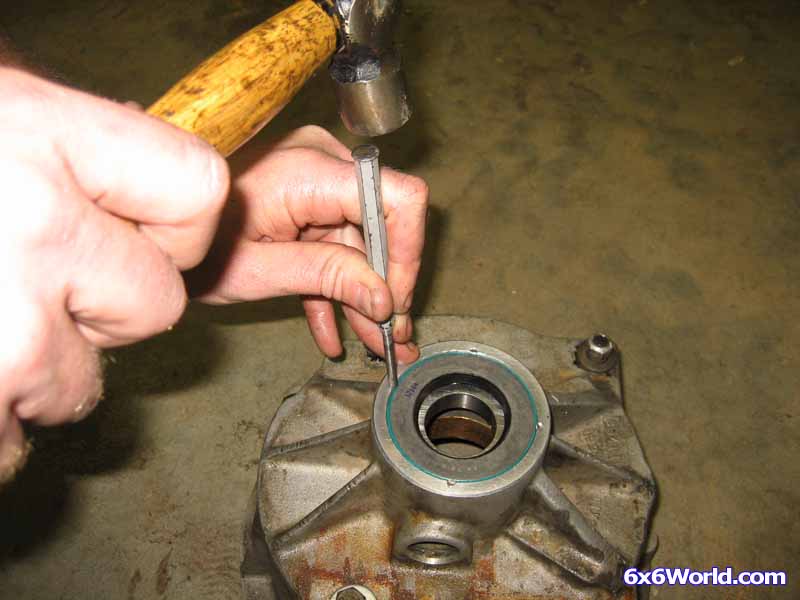
Optional step – The reason that I had to rebuild my transmission was because a main seal worked it’s way out of the transmission housing. In order to hopefully prevent this in the future, I took a punch and pinged the housing in several places to help hold it in place. This day I only had a small punch. If you will read on to the other side’s reassembly I have the correct sized punch and only hit the housing in four places with it.
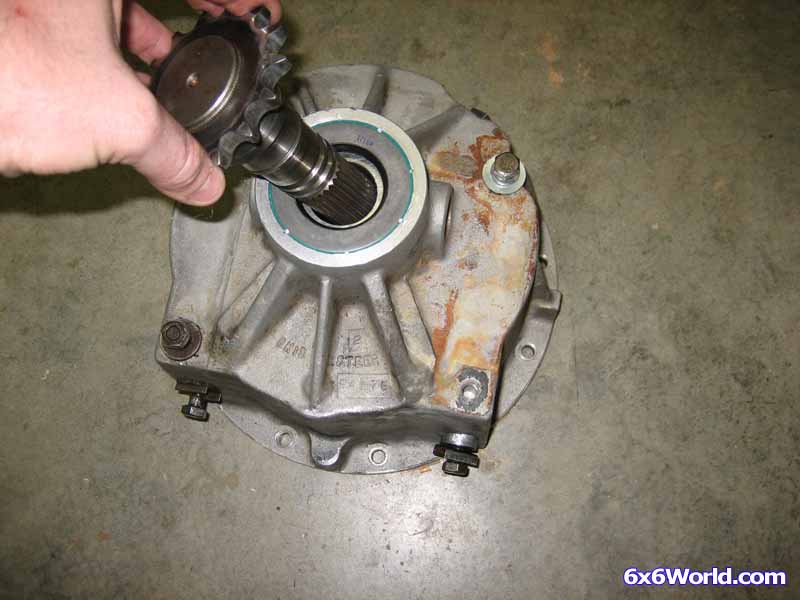
Now you can install the output shaft from the outside of the T20 skid steer housing.
You may have to gently tap it until it goes in place.
[BREAK=Assembly - Right Side 2]
Reinstall the shaft retainer ring.
Install the shift collar back on the shaft. Make sure that the detent spring goes around the shaft and doesn’t get pressed up in the collar.
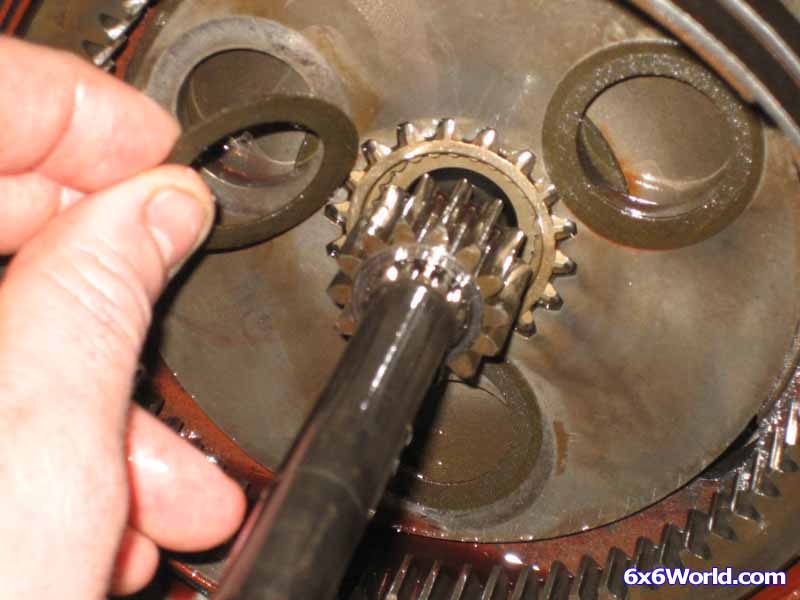
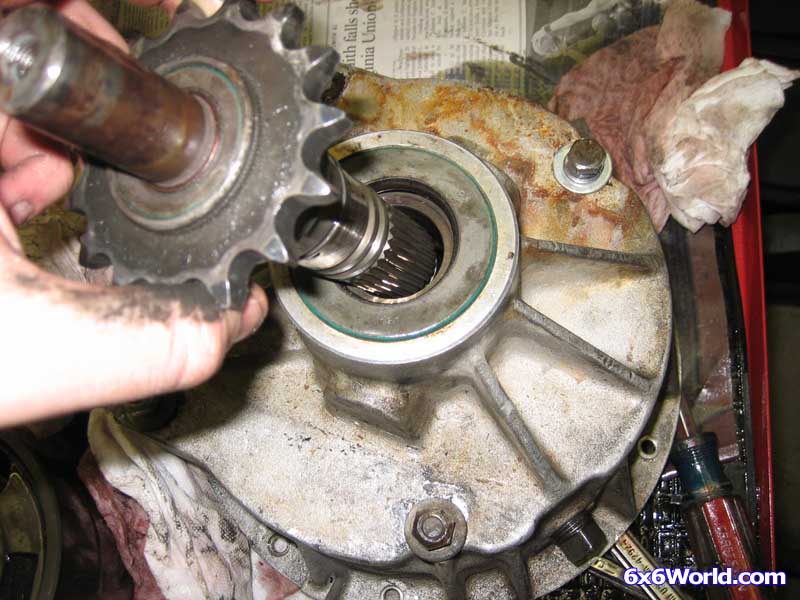
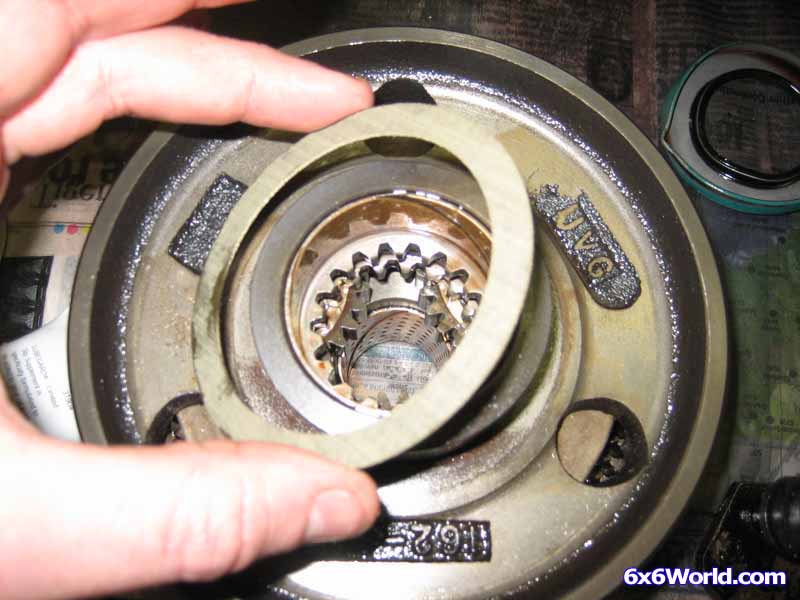
Put a new thrust washer on the ring gear drum.
Install the ring gear drum on the shift collar and make sure that the new thrust washer you just installed stays on.
TIP: To help keep the new thrust washers from falling off you can apply some ATF to the washers before you install them. This will help them stick to the drum or any other part during assembly.
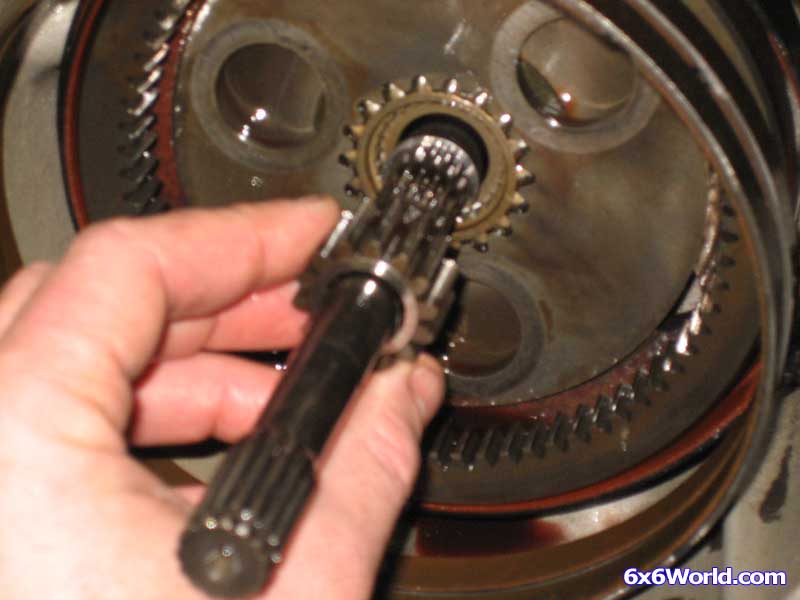
Apply a new thrust washer to the ring gear drum that you just installed.
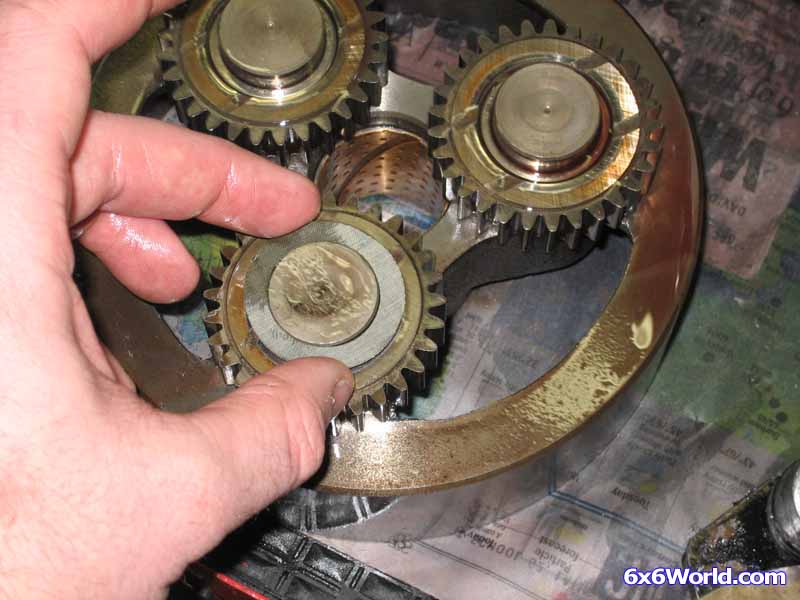
Install three new thrust washers on the outside of the planet gear / needle bearing assembly.
Install the carrier plate on top of the washers and then pick the complete carrier drum assembly up as one unit. Install it in the T20 transmission making sure that the planet gears align properly with the ring gear drum.
TIP: If you can’t hold the assembly together with your hands you can always just tie some string around it and then remove the string once everything is in place.
TIP: If you tilt the transmission on its side it is much easier to install everything as a complete assembly. You can also just install the carrier plate, washers, planet gears, and the carrier drum separately but it is a little more difficult to get everything lined up inside the housing.
Install the band anchor rod and sleeve.
Now you can reassemble the other side. (go to the next page)
[BREAK=Assembly - Left Side]
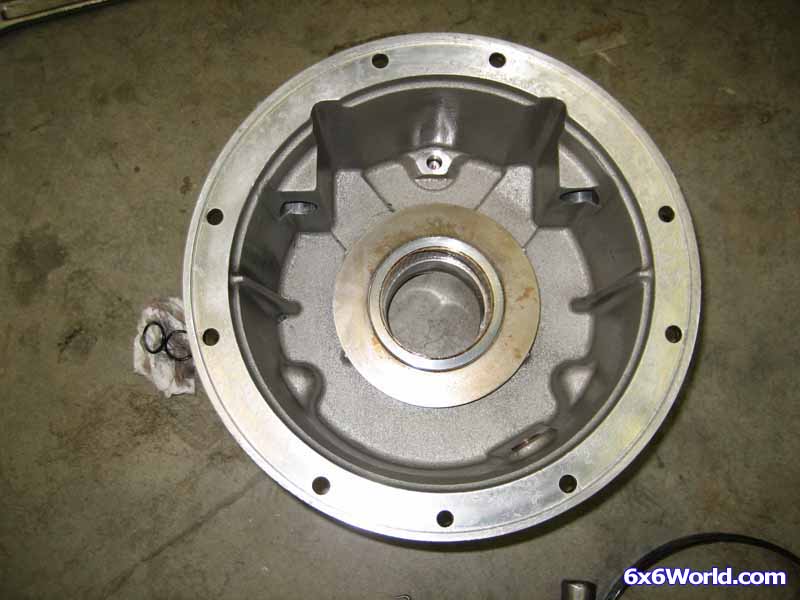
Clean the housing again paying close attention to the surface that the seal is against as well as where the main gasket used to be.
Install the new bearing.
Install the bearing snap ring by working it around the groove.
Then tap it into place and make sure it gets completely in the groove.
Tap the oil seal evenly into place.
Again, an optional step that could save you trouble in the future, take a punch and ping the housing in four places to ensure that the oil seal doesn’t come back out.
If you haven’t already, remove the old orings from the T20 brake band plungers.
Install the first brake band in the T20 housing. It is the band with the anchor point on the bottom and the plunger on the top. Insert the plunger through the housing without the orings. Make sure that it is lubed up before you push it through. Again you may have to insert the bolt in the plunger and pull it from the outside.
Liberally lube the plunger with vasoline. Coat the new o-rings with vasoline as well and install them on the plunger.
Install the bolt and washer on the plunger so that it does not pull back through the T20 housing. Then push the plunger into the housing.
Install the upper brake band in the same manner. This band should have the plunger on the bottom and the anchor point on the top.
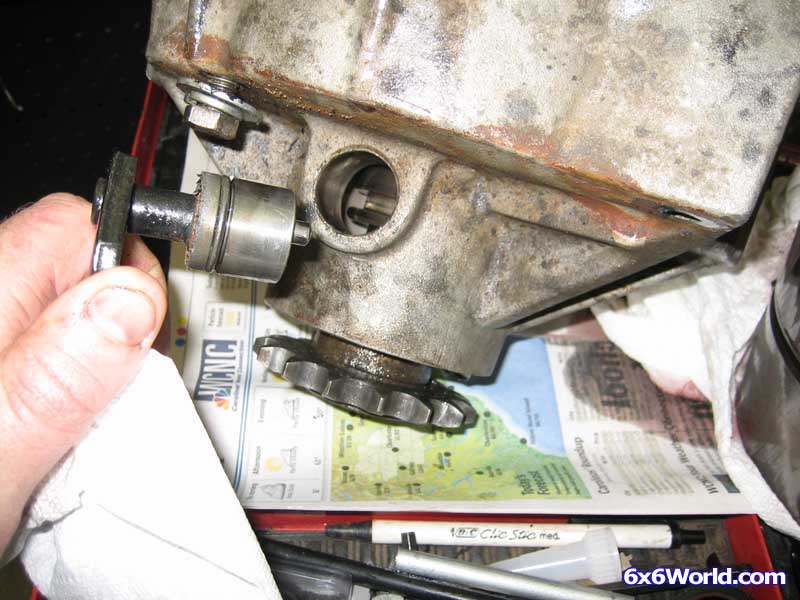
On the input shaft there is a small outer seal to replace. You just remove the old seal and then tap a new seal back into place. I used a large socket that fit over the input shaft to tap the seal evenly. Just be sure that the inner part of the seal doesn’t get caught on the input shaft and tear.
Put the input and output shaft assemble back in the transmission housing.
Reinstall the shaft retainer ring.
Use those handy pliers once more to spread the retainer ring and get it in the groove.
[BREAK=Assembly - Left Side 2]
Install the shift collar and be sure that the detent spring makes it over the shaft.
Place the new thrust washer for the ring gear brake drum in the housing.
Install the ring gear drum and replace the old thrust washer with a new one.
Install the three new thrust washers on the carrier drum over the planet gears and needle bearings.
Install the carrier plate over the new thrust washers.
Place the entire carrier drum assembly back into the T20 housing.
Make sure that the planet gears align properly with the ring gear drum.
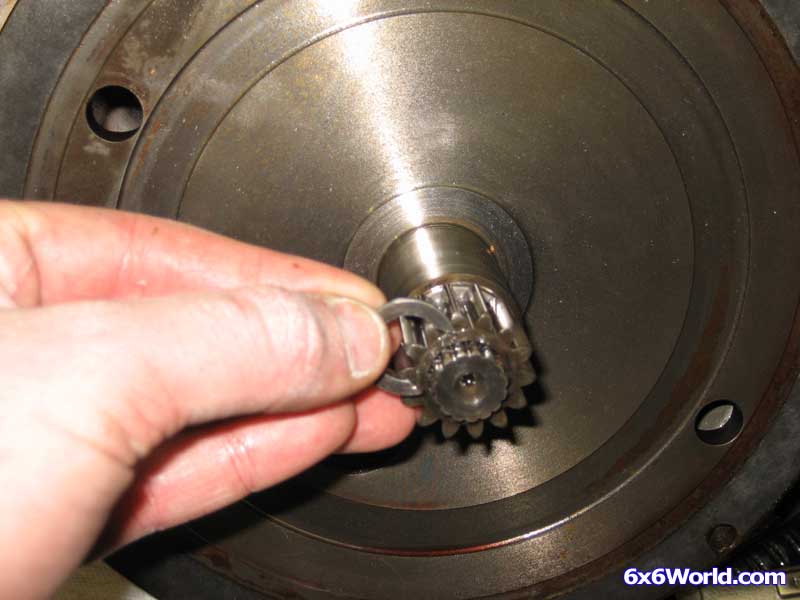
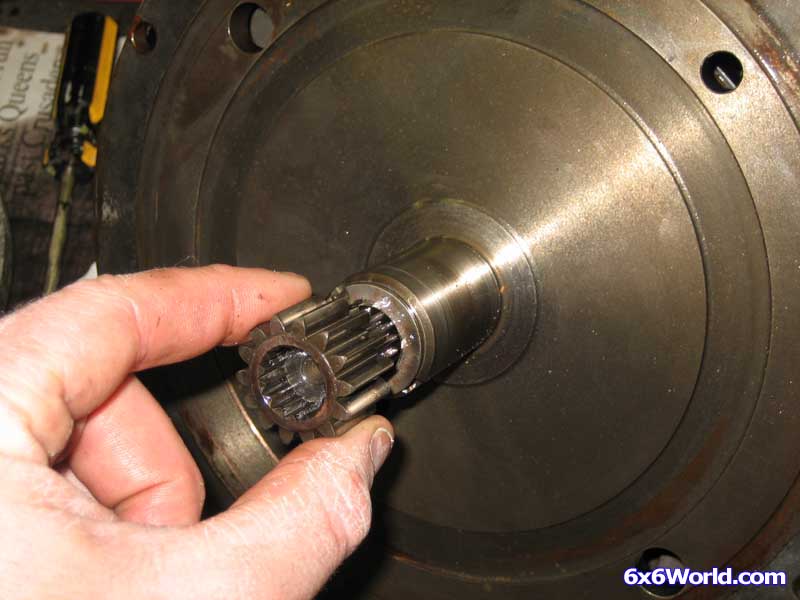
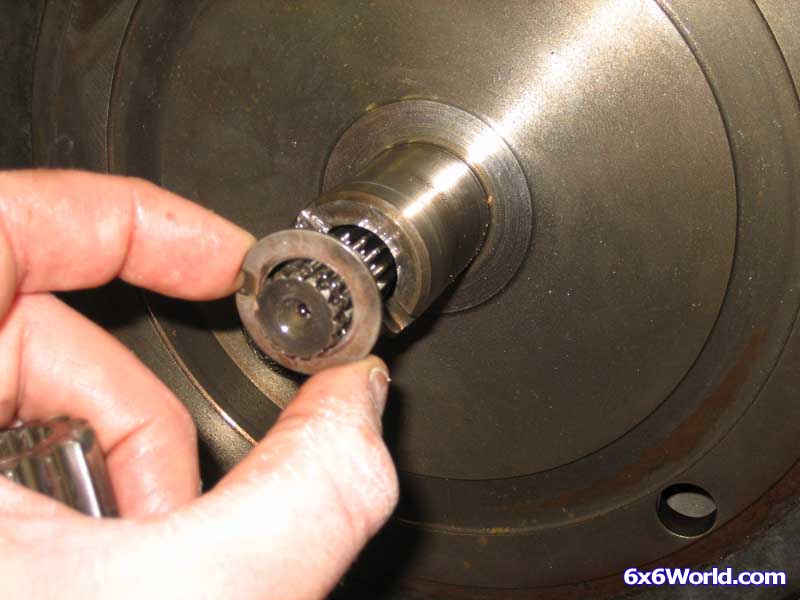
Install the sun gear and the washer with the ear facing up.
Install the band anchor rod into the lower brake band.
Insert the band anchor sleeve over the rod.
Insert the upper brake band end onto the band anchor rod.
Install the new T20 skid steer housing gasket.
Install the center housing plate onto the input shaft.
Install the washer with the ear facing down.
Install the sun gear and the c-clip.
Install a new gasket on the other half of the transmission.
Now it's time to put the two halves back together. (Next Page)
[BREAK=Final Assembly]
Place the two halves of the T20 housing next to each other and line up the bolt holes.
Bolt the two halves of the skid steer housing back together.
If you haven’t already you need to replace the orings on the shift levers in the same manner that you did the orings on the plungers.
Before you install them back in the housing make sure that the shift collar is in the neutral position. You can place a screwdriver into the slot on the shift collar and move it towards the center of the transmission or the outside of the transmission. There are three positions so it is easy to tell when you are in the center (neutral) position.
Once you are in the neutral position you can install the shift lever in the housing. Make sure that the pin on the end of the plunger hits the groove on the shift collar. Then install the shift lever retainer plates over the shift levers to keep them in place if you wish.
Note: The left and right shift levers are slightly different. The pin on the end of the plunger is offset in one direction or the other. If you install them backwards then they will not work. The transmission will work fine in forward but it will not shift into reverse. Just be sure that the pin is hitting the shift collar when you initially install them.
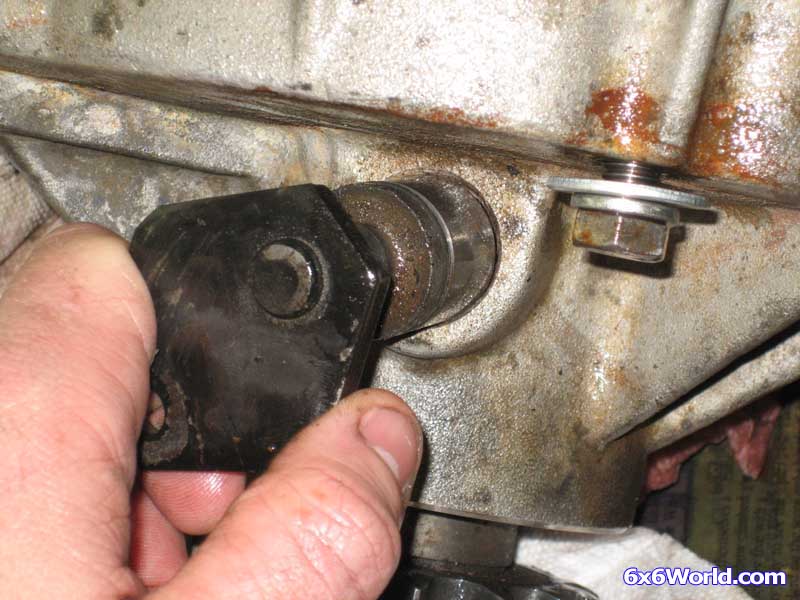
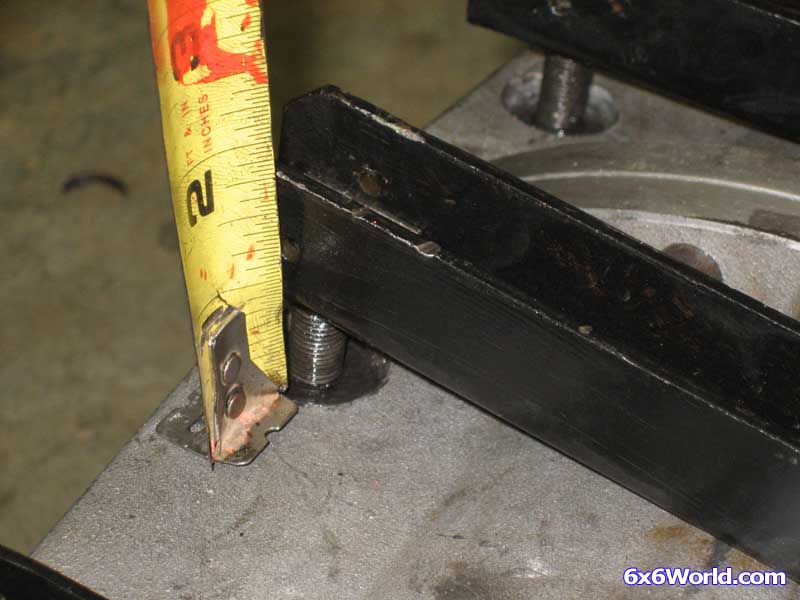
Install the brake levers back on the plungers. When you put the bolt and washer back on be sure to turn the top and bottom bolts equal amounts to keep the brake lever parallel. Once you have the brake lever installed, if you pry on the back of it and pull the plunger out it should measure the same from the back of the brake lever to the housing on the top and the bottom.
Once you have that measurement equal on the top and bottom you want to pry the top plunger out and measure that distance again. Then while still pried out at the top, measure the distance from the brake lever to the housing at the bottom bolt. There should be 5/16” difference. Basically you want 5/16” of travel for the brake levers.
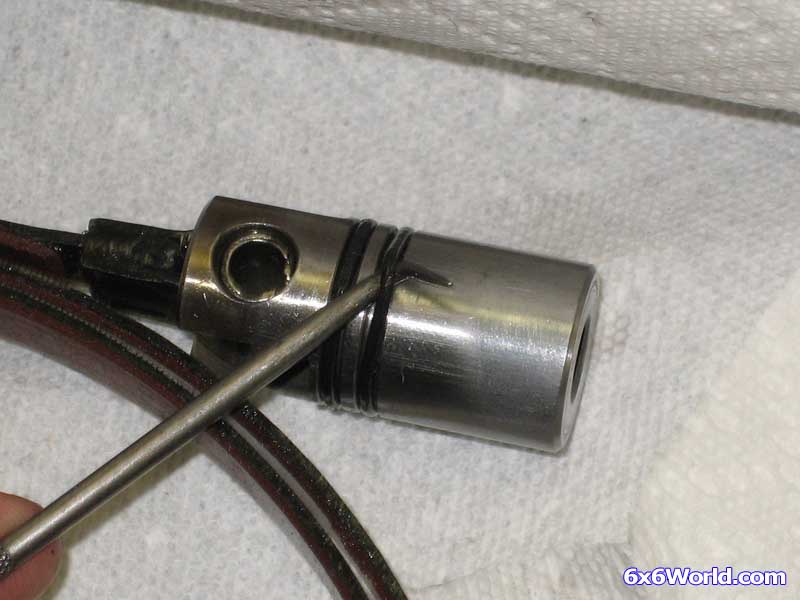
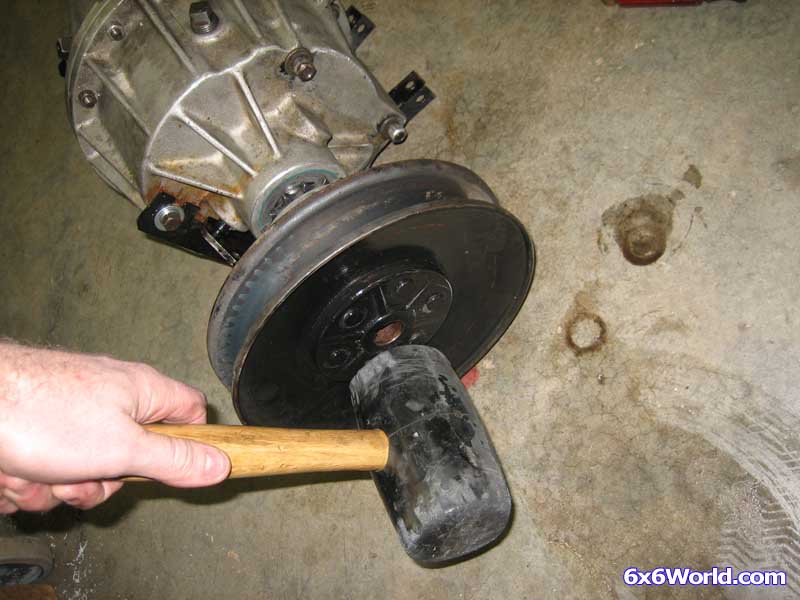
Now you can reinstall the clutch assembly or you can wait and do that in the 6x6. I chose to go ahead and do so now.
Align the keyway on the clutch with the key on the shaft.
Tap the clutch back onto the shaft and make sure that the key stays in place.
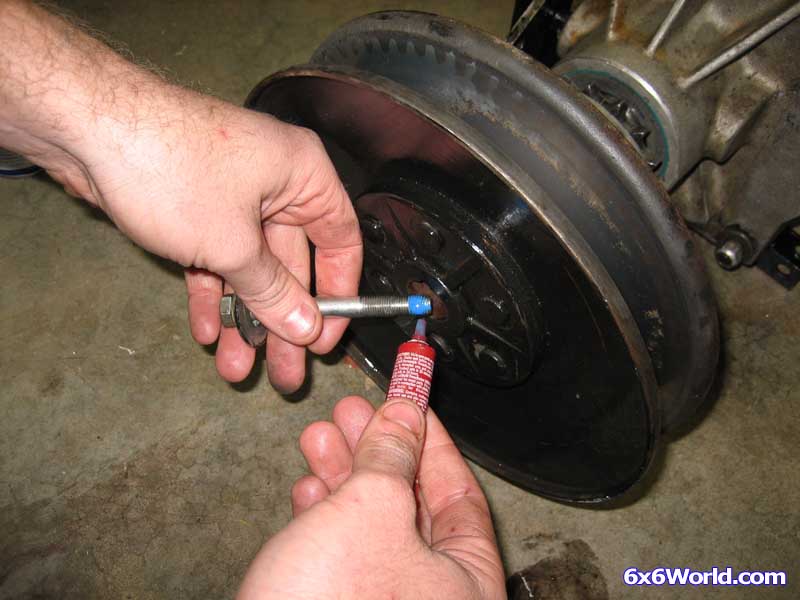
Reinstall the retaining bolt back on the clutch. Be sure to use some threadlocker to prevent it from coming loose.
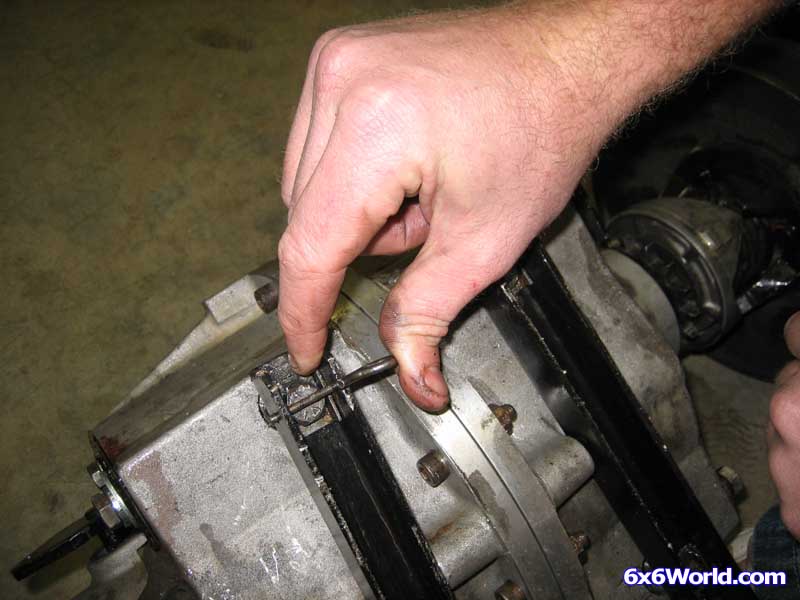
If you haven’t done so yet, reinstall the hair pin clips on the brake levers.
Install the drain plug in the bottom hole and put one quart of fluid in the T20 transmission. Then reinstall the vent plug in the top hole.
Now you have a transmission that is ready to be installed in your 6x6 ATV. It should now give you years of trouble free use!


 Reply With Quote