


How-To rebuild your Salsbury Clutch
(note: All pictures can be clicked for a larger view)
Salsbury was a very popular brand of clutch system for many of the amphibious ATVs from the 1960s to around 1980 when they closed up shop. Attex, Hustler, Scrambler and Max used them on at least some of their models, and I'm sure more of the lesser known machines used Salsbury as well.
Attex used model 910 for the ST400, Chief, Thunderchief and Superchief and the 780 for most of it's single cylinder two-strokes. I'll try and be clear on how to do a simple rebuild of the 910. The 780 is very similar in design and goes pretty much the same way.
Safety First!
I can't stress enough the importance of safety glasses when you're working on the clutch, especially the springs. Other than that, the only caution will be to keep your fingers out of the way whey you're moving the clutch faces or springs.
Let's Begin!
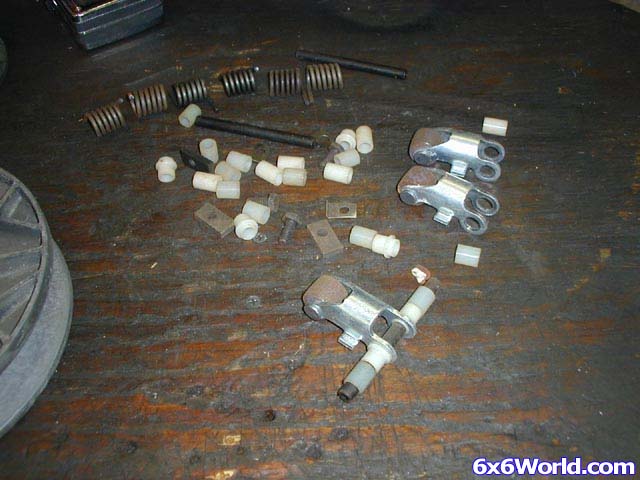
First thing to do is find the parts to do the rebuild and that's harder than the rebuild itself. Lately there have been some NOS kits on the internet, mostly on ebay. If you find a kit, you'll still need to find the nylon spline liners. I've never found a kit that includes them.
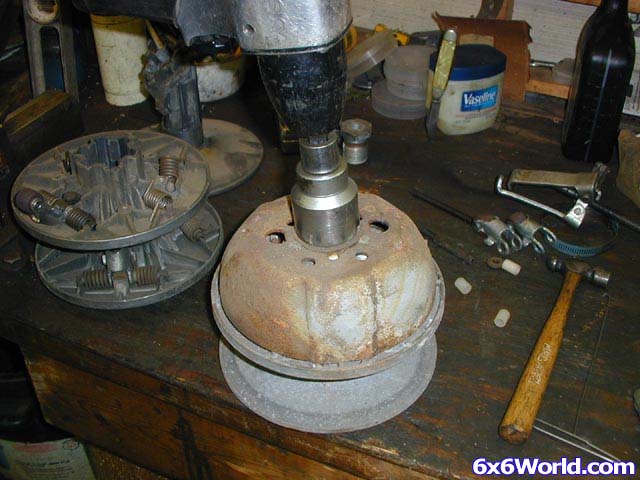
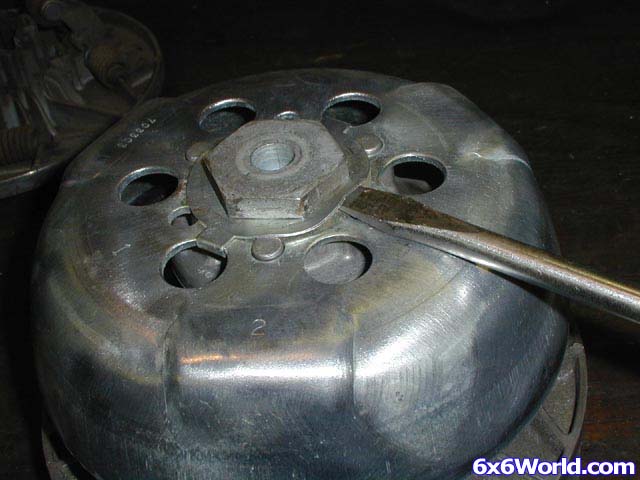
It's better to push the outer clutch face in towards the inner far enough so that it "locks" over center before you take it apart. This way the springs aren't loaded against the outer cover (ramp plate). Keep your fingers from between the pulley faces! (or it'll hurt) If you don't have access to an impact wrench to pull the retainer nut, it's easier to flatten the lock plate and loosen the nut before the clutch is removed from the engine. If the clutch is off the engine, I always use an impact wrench when possible- it makes it lots easier.
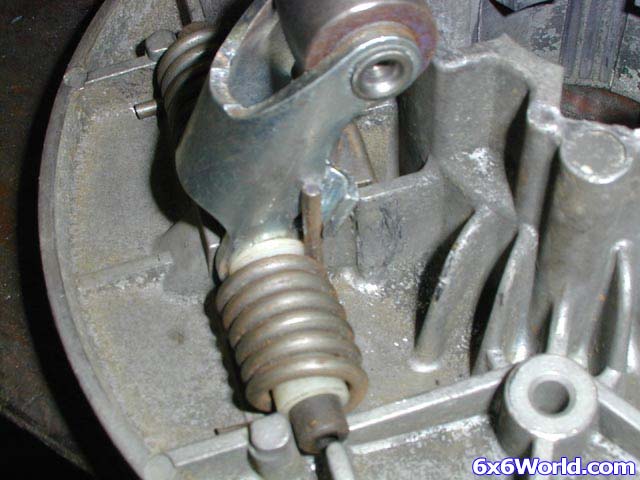
When the cover's off you see the guts of the clutch. With this particular unit it was easy to push the faces together and once inside it was easy to see why: only one spring was intact. Usually it's easier to remove the hex bolts and release the spring tension before the spider is removed, but in this case it wasn't necessary.
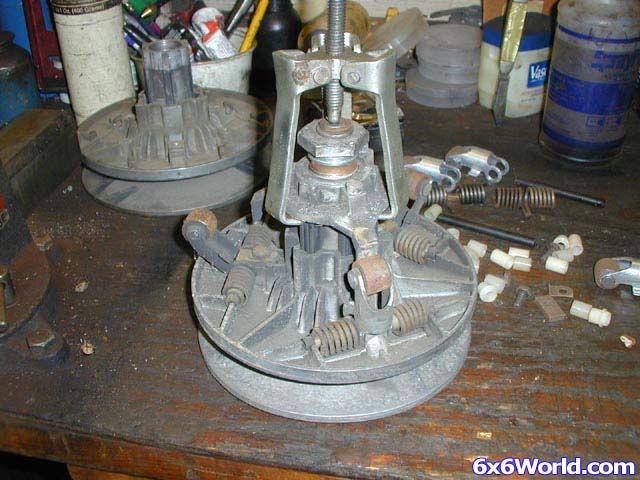
Use a puller on the spider and pull it straight off the end of the hub.
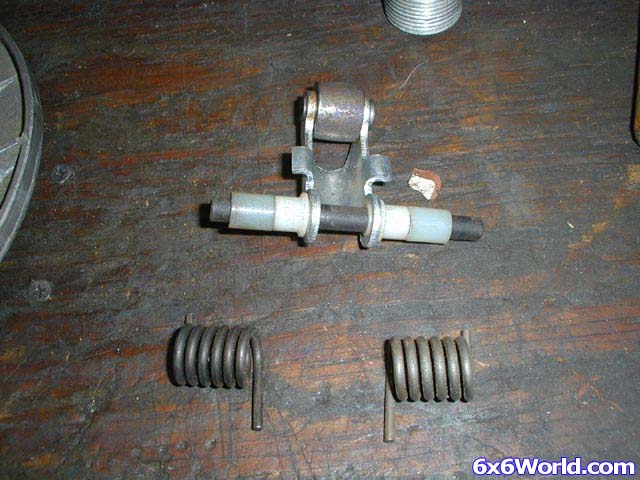
Once the spider is off, the moveable face can be removed and disassembled. Release the springs from the roller arms with a pair of pliers or a screwdriver, then flatten the locks around the hex bolts and remove them.
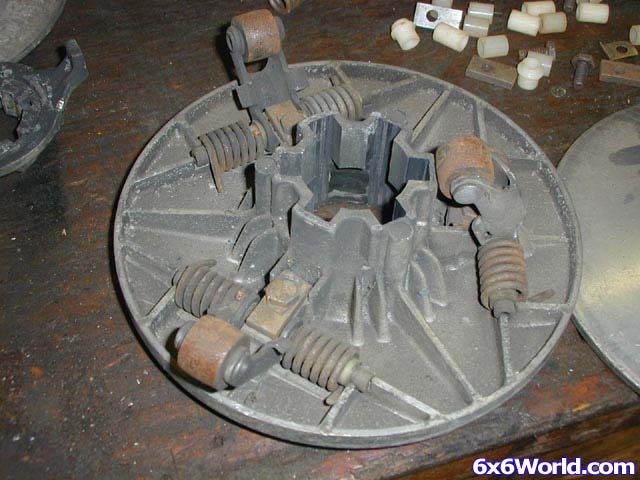
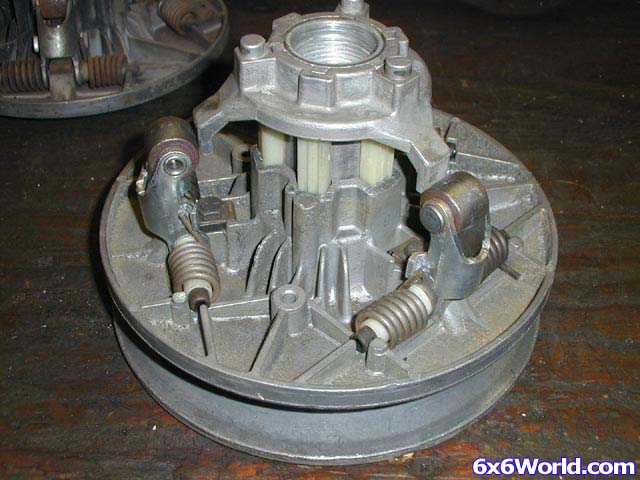
Remove the rollers, bushings, and arms from the moveable face. The only thing left to remove are the nylon spline liners from the fixed face of the clutch. They should pull off easily.
Use brake cleaner or similar degreaser to clean up all the parts you plan to reuse and brush them off with a soft wire brush or wire wheel. Check all the moving parts for wear, especially the spline on the fixed face. It should have no grooves, or at least minimal grooves in the spline surface.
I've put clutches together with minor wear and as long as the nylon spline liners are replaced, the clutch works like new. The inner splines on the movable face of the clutch don't seem to wear out as easily, but they should be checked as well. The spider arms should be flat on the surface that the rollers contact with and have no depressions. If there are uneven spots on this piece, the clutch will "jump" under certain conditions.
[BREAK=910 Salsbury Clutch Reassembly]
Now that everything is clean and you're satisfied that all the parts are useable, start to put it back together. First put the new spline liners on the fixed face hub.
Find the right bushings from the kit for the clutch you have: most of the kits I've had are used for more than one model, so there's extra parts and you need to sort out the ones you need. The collared bushings fit into the roller arms. The 910 will use the longer nylon bushings from the set - make sure they are a good fit between the boss in the clutch and the collared bushing.
The new springs will have one leg longer than the other. The longer leg of the spring will be on the inside to locate on the tang of the roller arm.
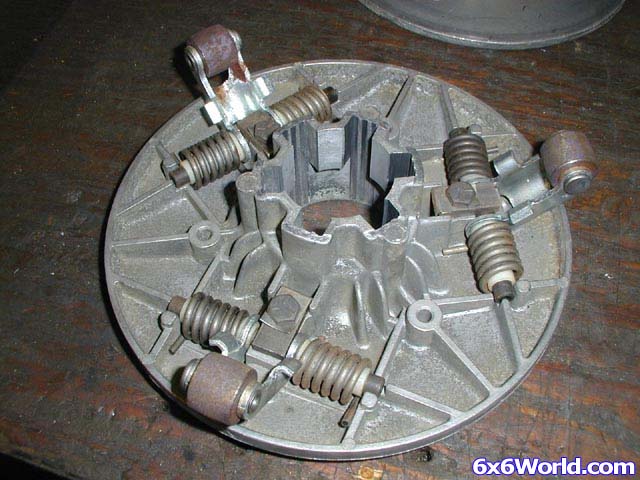
Fit all three sets into the movable face casting.
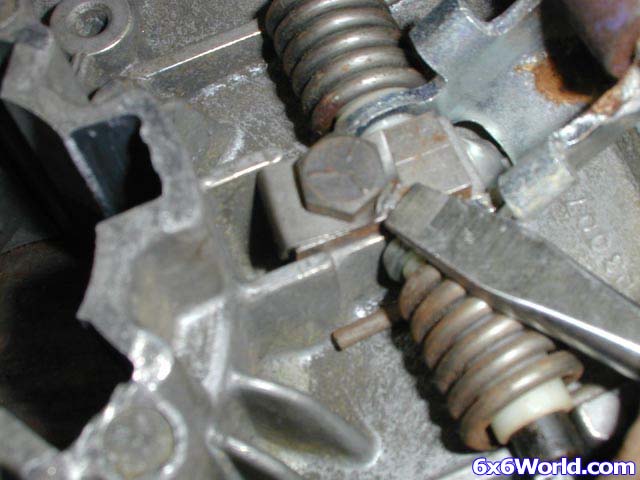
Then install the metal locks and the hex bolts and torque to 5-7 ft. lbs as per the manual. Now bend the locks over one flat of the hex.
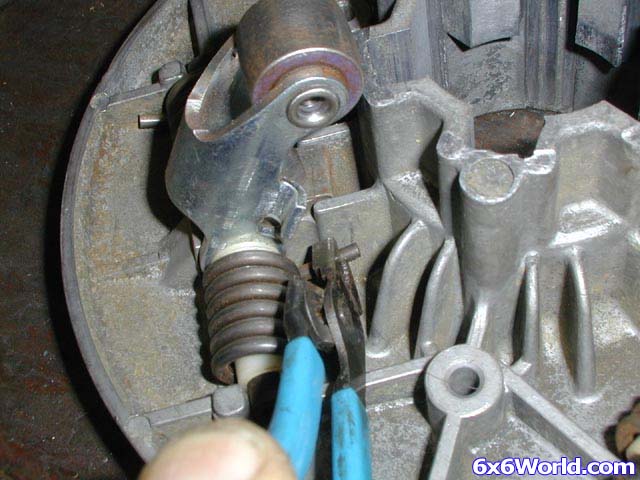
Here's where the fun begins. There's a special tool for the springs, but I've never seen one. People always laugh at my tiny Channel locks, but I've never found anything that works nearly as well for this type of thing.
Pull the end of the springs over the tang on the roller arm on each of the sets. It may take a couple tries to get the hang of it, but it works.
Once that's accomplished, you need to block the roller arms out with wood blocks far enough to fit the spider back on. I have found that if you don't have wooden blocks the right size, two teenage boys with screwdrivers will suffice. With the arms out, just tap the spider back into place with a soft hammer.
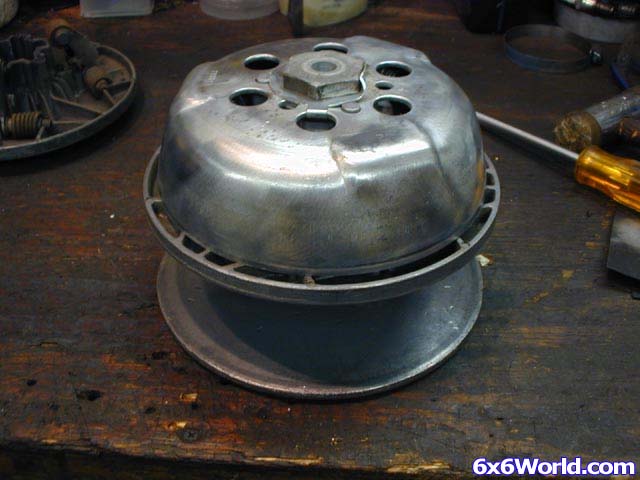
Now you can put the cover (ramp plate) back on, making sure the push-outs in the cover are directly over each of the roller arms. Install the ramp plate, retaining nut and torque to 150 ft lbs. Bend the lock plate over one flat of the hex.
Don't use any kind of wet lube on the moving parts. Wet lubricants will hold dirt, wear parts prematurely, and "gum up" the works so that the clutch jumps or sticks. There are some commercial dry lubes for clutches available and I'd recommend one of those. I have some spray type dry lube left over from my truck mechanic days that was made for the S-cam brakes on heavy trucks. It works fine, too.
Now you've got a clutch that will last for many years with little or no maintenance. Have fun!


 Reply With Quote


