Mid-Engine Max IV

  1. Welcome to 6x6 World.

    You are currently viewing our boards as a guest which gives you limited access to view most discussions and access our other features. By joining our free community you will have access to post topics, communicate privately with other members (PM), respond to polls, upload content and access many other special features. Registration is fast, simple and absolutely free so please, join our community today!

    If you have any problems with the registration process or your account login, please contact us. Looking forward to seeing you in the forums and talking about AATVs!
+ Reply to Thread
Page 3 of 7 FirstFirst 1 2 3 4 5 ... LastLast
Results 21 to 30 of 61

Thread: Mid-Engine Max IV

  1. #21
    Join Date
    Sep 2008
    Location
    Levittown, NY
    Posts
    160

    AWSOME

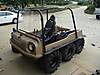
    Looks great Mike. I picked up a very similar Max Iv from SiliconTi. I am doing a similar set up as you ( bandolero, etc) I have the motor tranny and most of the axles out so the frame can be sandblasted and painted. I am going to keep it a 4 seater as it is the family truxter . I am working on design right now making both benches have suspension using mini bike shocks.
    Your machine looks great. I hope to get mine there soon enough.
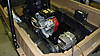
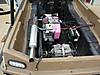
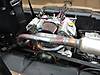
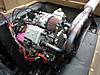
    Famous last words: I swear honey... I am just going to change the tranny fluid. I won't tear this one apart...

  2. #22
    Join Date
    May 2007
    Location
    Kings Mountain, NC
    Posts
    7,788
    I made a little more progress this week.

    -I finished machining all of the slots in the motor mount
    -Found a belt that fit and cut out the opening for the belt
    -Heated and molded the body
    -Welded the battery tray to the engine mount
    -Painted everything
    -Started mocking up the exhaust

    I decided to go a slightly different route with the exhaust than I initially intended. This meant that I needed a different bend that I didn't have so I had to stop for now. When the exhaust pipe comes in I will finish tacking it together.

    Now I really need to start wiring the motor, install the K&N filter, fuel line, throttle cable, etc. but I feel like I am almost there. Slowly but surely:

    Here's the finished engine mount ready for paint:


    Here is where I reused and relocated the engine isolators:


    Here's an shot of the motor installed with the exhaust mockup in progress:
    Last edited by Mike; 08-29-2009 at 07:03 PM.

  3. #23
    Join Date
    Jun 2007
    Location
    Tulsa, OK
    Posts
    1,725
    What a cool machine.. it's starting to grow on me

    I like the way the exhaust looks, with a longer rear cylinder primary tube.. is supposed to be better than equal length.

  4. #24
    Join Date
    Mar 2008
    Location
    Rockwell, N.C.
    Posts
    2,627

    Thumbs down Very Nice!

    Jennifer will be proud Mike. That is a great looking machine and seems to be moving along nicely. Keep us posted!!!!!

  5. #25
    Join Date
    May 2007
    Location
    Kings Mountain, NC
    Posts
    7,788
    Quote Originally Posted by Roger S View Post
    ... with a longer rear cylinder primary tube.. is supposed to be better than equal length.
    That's good to know. I was following Whipper's advice from Al Hodge and trying to make them both 18" before they hit the collector. The one that I have in the picture is right at 18" but the front one is going to be probably 17" so that will work out pretty well.

  6. #26
    Join Date
    Jun 2007
    Location
    Tulsa, OK
    Posts
    1,725
    When primary tubes are brought together, their pulses affect all other tubes. On an engine that fires evenly, equal length is normal. The vanguard front cyl fires, 270 degrees later the rear does. Then it's 450 degrees before front fires again. These harley pipe builders use a longer tube and/or more bends to slow the arrival time of the rear cyl pulse to the collector. The experts build and test all day, most of us manage to get one set done and call it good, me included.

    RB Racing LSR 2-1 Exhaust Technology

  7. #27
    Join Date
    May 2007
    Location
    Kings Mountain, NC
    Posts
    7,788
    Another day of working on the Max. We finally got to take it outside for the first time and fire it up with the completed exhaust. It sounds really good however, after fully engaging the clutches I realized that my belt cutout on the engine mount wasn't quite wide enough. The belt was just barely hitting the engine mount. So the motor had to come back out and the mount was ground another 1/2" or so to make enough room for the belt. Everything is back in and working fine now.

    The tub isn't fully molded for the tires yet so we didn't get to take it for a spin but we are getting closer. I've got to finish the mud flaps, mold the tub some more, coat the exhaust, and work out a few throttle linkage issues but Jennifer should be outrunning me any day now.

    The only issue that is worrying me a little is that the driven clutch has a bit of wobble to it. I bought this Max without an engine so this is the first time that I have seen the clutch engaged but I will dig into that after I finish everything else.


  8. #28
    Join Date
    Jul 2007
    Location
    I live in Shreveport,,Louisiana
    Posts
    3,285
    Mike


    I like it! It turned out really well.The transformation that you did to Jeniffer,s Max IV looks awesome!

  9. #29
    Join Date
    Jul 2007
    Location
    North Huntingdon, Pennsylvania
    Posts
    429
    Looks awesome!!! I can't wait to see it in action. Don't forget an oil overflow can!!!!!!!

  10. #30
    Join Date
    Jan 2008
    Location
    Vicksburg, Michigan
    Posts
    3,507

    Cool

    Wow, Mike, looks good!

    I tried searching so forgive me if I missed it but what size are those Vampire ASX tires? They sure look nice on there.

+ Reply to Thread

Posting Permissions

  • You may not post new threads
  • You may not post replies
  • You may not post attachments
  • You may not edit your posts