Announcement

Collapse
No announcement yet.

Conquest/Avenger style Chain Tensioner Brace fix

Collapse
X
 
  • Filter
  • Time
  • Show
Clear All
new posts

  • Conquest/Avenger style Chain Tensioner Brace fix

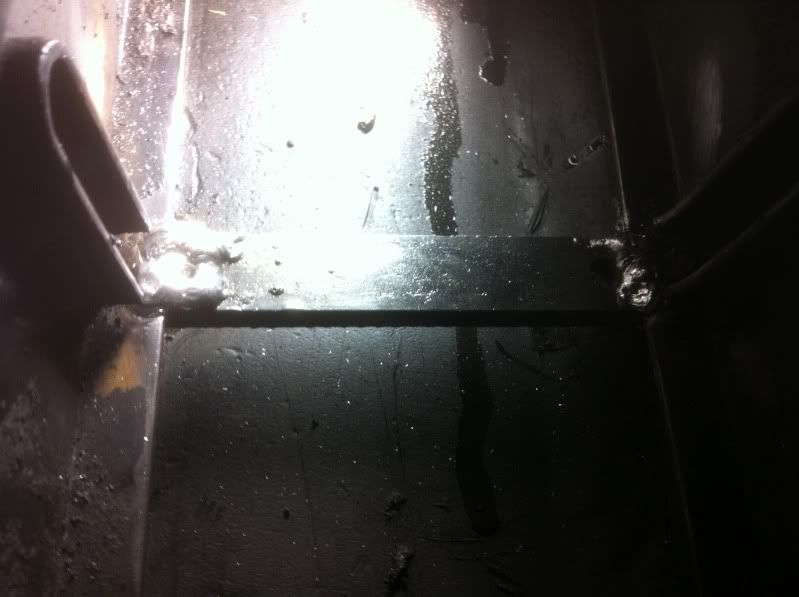
    Finally got around to attempting a fix on the Chain Tensioner Brace in my Conquest. Of course it was one of the ones under the Gas Tank that busted out on me. Had to clean verything out as good as I could. I also lost the piece that I needed to weld back in. Fortunatly, one of the Steel jaws out of my Bench Vice was very close to the right size.
    Had to pack damp rags all around the weld location and then cover them with some Carhart Tarp to make sure I didn't ignight my Fuel Tank. That made for a tight work location. Also very hard to get a Whire Wheel in there to clean off paint and other contaminants.
    Got it done though. What a crappy place to work, almost had to be a contortionist to get in there.
    Anyway, It was welded from the bottom of the frame originaly, and I have tried to weld it in from the top, will see if it holds out.


    RD

  • #2
    Fine Job RD. Are you going to use the Avenger style tensors and if you do use the course tooth type. The fine tooth will ratchet up to fast as the body twists. You may already know this, this was a upgrade in the Avenger models.
    Life should not be a journey to the grave with the intention of arriving safely in an attractive and well-preserved body, but rather to skid in sideways , cigar in one hand, whiskey in the other, body thoroughly used up, totally worn out and screaming "WOO-HOO, what a ride!!!"

    Comment


    • #3
      I will as they become damaged. Argo has discontinued the fine tooth ratchets, as well as the smaller wear pads. For this job, I happened to have one last "Small Tooth" Ratchet on hand, so I'm using it.

      Actually, I've never had the problems with the old style ones on the Conquests, I suspect that the lighter body material allows the Avenger to flex easier which may have created the need to modify the design.

      Another thing I noticed is that with the thicker wear pads I had to make my chains 5ft + 1 Link to get the chains together. I didn't count the links but I measured the 5 ft it normally would take and it would NOT reach.

      RD

      Comment


      • #4
        Good work. You could always siphon the gas out of the tank and then fill with water to the brim if that happens to the other side. That would be the safest way without removing the tank. I never did figure out how to get that darn thing out. What caused it to break in the first place?

        Comment


        • #5
          Originally posted by sparkola View Post
          Good work. You could always siphon the gas out of the tank and then fill with water to the brim if that happens to the other side. That would be the safest way without removing the tank. I never did figure out how to get that darn thing out. What caused it to break in the first place?
          I almost filled it with water, but figured I was safe. Even had a fire extinguisher on hand. Short of lifting the upper body, I havent figured out how to get the tank out either.
          As for "WHY" it broke out.......... That's a bit of a mystery, all the others look fine. The chains were stretched to the point where they needed changing, but not dangerously stretched. I had all my parts gathered up and planned to change them after that particular trip.

          RD

          Comment

          Working...
          X