Announcement

Collapse
No announcement yet.

Combat Vehicle Simulator Build

Collapse
X
 
  • Filter
  • Time
  • Show
Clear All
new posts

  • racerone3
    replied
    Originally posted by hydromike View Post
    Aw, C'mon! He's a whole two days closer as far as the U.S. Mail is concerned! Today, I tell you....they'll show up TODAY!

    It's looking fantastic. I can't wait for you to be able to take it out into some rough terrain....
    I wasn't grumbling. They did in fact show up today, and axles are back in the machine. Lunch break then headed out to run chains. Wiring harness went in this morning... she just might drive today

    Originally posted by JoeMeg View Post
    Looking good! I'm shootin for fall Busco trip to see her in person. Did you consider submerging those frozen axle/hubs in the electrolysis tank with those graphite consumable electrodes?

    Joe.
    I didn't try it on these hubs Joe. I had no luck with the last set I tried it on. I have 2 spare hubs on the way... that just means I'm only allowed to kill 2 axles per ride

    Leave a comment:


  • JoeMeg
    replied
    Looking good! I'm shootin for fall Busco trip to see her in person. Did you consider submerging those frozen axle/hubs in the electrolysis tank with those graphite consumable electrodes?

    Joe.

    Leave a comment:


  • hydromike
    replied
    Originally posted by racerone3 View Post
    the flanges from H-Mike didn't come in, however the parts from Don did
    Aw, C'mon! He's a whole two days closer as far as the U.S. Mail is concerned! Today, I tell you....they'll show up TODAY!

    It's looking fantastic. I can't wait for you to be able to take it out into some rough terrain....

    Leave a comment:


  • Mike
    replied
    That looks so good.

    Leave a comment:


  • racerone3
    replied
    Another back up and punt day

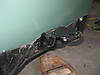
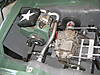
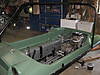
    the flanges from H-Mike didn't come in, however the parts from Don did (including an outer flange). Add that to the flange I got from George yesterday and I was able to put the 2 crucial axles in the machine. This allowed me to get the 2 short chains installed and the trans/ engine cradle locked down.

    Don also sent ma a trailer hitch. The inner portion of the Attex hitch was quite robust, but the outer looked a little wimpy so I built an industrial strength version. Once that was in, I was able to install the engine.

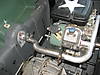
    The exhaust is comprised of what I suspect to be an MaxII manifold that I got from Swift a long time ago, flex pipe, and a modified Glass Pack that Lewis gave me. I had to cut 4.5" out of the Glass Pack and weld it back together. to make it fit the machine, and I was dubious about how it would work, but the sound is awesome! It will still need a brace from the T-20 to the flex pipe, and some header wrap to keep heat off the plug wire and seat back.

    I also welded up one of the NOS cages that I got from Gus M. Quite glad that Gus had them as I was forced to sell my tubing bender a few weeks back. The only liberty I took on the cage was to weld a small tab to the back for the hood prop to catch instead of drilling a hole in the cage (for water to collect in) This cage will probably only get used for showing off purposes, and the one that came with the machine will get a few modifications to make it "trail ride friendly"

    Tonight I will get the wiring harness finished up, and hook up the throttle. Axles, bearings spacers and bolts are laid out. should be about 20 min per axle to get them in. I still need to source a 15' choke cable, and 2 (22")Rawhide 3's

    Leave a comment:


  • George
    replied
    Like the color!

    Leave a comment:


  • racerone3
    replied
    Thank you Larry.

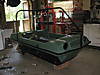
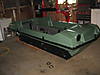
    I had intended to get the drive line put together before installing the upper body just to make things slightly easier to work on, however it was ready to go and I'm still waiting on a few parts so I went ahead and put the body back together. I'm not thrilled with how the upper came out, but hopefully she will be so covered in mud most of the time that it wont matter.

    Getting the gas tank mounted up to the inner body band proved to be quite a challenge. There are a couple rivets that I still need to drill out and replace with bolts. just need to talk myself into laying upside down in the machine with hot metal falling in my face and seat mounts jabbing me in the back and that task will be done.

    cupped washers came from George today to repair the last few sprocket tubes. I should go get that done, but I will probably wait till tonight when it's <100 degrees in the shop. The trailer hitch and flanges for the bearings should be here tomorrow so if all goes well, the machine will be very close to a roller by tomorrow night.

    Leave a comment:


  • LarryW
    replied
    Looking good Race! I like the engine paint.

    Good luck on your hubs. I do still have a hub that never came loose without the bolt. I may need to use some heat on that one.

    Leave a comment:


  • racerone3
    replied
    Got the T-20 back together this morning after a lot of work to remove the broken fill plug and fix the mangled pivots. I don't believe this is the original trans from the machine, and it looks to have been freshened up at some point. It has the full compliment of thrust washers which I've never seen in a T-20 of this vintage. Shouldn't matter though. everything lined up well, and the trans was working great when it came out of the machine.

    I've had to cut some corners on this build that I usually try to avoid, such as reusing hardware. A couple hundred worth of hardware just isn't in the cards right now and I can always change stuff out down the road. It will also be a while before she gets accessories like winch and bilge pump.

    So far I've had no luck removing hubs from axles. this is fairly important as I tend to go through a few axles. I've actually only managed to get the bolts out of 2 of them. The current plan is to drill the remaining bolts out and do the Larry W method of removal.... go drive it. just need to get some bolts to put in as wheels eject on the trails and remember to carry the tool bag. I will also need to come up with a few spare hubs to carry to rides in case I kill one of the axles that hasn't yet lost it's hub

    While it will be far from "finished", I hope to be driving the machine by the end of next week.
    Last edited by racerone3; 06-03-2011, 05:53 PM.

    Leave a comment:


  • Stonewall
    replied
    Sounds like it's really coming together, can't wait to see it finished!!! I was planning on painting up my Kohler just like that

    Leave a comment:


  • Joe M
    replied
    Looks great!!!!!! You're not coming to Ashtabula?

    Leave a comment:


  • vanmeterj1
    replied
    That vangaurd may just put out about another half a horse now just from the paint job alone!

    Looking good man.

    Leave a comment:


  • racerone3
    replied
    Lower Tub, skid plate, frame and inner body band are done. hopefully parts will start trickling in and assembly can begin later this week.

    I finally got around to tearing down the T-20 that came with the tank expecting the worst. Fluid looked like new. bands measured ~0.106, drums are perfect. once I get the broken fill plug removed and fix the mangled mounts for the tongue depressors, it can get new seals and go back together.

    Most of the small parts and pieces are sandblasted and painted. I still need to remove the old bearings and clean up all the axles. I built a very quick wiring harness when I swapped in the Vanguard and it will need a few wires added for bilge pump and the factory brake light. I also need to add a 12v outlet somewhere, but I'd rather it not be in the dash as there wasn't one there from the factory. I'm trying to keep the number of items not original to the machine as low as possible and still have a solid reliable trail machine. the 18 vanguard is one item that will be a step away from stock but I dressed it for the part as well as I could

    Leave a comment:


  • Dan67
    replied
    Looks really good man, hope to see it soon.

    Leave a comment:


  • hydromike
    replied
    Excellent looking supports! That should hold the old girl's pantaloons in place for a while. Making the frame removable without taking the top off is something I wish I had done, but I didn't. The "drops" you come across at your steel supplier are just what the operation called for. All of the plastic repairs look great, too... I'm looking, and I can't find any of them in the pictures...

    Leave a comment:

Working...
X