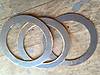
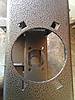
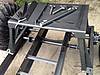
“rings" I had plasma cut to complete the modification for the HD Argo bearing to properly fit my frame. Evidently Adair Argo built this kit using an older Max frame that had a different size bearing than the one on my frame. The kit was supposed to "bolt on", but if i do that there is no where near enough "hold" area on the frame where the bolts go through for my liking. I want these things well supported. The placement of the new bolts are centered right on the edge of the of factory axle holes on the frame. These rings are made to fill in the gap and keep rigidity of the frame bolts-to bearing housing after tig welding them in place. " I am fully aware this opens up pandora's box regarding the tub bolt locations. I have a fix for that and i'll elaborate more on that at a later time.
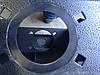
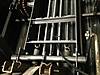
I have not tig welded in a while and chose to use a carbon rod for the first one I did here. It has virtually 100% penetration but it has too much carbon in it, so my next “ring” will be welded with a 309L rod and 70a from my Miller Diversion 180.
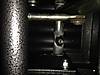
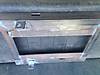
100% penetration (view from the back side.
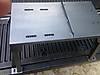
Also a pic of the engine table. Since its pretty large, it's easy to see a good pic of the powder coating. I think it looks real nice.
A little bit more progress
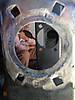
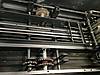
Tight fit for tig welding
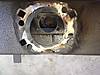
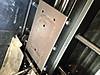
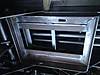
Welded, ground flat, and "new" holes drilled that match the argo bearing housings. As you can see the bolt pattern is slightly tighter here, hense the reason why i added the metal rings so i had plenty of metal inbetween the bolt and the large inner hole where the axle goes.
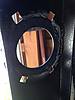
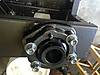
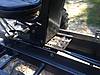
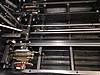
Here the housing is mocked in place on the frame. Per the 3rd photo you can tell the placement of the new holes would have required me to fill the square holes and re-drill holes through the middle of the weld if i was to put the housing in the normal "flat/square" placement. This tilted placement allows me to 1). not have to spend lots more time filling the square holes 2). also i dont have to deal with drilling through weld, which as most of you have found out doesnt work out well most times. You can "do" it, it's just not as easy and it make me spend more time resharpening drill bits. The weld is harder than the surrounding metal so it dulls the bit quicker and also wants to "push" the drill towards the softer metal, making for holes that end up not exactly where you intended to put them.
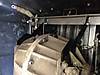
Decided to go ahead and install a larger car battery:
Bottom of new battery box. Bolts thru the tabs on the factory rear battery bolt location
New battery box in place. Factory 275 CCA, new battery 550 CCA
Final comments on this build; I am very happy with the new powder coating and HD bearings i've installed. I did end up with some "small" drops of water that leak into the tub from the rear bearing on the passenger side, also from the rear and middle bearings on the driver side. I would have to spend plenty of time in the water for enough water to come into the tub for it to be a problem, nothing that a bilge pump cant handle. Sometime this coming year i will take it back apart to replace all of the sprockets and the chains, all at once. When i do that i'll see if i can do a better job of sealing out the water. All of the modifications that i made have worked as intended and have been beneficial. I do plan to make a preasurized oil spray for the chains or a dip/bath oil system in the future, since i cant talk myself out of the idea. I have some ideas regarding this setup that i just didnt want to deal with at the time i did this build since i already had enough going on. I'll get around to the particulars of the modifications as time permits.

 Tweet
Tweet


Comment