Announcement

Collapse
No announcement yet.

Max II Project

Collapse
X
 
  • Filter
  • Time
  • Show
Clear All
new posts

  • Max II Project

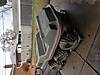
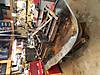
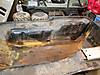
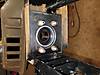
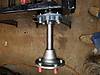
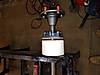
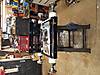
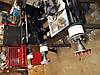
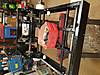
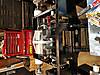
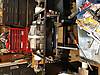
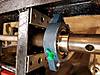
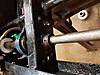
    Came with NOS uncut top. Original frame was junk. Came with newer good frame. Reinforced the bearing mounting areas. Using Argo HD bearings with custom 3" UHMW bearing extensions/synthetic bearings. Made chain adjusters. New solid axles and sprockets. Split the shifter. Picking up 670 predator this weekend. Adding mild cam, heavier valve springs, custom exhaust in stock location, and intake. LED headlights and taillights.

    Still have original 3 bolt axle if someone can use them along with 3 to 5 converters.

    Looking for stock roll bar to make roll bar fab a little easier. Plan is to put it to the test at Busco.

    Basically all mechanical parts are new.

    sigpic

  • #2
    What are those spacers made of?? man those are big!!!

    Comment


    • #3
      UHMW 5" diameter 3" thick.
      sigpic

      Comment


      • #4
        You felt no need for inner bearings while it's apart?

        Oh wait, did I see HD bearings inside and outside of extensions?
        sigpic

        My new beer holder spilled some on the trails - in it's hair and down it's throat.
        Joe Camel never does that.

        Advice is free, it's the application that costs.

        Comment


        • #5
          I was going to put inside bearings but I cant find any that fit the inner rails. What fits? I'd love inside bearings.

          Only HD bearings on the outside. The UHMW is milled 30 thousands over so its a tight and acting like a synthetic bearing.
          sigpic

          Comment


          • #6
            You could bolt 2 bolt flanges on one rail and then you would need to weld 2 straps each to hold the other rail set. I think g has some pictures of his.
            sigpic

            My new beer holder spilled some on the trails - in it's hair and down it's throat.
            Joe Camel never does that.

            Advice is free, it's the application that costs.

            Comment


            • #7
              I thought about doing that. I actually have the bearing. I'd love to see pics.
              sigpic

              Comment


              • #8
                great project .... see you at busco for some testing. nice fab job ! johnboy va.

                Comment


                • #9
                  since you are down that far you can also check out JBF's Copperhead pics. Different way of doing it.
                  sigpic

                  My new beer holder spilled some on the trails - in it's hair and down it's throat.
                  Joe Camel never does that.

                  Advice is free, it's the application that costs.

                  Comment


                  • #10
                    Looking good Mike!

                    Comment


                    • #11
                      Heres how I ended up doing the inner bearings. I meachined the square tubing to fit the channel tight, then spot welded it from the back side.
                      sigpic

                      Comment


                      • #12
                        Works for me, maybe literally.
                        sigpic

                        My new beer holder spilled some on the trails - in it's hair and down it's throat.
                        Joe Camel never does that.

                        Advice is free, it's the application that costs.

                        Comment


                        • #13
                          I used the bushing rod for lining everything up.
                          sigpic

                          Comment


                          • #14
                            Where you find those hubs??? those are g&g hubs correct??

                            Comment


                            • #15
                              Hubs?
                              sigpic

                              Comment

                              Working...
                              X