Announcement

Collapse
No announcement yet.

First 89 Max II Rebuild

Collapse
X
 
  • Filter
  • Time
  • Show
Clear All
new posts

  • First 89 Max II Rebuild

    Well hello to all. My name is Russ. Just to give ya a little background about myself. I am 22 years old, live in Baltimore, MD. I work for Alban Tractor Co, which is a Caterpillar Equipment dealership. I love to hunt. I primarily hunt on the eastern shore of maryland. I hunt small elk like deer called sika deer. They roam the low lying swamps of the shore. This is were i plan to take my 6x6 once i'm done with it. So to the good stuff.

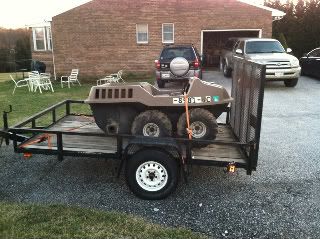
    I am the proud owner of this up and coming 89 max ii 6x6. Bought it about 1 month ago and have done some pretty good work to it so far. I figured on making this thread to document my process and just show off work as well as get some help from forum members who are willing to give me some advice. So heres the story.

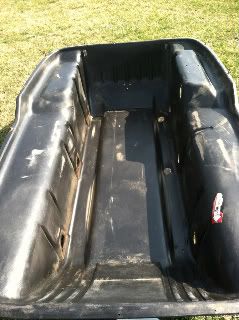
    89 Max II. Pretty rough shape when i bought it. Craigslist ad said doesn't run, sat for year, axle bearing out. So i thought ok, not to bad. To my dismay when i arrived, it had two axles out, hadn't been moved in prolly over 4 years, prolly hasnt ran in 6 or more, sprokets lodged underneath frame against lower body, pretty rough, dirty, and rusted shape. Pretty much to say the guys asking price of $1000 was way over what this thing was worth. Well, money talked and no bull**** on my side and i picked it up for a very lower price. Anyways, i brought it home and started dissassembling.

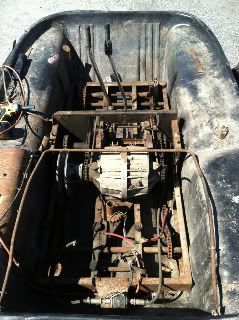
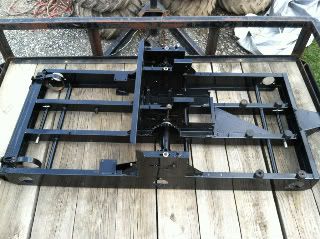
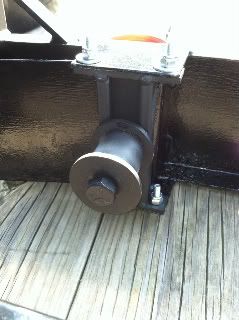
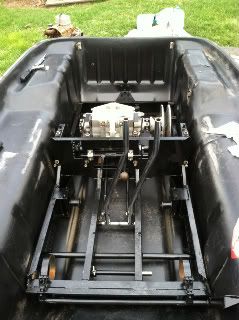
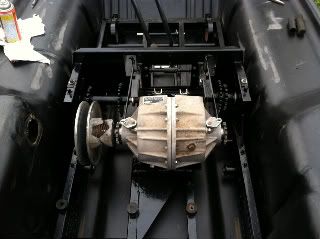
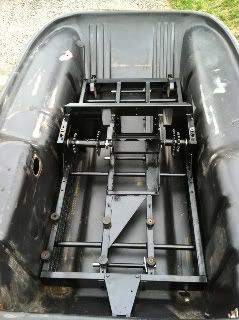
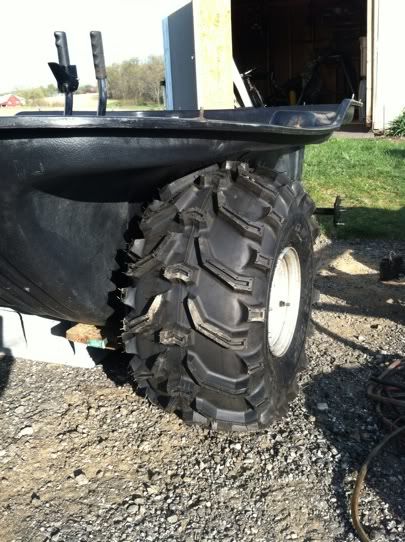
    First couple days- pulled off upper body. Found gas tank full of rust, dirt, and water and old gas. Throttle cable broken and froze up. Engine full of leaves and twigs inside of flywheel. (Mouse was living in there lol). Frame was pretty rusted in one spot from water sitting inside for about 5 years lol. Chains rusted together, muffler rusted bad. But from what it seems the transmission has oil and seems to be working correctly. So i fully dissassembled the entire machine. removed engine, all wiring, transmission, all sprokets, axles, wheels, tires, flanges, frame, and axle shafts through frame. From here i did an inspection and listed what i was going to need and fix. So off to my shop to clean parts.

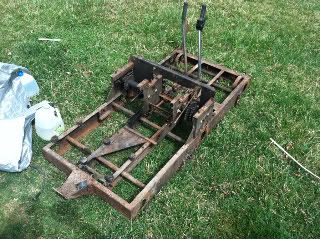
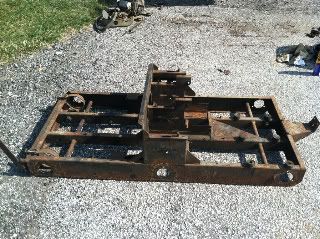
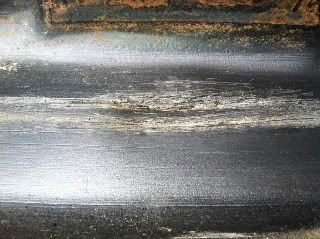
    Next couple weeks- Took axles and blasted off and coated in por-15. For those who dont know what por-15 is, it is about the best rust converter and preventer i have ever found. Once that stuff dries it has as hard as steel. Well almost. You can hit it with a hammer and it wont chip. Sand blaster all sprockets and coated in por-16. Wire wheeled complete frame and coated in por-15. Cleaned up axle shaft supports on ends with are stationary through frame. Blasted and por-15ed some other parts as well. Looked at tub and found crack in bottom were sprocket lodged under frame and created hole in tub. As well as found some cracks in tub around where muffler bolted. Cleaned inside of tub. Scrubbed and scrubbed.

    Parts ordered so far. Axle bearings, axle flanges, new chain adjusters, all new chains, plastic welding rods, body wing nuts, throttle cable, throttle, t-20 trans seal kit.

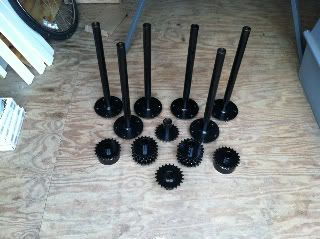
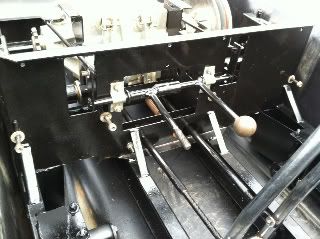
    So far i've taken the t-20 apart. No damage, and looked suprisingly good inside. Resealed entire trans. Forgot to take pictures of this part, but at same time my hands were a little oiled up and dirty to take pictures, but i did reseal it well.

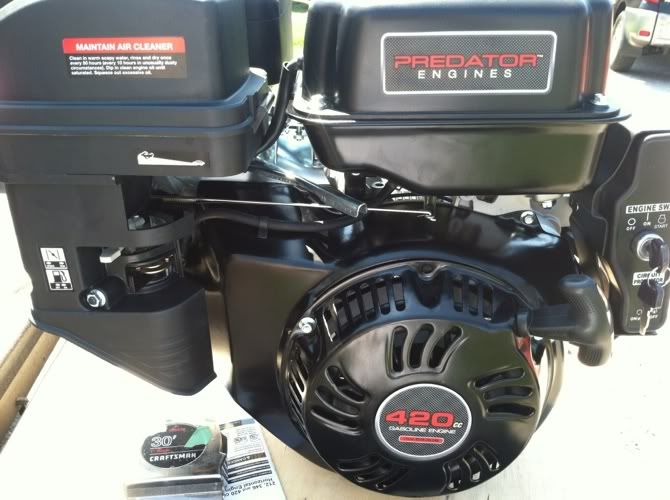
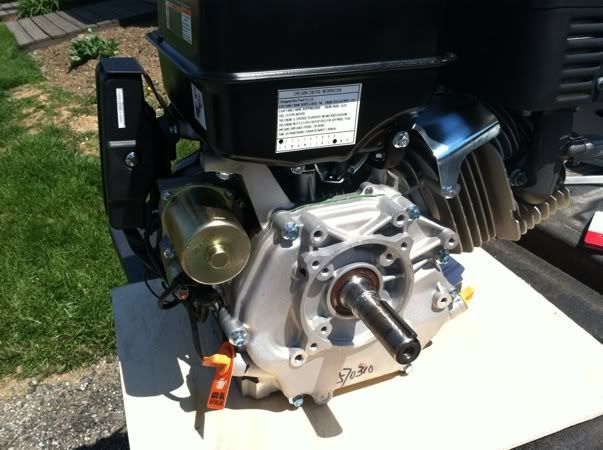
    Plans for this weekend of the 3-31, 4-1. Clean rest of tub and plastic weld it together. I will take pictures of this step to help others. I will hopefully set frame in tub. Attach trans sprokets, install trans. As for an engine. I'm hoping to pick up a small 11hp from a guy at work for a good price and hoping it will do the job for awhile until i can save for a 18+ hp motor. Anyways, ill keep updating with pictures and progess to track it myself as well as help for others possibly. As well as if i can get any hints or tips from fellow members. Thanks in advance.


  • #2
    Looks like you are off to a good start. The hard part is behind you. Going back together is always much easier. Keep up the good work.

    Comment


    • #3
      Very nice! It's always great to see someone who does a quality restoration and does everything right and doesn't cut any corners. When your machine is done, it'll be just as good as a new Max, I'm sure. Like Mike said, the hard part is done. Putting it back together isn't going to be tough at all, and now you'll know every square inch of the machine. A couple tips for you:

      1) Make sure you fill the T-20 with just a hair less that 1 quart of ATF type F fluid and add about 4 ounces of limited slip differential additive (to bring the total amount of fluid in the T-20 to a quart).

      2) An 11HP will move the Max, but you'll certainly want to upgrade the engine like you said. Did it have a Tecumseh OH160 or OH180 in it originally? I have a few parts if you need them.

      3) Use 3M Strip Caulk between the flanges and body to get a good water tight seal.

      4) Use Never-Seize on the axles and sprockets when you put everything back together so when you have to replace something in the future, you don't have to fight with rust.

      And I'm surprised everything came apart so easily, sometimes you just get lucky. That's a good feeling. Keep us updated and keep up the excellent work!
      "Looks like you have a problem with your 4 wheeler........you're missin' two wheels there"
      sigpic

      Comment


      • #4
        if ur on a budget like me ,Haber fright has a 420 cc ele.start for about 340$. is close to a 14~15 horse . i run one and it does well. also i plastic welded a bilge pump in the base of the tub.(just in case i poke a hole) 25$ walmart.

        Comment


        • #5
          Originally posted by jpswift1 View Post
          Very nice! It's always great to see someone who does a quality restoration and does everything right and doesn't cut any corners. When your machine is done, it'll be just as good as a new Max, I'm sure. Like Mike said, the hard part is done. Putting it back together isn't going to be tough at all, and now you'll know every square inch of the machine. A couple tips for you:

          1) Make sure you fill the T-20 with just a hair less that 1 quart of ATF type F fluid and add about 4 ounces of limited slip differential additive (to bring the total amount of fluid in the T-20 to a quart).

          2) An 11HP will move the Max, but you'll certainly want to upgrade the engine like you said. Did it have a Tecumseh OH160 or OH180 in it originally? I have a few parts if you need them.


          3) Use 3M Strip Caulk between the flanges and body to get a good water tight seal.

          4) Use Never-Seize on the axles and sprockets when you put everything back together so when you have to replace something in the future, you don't have to fight with rust.

          And I'm surprised everything came apart so easily, sometimes you just get lucky. That's a good feeling. Keep us updated and keep up the excellent work!
          1) Wells that's good. Because I did that exact same thing learning from a thread on here
          2) Yea. The 11 isn't much but it's a basically new Subaru Robin 11hp electric start for $100 to get me but till I can save more for something bigger. Is like to put those either predator or duromax 16hp in but not enough money. I'm trying to stay inside a budget to keep the misses happy. So far my budget is doing good. My techumse is a 14hp I think. Not sure which one if it is actually a 16hp. It Deff needs a new carb. Throttle locked up and gumed up bad. I had no spark from plug so not sure if coil pack is good or if air gap on flywheel is right. Because I think on these they ignite off flywheel correct? I'm not sure. It seems like it has compression but haven't tested it. I appreciate your help alot.
          3) also learned that technique through this site as well. But I do appreciate you letting me know because if I didn't find it through searching your post helps tremdesously.
          4) yes sir. I have a can of copper anti seize that I use on my job frequently that will be working its way to use on the 6x6

          Thanks for the tips and help. I appreciate it.

          Comment


          • #6
            Originally posted by xxzenxx View Post
            if ur on a budget like me ,Haber fright has a 420 cc ele.start for about 340$. is close to a 14~15 horse . i run one and it does well. also i plastic welded a bilge pump in the base of the tub.(just in case i poke a hole) 25$ walmart.
            That's exactly what i was thinking about getting if I didn't have this 11hp for so cheap. Most likely I will go to either fixing the Tecumseh or buying one of those motors.
            As for the bilge pump that is a great idea. I may plastic weld one is as well. Thanks for the great tip.

            Comment


            • #7
              So i got to do some work to the max this weekend. Heres what happened.

              Heres some views of the frame and sprokets coated in por-15.


              Cleaned the tub completely. Scrubbed and Scrubbed. Then cleaned the crack with denatured alcohol and welded it up. I bought some hdpe welding rods offline. I went to harbor freight and bought a plastic welder. Worked very well and did the job good. Heres some views.


              So i got to install the frame. Installed t20, shift levers, brake levers, and 2 chains. Also installed new roller style chain adjusters. Dont judge. I would have made my own but i threw the old ones out by mistake. Here are some views.


              Any questions, comments, remarks, concerns, or anything please post. Thanks
              Last edited by Rustyfritz; 04-01-2012, 09:37 PM.

              Comment


              • #8
                Looking good. Keep it up and you will be driving in no time.
                l like to buy stuff and no I don't do payments!

                Comment


                • #9
                  You work fast and do really great, high quality work!
                  "Looks like you have a problem with your 4 wheeler........you're missin' two wheels there"
                  sigpic

                  Comment


                  • #10
                    Keep up good work fellow Cleveland brothers worker! Or are you beckwith!? lol

                    i work hand in hand with CAT everyday so i'm sure we see alot of the same stufff!
                    I have officially caught the 6-wheel-sickness!!

                    "If your gonna be dumb, you better be Tough!"

                    "I have done so much, with so little, for so long, that I'm now capable of doing practically anything with virtually nothing...."

                    BUY AMERICAN..or...BYE AMERICA!!!

                    Comment


                    • #11
                      Originally posted by jpswift1 View Post
                      You work fast and do really great, high quality work!
                      Thanks. I try my best.

                      Comment


                      • #12
                        Originally posted by mustangwagz View Post
                        Keep up good work fellow Cleveland brothers worker! Or are you beckwith!? lol

                        i work hand in hand with CAT everyday so i'm sure we see alot of the same stufff!
                        Neither. I'm with Alban. In Maryland.

                        Comment


                        • #13
                          Nice looking resto job !! I would love to see what the welded bilge pump looks like. Im trying to figure were you would weld it to ??? I just installed mine and the one thing im gonna change is im putting a course Brillo pad ( brass ) under it to ack as a filter for sticks ect... I love the split shift and I think im going to try that myself.

                          Comment


                          • #14
                            Well, got to do a little more work on the max this weekend. Wasnt the best time but did get some done.

                            I cleaned up the outside surfaces of the tub where the axle flanges mount up. Applied 3m strip caulk to the body. Installed flange, installed new bearings on axle, installed axles, bolted up, bolted down sprokets, locked axles in place. Short to write but did take a decent amount of time to accomplish. I than began installed chains. This is where I started to run into trouble. If you have read, i installed the new type roller adjusters on my max. So the least adjustment of the roller is still more adjustment then the least of the original style slide type. If that makes sense. Well i split the chain to the right amount of links and man was it tight as all get out to get this chain to attach. Finally got it attached and it was tighter then a banjo string, way to tight for a chain on this machine i would think. So i took it back off and installed 1 more link and now it was way too loose. So now i'm in a dilemma. So i post a thread about my problem and found that i could buy half links. Well i went around trying to find half links sunday but tractor supply wasnt open on easter, so i had to put that aside for the day. So then i went on to the new tires. Tried breaking the bead of one tire with my truck y backing over it. No luck. The damn bead is like welded to the rim. So tried another good tire. Roller over it and popped fine. Removed that tire. Then came the fun part, installing the new tire. That was a pain but i got it. I got one tire on so far.

                            Then comes the pride and heart of the max. The new engine. So after much hope, my friend with the 11hp subaru said it needed some work so i decided to pass on it. I went to Harbor freight sunday and picked up the Predator 428cc 13hp engine. Brought it hope, took it out of box and it was good looking. Added oil, installed mounts on it and fired it up. This is where it got scary. When it started it sounded like the thing was gonna come apart. But after a few short seconds that went away and its purring real nice. Sounds real good. Let it run at idle for about 3 hours to break it in like the manual says. Come to find out when i installed my drive clutch on the engine, its not working correctly. At idle it was trying to close. Once i reved the engine the clutch closed and would not return. I had to bang it back open. So it seems like i either need a new clutch or to rebuild it. Does anyone know what model of Salsbury would be on an 89 max II. I got the information off the clutch but it doesnt say anywhere what the model is. I wanted to order a rebuild kit off ebay for them just not sure which model woulf fit my clutch. If anyone has a working one laying around they want to sell at a decent price let me know.

                            So basically that was it for this weekend, some accomplished, not much. Anyways, heres some pictures of the progress.....


                            Comment


                            • #15
                              Sorry to hear about the minor hangups. They happen to all of us, even on the simple jobs.

                              As far as the clutch is concerned, follow this how to article that Don wrote up and you'll be back in business. He's the man when it comes to AATV repair.

                              How to rebuild your Salsbury Variable Speed Clutch for your 6x6 or 8x8 amphibious ATV


                              Keep up the good work!
                              "Looks like you have a problem with your 4 wheeler........you're missin' two wheels there"
                              sigpic

                              Comment

                              Working...
                              X