Update
Well I have been tinkering away on my 300d whenever I have had a free second here or there and I am just about done with cleaning the inside. There are still a few spots that I am not going to worry about, such as where the frame sits against the tub, mainly because this will not be see anyway once it is put back together. I still have to clean up under the dash area, get the black paint-like substance off of where the guards were and maybe give the upper body a try at sanding/polishing. Heres some more pictures. It really does look like a whole new machine inside compared to what it looked like when I first got it!
DSCN0938.jpgDSCN0941.jpgDSCN0937.jpgDSCN0940.jpgDSCN0934.jpg
-
Thanks Jeff! The engine cover did clean up really good, minus one spot hear and there. I also didn't remove the screens to clean under them, but I didin't see a need to. All of the fasteners are still there and in good shape so I said the heck with it. I am also wanting to hurry up and get this project done sooner rather than later so my grandfather can have a chance to see his old attex again! Someday down the road I will tidy up some of these areas I am intentionally skipping right now, but I just want to get it fairly cleaned up, shined up and running so I can drive it!
I picked up a bottle of that purple power tonight. It looks like pretty good stuff so I will have to give it a try this weekend when I have a chance to do some more work, unless it snows and I get to have one ride on my snowmobile this year
Leave a comment:
-
That cleaned up very well and it looks great, Martin. You might want to get some stuff at Autozone called "Purple Power" degreaser. It's the best stuff I ever used and it's simply amazing. That grease will disintegrate and wash right off after a little bit of that stuff, some light scrubbing and then a spray from the hose. So far, so good.......keep up the good work!Leave a comment:
-
Thanks for the comments on the stain. It just looks really weird so I thought I would ask about it to see what everyone thought. As far as a hitch is concerned, I had seriously considered one in the past when I was brainstorming but I don't think I will end up going with one. This project, when it is finished, will not be any work-horse or trail rig, so I don't think I will really need one. Plus, I am trying to keep it as original as possible, which isn't always a good thing (especially when attempting to track down decent balloon tires!)
I started the cleaning portion of my project today with a couple of plastic scrapers, blue shop towels, fine scruff pads and a can of plexo. I scraped a LOT of pine needles and other gunk out and realized that there is still quite a bit of stuff that has basically 'crusted' itself on the bottom. I was able to get the inside of the engine cover looking as good as new. I was quite supprised how good it looks with just a little bit of plexo and a scruff pad...and a little bit of solvent on the tin.
Still LOTS of cleaning to do
Leave a comment:
-
Thanks for the updates. If the stain is not deep dont worry about it but if it deeper then maybe try sanding it some.
Now would be a good time to add some bracket structure to attach a little hitch to the back if you don't have one already. Do it so there is a plate of steel where the hitch would go mounted flush with the inside of the tub.Leave a comment:
-
Looking pretty good. keep up the work and you will be driving in the spring. As for the oil stain, I wouldn't worry about it. The acetone should take care of it. My colt project was stained, broken, and weathered and the patches I used were the same plus painted. I havnt done the wetsanding or polishing yet and it looks real nice now.Leave a comment:
-
Here's an update on my project: Good news, I finally got the frame out! I ended up not using heat, but rather just got on the inside tube with a set of vise grips- not clamped on, just held hand tight and I was finally able to break it loose. Now I begin the fun part of cleaing the body, inside and out, to bring it as close as possible back to a brillant yellow shine!
The only thing I have a question on is- When I began the process of removing the axles, I started with the left front. I used some penetrating oil on the the pin and a little pit shot in between the axle and the tube. I tried to wipe up any excess, but when I removed the frame I noticed that tub underneath where the axle would be had turned to almost a 'pale green' finish. Is this something that can be taken care of with a little acetone/sanding/polishing or is it something that can't be removed? The first picture shows what I am asking about.
Here's some pics
DSCN0882.jpgDSCN0881.jpgDSCN0880.jpgDSCN0885.jpgDSCN0884.jpgLeave a comment:
-
Heeeeeeeeeeat! Throw a propane torch on it, and see if it'll budge. Give it a shot of penetrating oil and see if you can get it to budge by putting a pipe wrench on it. Be careful not to put TOO much force on a pipe wrench, as you can dimple the tube and be in worse shape than you started. Tap it around a bit with a hammer when you heat it, too. You can put a piece of aluminum or something in the tub to protect it from the flame, too....Originally posted by Duck89 View PostLeave a comment:
-
More pictures. The first two are of the only cracks in the tub, on the right front corner. The third is of the stuck axle/sprocket I am asking about in the previous post.
100MEDIA_IMAG0457.jpg100MEDIA_IMAG0456.jpg100MEDIA_IMAG0452.jpgLeave a comment:
-
Thanks for all the bearing info and I will be sure to give those folks over at Buffalo Bearing a shout. For now, however, I have found another problem. I have all the axles out....except one. This axle is the left rear, which before I began this project, I believe to be bent based on a visual inspection alone. Sure enough, I had to beat out the pin that goes through the sprocket/axle with a hammer and a punch because it simply would not just pull out like the others before it. Now, I cannot even get the sprocket to turn at all on the axle. It seems completely stuck. Could this be from a bent axle? Any suggestion as to how I can free it up (hopefully without cutting) so I can slide the axle out?
Leave a comment:
-
HydroMike has it for you! Just make sure you get the wide inner race. I though it wouldnt matter once and bought 6 new bearings that I had to rig to make work. The axle isnt quit long enought to go in the bearing very far. Not sure why they didnt just make the axles a little longer? But I had to space the inner bearings out more to make them work. Long story short, you DO need the wide inner race.
Leave a comment:
-
Martin, those bearings are available through Buffalo Bearing. Tell those guys the part number or the Fafnir number that Mike gave you and they'll be able to find something for you. Their number (716) 874-1720. Mention that you're from 6X6World and they'll take good care of you.Leave a comment:
-
Jeff,
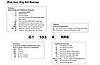
Yeah, I didn't figure it would work. Ill have to remember that the bearing will fit a later model if I ever get one of those and not another first gen! The bearing on the right, which I am trying to find a new one of, is one that you gave me from last fall when I bought those 2 tires from you. I believe those are the same bearing that are in my machine right now. Do you know if those bearings are still made and, if so, by what manufacturer/part number?
ThanksLeave a comment:
Leave a comment: