 Tweet
Tweet
Can't wait to see the finished product. Nice Work!
-
-
Looking good.Comment
-
Ha, that's funny- I just watched a Mud Ox video from Busco Beach earlier today and the guy kept yelling "John Boy", so I assume that's you!
Man O man. I just spent $800 on parts and shipping to rebuild this T20. The poor third world children that could have fed... Geez.
When I cracked that thing open it looked just like the scene in Titanic when he pulls that safe out of the ocean and opens it up- and all the mud and old money that spilled out. Yeah, minus the money. There was about an ounce of dirty water/atf in it. Then mud. BUT, I only need bands. And all the seals and clips and thrust washers. I got a red spring clutch too.
Poor hungry African kids.Comment
-
that was me sean being yelled at in the video !! it is a great time if you ever feel inclined to come. speaking of the titanic, i have a couple of genuine rivets from the ship i aquired when big huge pieces of the titanic that had been brought up were being restored in the warehouse that i had my shop in. it's amazing to hold them in your hand and think of their history..... have fun and your machine is super ! johnboy va.Comment
-
That's cool! I love the history.
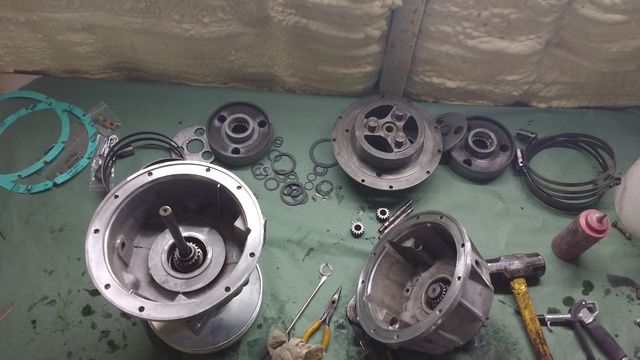
I finished the trans rebuild a few weeks ago. I put to good use the free sandbasting cabinet I got from the shop. Before/after:
After the mass cleanup:
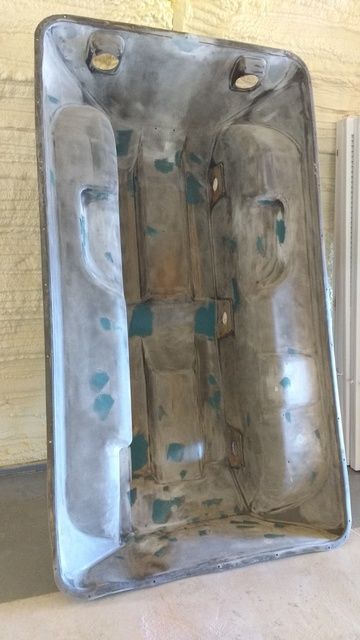
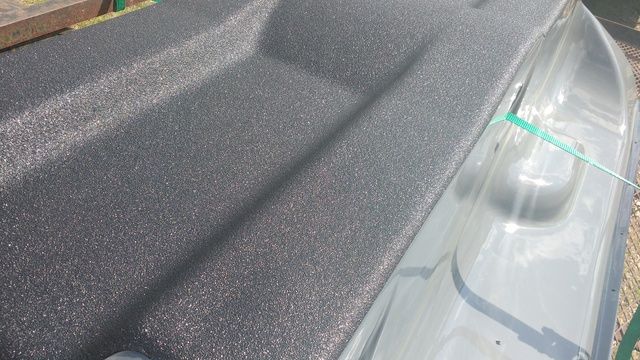
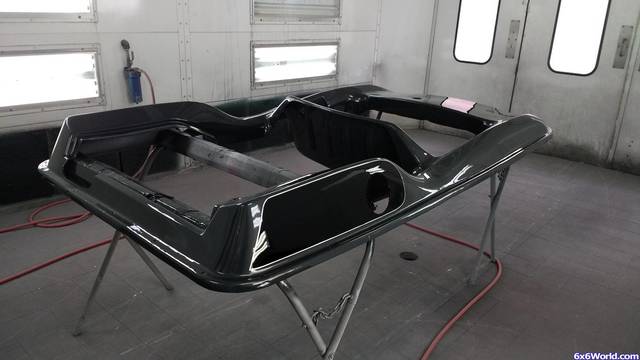
The last couple weeks I've been pecking away at the body and paint work on the tub halves. What a chore trying to get all that texture out of the plastic. I've sanded the whole thing with 80 grit on a DA sander, filled all the holes with fiberglass (because the plastic weld technique was undesirable in every way), then back over everything with 180. Then a very heavy coat of 2K primer, sanded with 180 again and primered again, then sanded with 400 for paint. I've got the bottom painted on the outside so far. After I flipped the tub I realized just how bashed up the bottom of the Hustler gets, so I decided that paint alone was not enough for a good job. I partially feel like I was robbed, but for $190 the Rhinoliner looks awesome. It's nice and thick too. I am thrilled that it filled in all the gouges that were there. Tomorrow I'll spray the inside of the bottom half of the tub gloss gray and the frame epoxy black. Then I can start putting the chassis back together! Whew!
This is the fiberglass filler I mentioned in another post:
Glossy gray bottom:
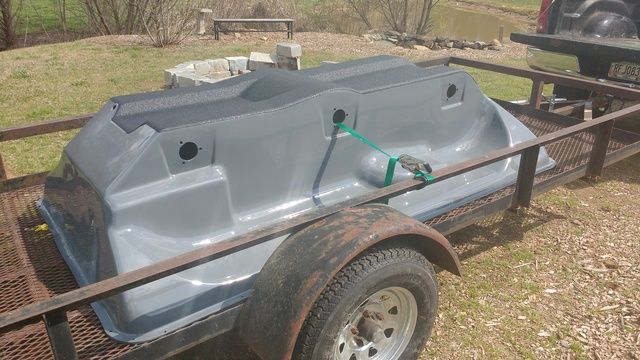
Rhinoliner that looks like Line-X, which I like better than regular Rhinoliner!:
Comment
-
Wow that looks good!Comment
-
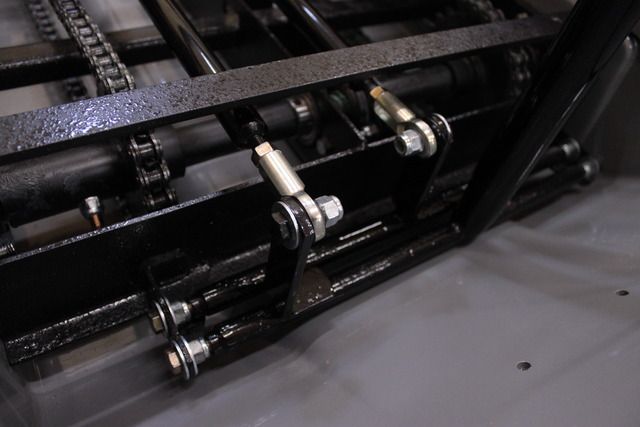
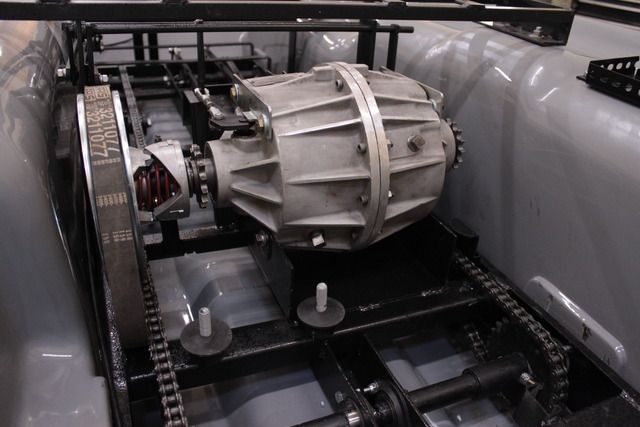
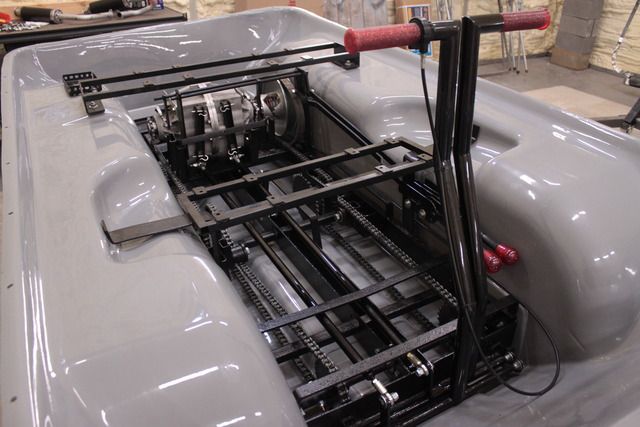
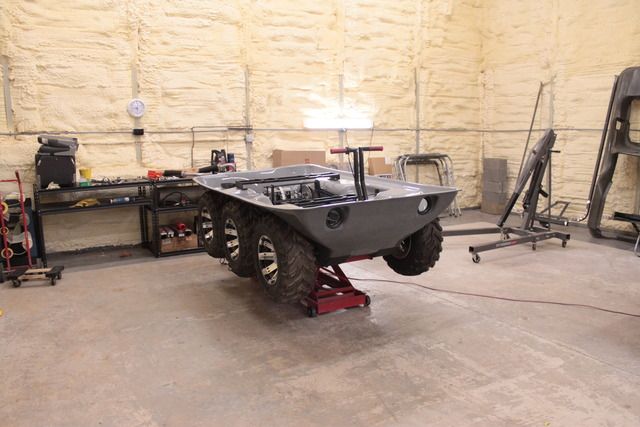
Today the Hustler finally was at the top of my priority list. I had hoped to get the engine and transmission in, but those aspirations were a little bit of a stretch. I was able to get the axles and chains in last weekend. That was a huge deal to get it rolling on it's tires again AND to have it all caulked up. I painted the handlebars and control bars this week at the shop. All that went in today, too.
During my trans install today I discovered that one of the four trans mounting holes was stripped out. A trip to Ace got a set of 7/16 bolts. Once it was drilled and tapped I was glad I was kinda forced to do it. They seem much more substantial than the 3/8" that were in there. The reverse linkage was also a bear to get working and adjusted. It turns out that one of the shift turn-arm things was actually spun 15 degrees or so, so I had to press it out and press it back in correctly. NOW everything seems to work well...
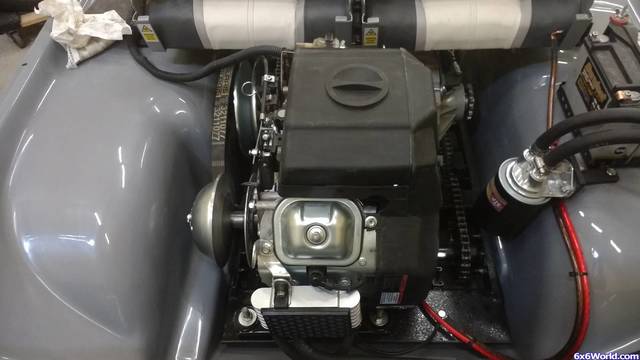
Next time on "the Suburban Hustler" I'll be removing the governor from the Predator 670 and installing a remote oil filter, and HOPEFULLY getting the engine in there for good!
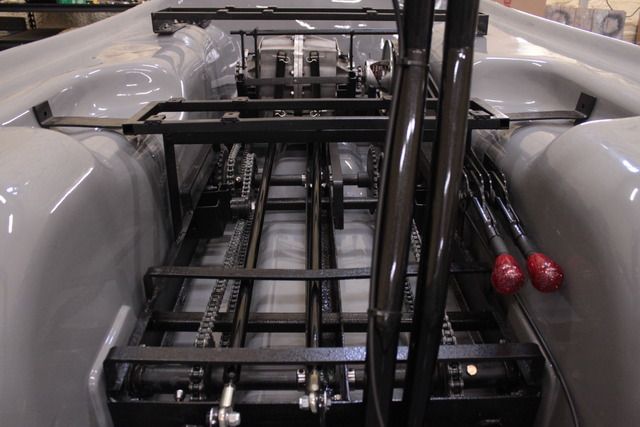
Happy with how this all turned out. VERY strong and rigid. I sprayed the frame flat black with clear coat speckled on to hide the rust pitting.
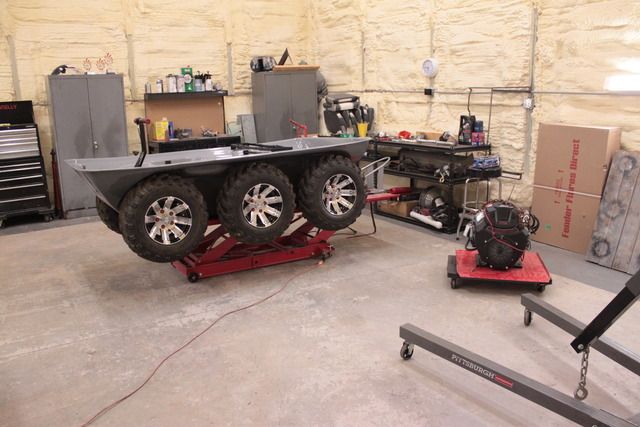
Harbor Freight motorcycle lift table makin' it happen.
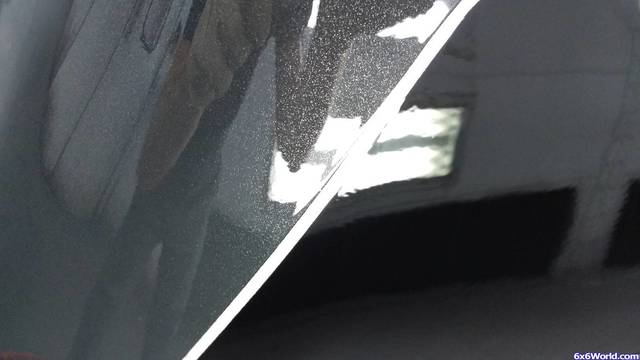
How many different textures and finishes of black can there be...?
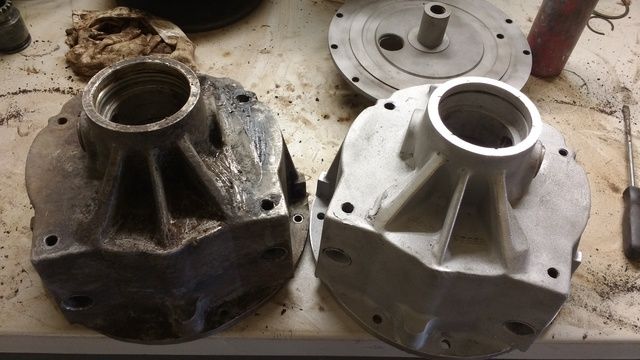
Home at last! I'm glad I took the time to sandblast the case halves, even if they got dingy again.
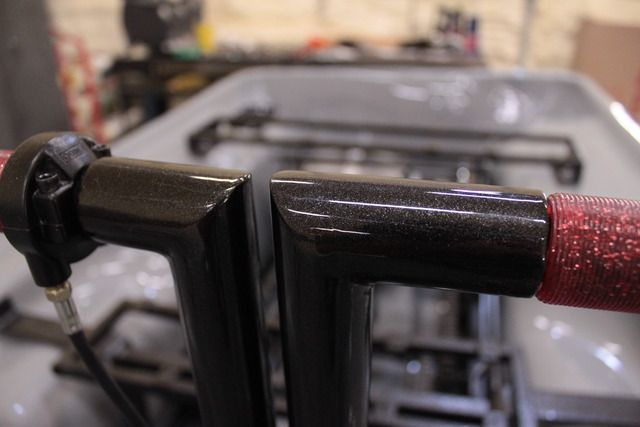
I went back and forth about what color to do these. Slick and sparkly black it was. I'm fully expecting to have to put some clear vinyl tape down the sides to protect against scratches from muddy shoes.
Looks clean for now...
Getting parts off of the storage shelves and into their permanent places makes me very happy.
Comment
-
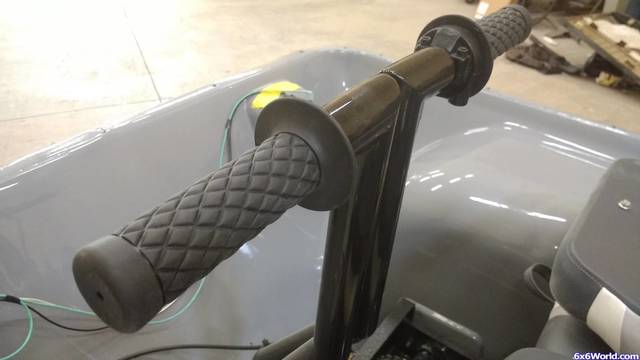
The more I look at those handlebar grips the more I hate them... I'm pretty sure all the red will get blacked out before it's all said and done.
And...
It's been A YEAR since I started this build. Man, doing this kind of stuff with kids is so different than without. I remember being younger and confused when I'd hear about guys taking years to build a car. I used to build a car in a couple months! Well... now I know. Children. And a garden. And chickens. And weeds. I feel like I come home from work just to get to work again!
It's awesome, though. I'm extremely grateful for the time I do have AND looking forward to my almost-two-year-old son being old enough to help with projects and not just poke everything with a philips head screwdriver. Is it bad that I'm already looking over Craigslist for his first project car? Haaaaahaha!Last edited by SeanD; 06-03-2017, 07:34 PM.Comment
-
Thank you, PHOTOBUCKET, for cleaning up the years of my internet presence on numerous car sites... haahaaaaaa. Oh man.
Well, thankfully I can just upload my junk here!
Anyhow,
PAINT!
Top is painted
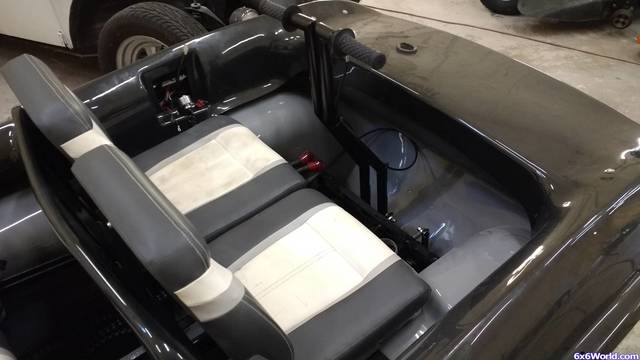
I finally gave up on "acquiring a taste" for the grips that were pink but supposed to be red. These are mo' better.
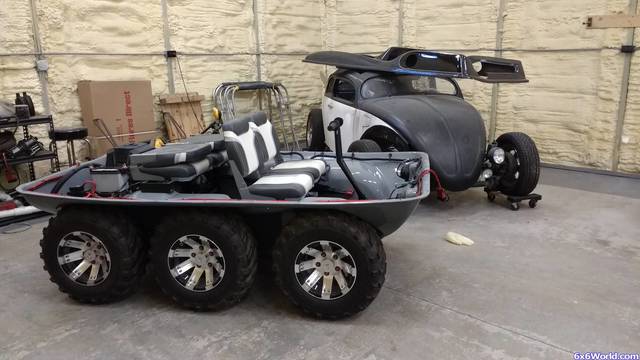
Engine is in. Trans is in. Seats are in. Battery is in and wired. So close... So close.
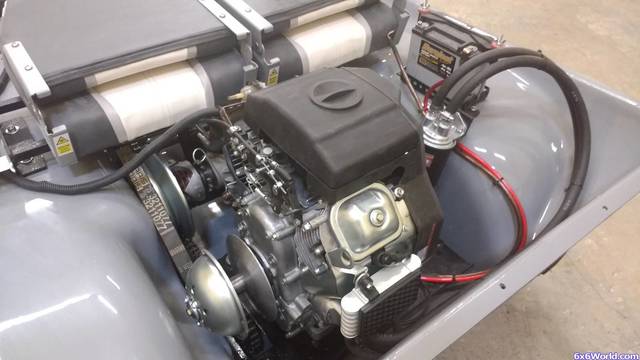
Here you can see the oil filter relocating kit. Bracket is tied into battery tray brackets and then double sided taped. It's good. MAN, that thing leaked a couple quarts of oil all down into the tub before I realized that there was an interference between the Predator oil filter area and the relocator kit keeping it from sealing on the O ring. AARRGH!!! Cut off wheel. Grinder. Clean. Fixed.
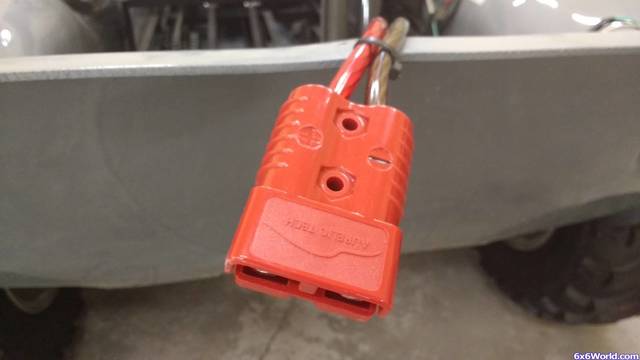
Wiring up the quick connects for the front-and-back winch. These things are pretty cool. Now I just need to figure a way to cleanly get them through the tub.
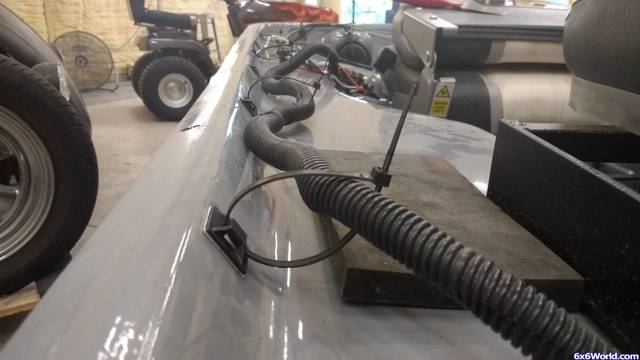
I've never seen these before but Amazon had them. They're self-adhesive zip tie posts. Perfect for the Hustler. ZIP TIES! All the wiring will get loomed before the top goes on.
Comment
-
This is by far one of the cleanest builds I've ever seen on a 6x6... That black top is so gorgeous I've got to ask, what did you do to make sure the paint will stay adhered to the HDPE? Burn off the waxy coating, flexible additive in the paint? I've gotta know your secrets for the body I'm going to swap onto my machine.Comment
-
Any paint manufacturer has their own plastic primer. I used a product called Bulldog. It smells like bunghole but works well. I sanded the whole body inside and out with 80 grit on a DA, then 180. I did all my body work at this point- filling holes with fiberglass filler and scratches with a glaze filler. Then degreased it all really well, sprayed a coat of the bulldog, then thick primer. It was like priming astro turf. Then I sanded it with 180 again, primed again, then sanded with 400. LOTS of work, but it's really not too different than painting a bumper on a car, other than smoothing out the texture.Comment
-
i'm not sure i would even drive it out of the shop !! beautiful build......j.b.Comment
-
Nice pics. The red connectors are called Anderson Connectors or couplers. They are popular for winch connections, and extending electrical runs for 12v machines.Comment
-
Man that thing is looking good. If it were mine I wouldn't be able to put it in the mud!Comment
-
Thanks guys!
I guess I was in the zone this weekend. I got a bunch of stuff done and a now just a very short list ahead of me to the finish line. I got all the winch wiring done, which I had been dreading a bit. The winch kit came with 10-or-so gauge wiring, which I thought should be bigger, but I needed to open up the relay box to remake all the wires to the 4 gauge I have. So, I got that knocked out, zip-tied it all down and magically, it works! I like it. As for now I'm just reduced to pulling stands across the shop. It entertains the children.
I got the side scoops painted to match the stripes on the body top. Even getting painted in my shop at home with the wrong sized tape, they turned out pretty well. I got the body band wire brushed (It was already pretty rusty just from the few months since I built it) and epoxy primed a couple days ago and took it up to the Rhino Liner shop. It should be done Tuesday. I had some epoxy primer left over so I shot the fuel tank as well. This allowed me to get all the fuel lines put into the body top with the pump and shut-off valve today as well. I thought, "Well... I guess I can put the top on now...?" It's been so long in pieces with such a long list of to-dos it was weird to get to this point. So, I put the top on. And it looks awesome. Once the body band and bumpers assembly gets back from the bedliner shop it'll be just down to little things like... a gas cap, and a new drive belt (which will be a bit of a hiccup since I need a different size), and to rejet the carbs. And the exhaust. Aaaand I have to fiberglass the decklid. Aaaaaaaand I have to get some solar panels to make into that decklid to charge the battery... and that may be it.
Maybe...
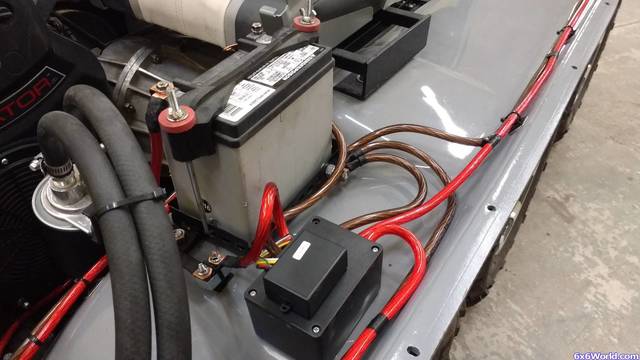
Winch wiring mess
Saturday's progress
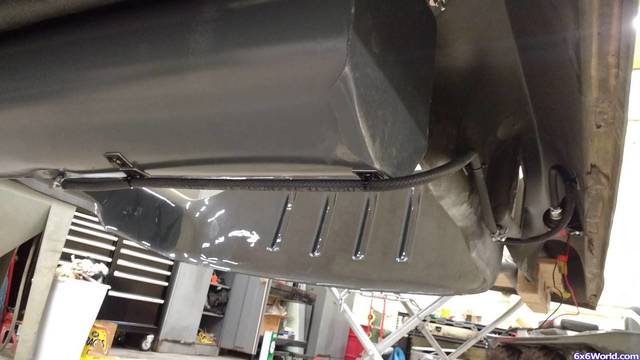
Fuel system in
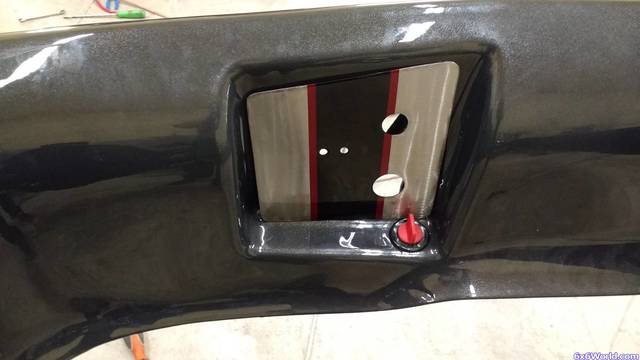
Switch panel and fuel shut-off. I figured that, while they should be close together, they should not be "THAT" close together. This way if there is a leak from that valve, it goes down into the tub WITHOUT dripping over a fuse block.
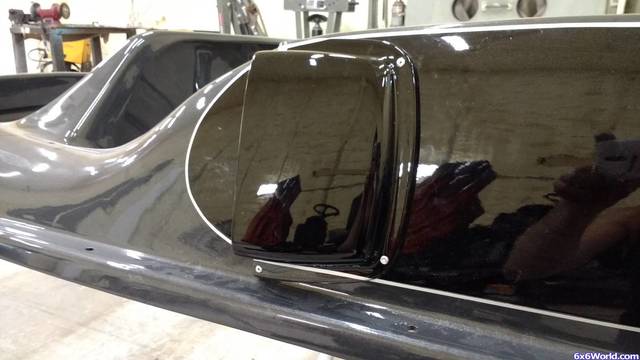
Chameleon-like side scoops
I'll take the body top off ONE more time to wet sand and buff it so that I don't make a mess in the tub, but that's pretty much it. There she is.
I'll drill some holes in the top and route the red cables through them with grommets. It won't be left all hillbilly like that.
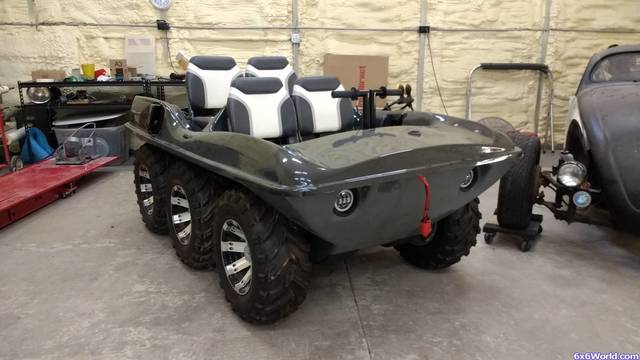
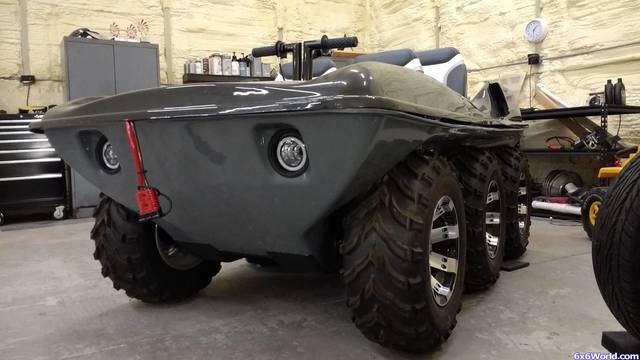
The lighter gray inside is perfect for the clean racecar look.
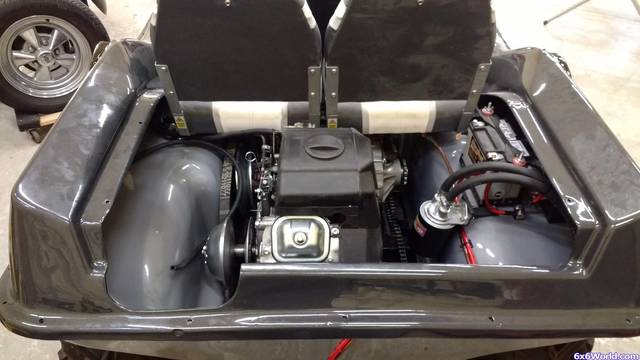
Those valve covers need attention. Maybe black wrinkle finish. I thought about red but they'd look like boobs...
And that's it for now! I'm going to stop by the sign shop tomorrow to get the decals made for the sides. I'm overly excited about that.Comment


Comment